how to create course: build a sellable course people buy
So, you want to create an online course.
It’s an exciting idea, isn’t it? Taking all that knowledge and experience you’ve built up and turning it into something that can genuinely help people, while building a business you love. But let’s be honest, staring at that blank page and trying to figure out where to even begin can feel like trying to climb a mountain.

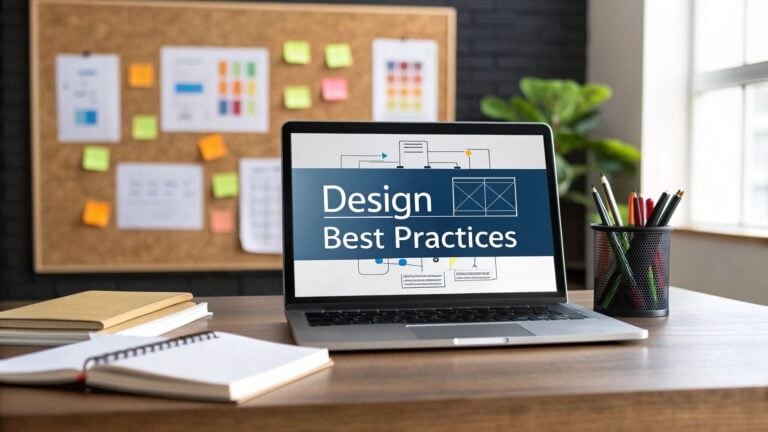
Before you start worrying about cameras, microphones, or lesson plans, we need to lay a solid foundation. This is all about getting into the right mindset and understanding what separates a successful course from one that just collects digital dust.
Why Your Mindset Matters Most
I’ve seen it time and again: the success of a course almost always comes down to the initial planning. Having the flashiest videos or the longest workbooks isn’t the most important part. The key is finding that perfect sweet spot where your passion meets a real problem people are desperate to solve.
You’re not just selling information. You are selling a solution, a transformation. Your goal is to guide someone from a point of frustration or confusion to a place of confidence and clarity.
The most successful courses are built on a simple premise: they solve a specific problem for a specific group of people. Your first job is to become an expert on that problem.
Thinking this way from the start changes everything. It shifts your focus from “what can I teach?” to “what problem can I solve?” This simple change makes your course more marketable, more impactful, and ultimately, more profitable.
The Opportunity is Huge (Seriously)
If you’re wondering if you’ve missed the boat, let me put your mind at ease. The demand for flexible learning and career development isn’t just growing, it’s exploding.
The global online education market is on a rocket ship, with projections suggesting it will hit a staggering $341.72 billion by 2025. This isn’t just a trend. It’s a fundamental shift in how people learn and upskill. You can discover more about these market trends and see just how big the opportunity is.
People are actively looking for the expertise you have. My goal with this guide is to help you start your journey with confidence, avoiding the common pitfalls I’ve made and seen others make. Let’s build something people will love.
Finding and Validating Your Course Idea

Having a great idea is one thing. Knowing if people will actually pay for it is everything. I can’t stress this enough: skipping the validation step is the fastest way to build a course that no one wants. Trust me, I’ve been there, and it’s a painful lesson in wasted effort.
In this section, we’ll get practical about validating your course topic without spending a single dollar. Think of it as your insurance policy against a failed launch. We’re going to become detectives, looking for clues that point to a profitable course idea.
Listen Before You Build
The best way to know what people want is to listen to what they’re already saying. Your future students are out there right now, talking about their problems, frustrations, and what they wish they knew how to do. Your job is to find these conversations and take notes.
This process of “social listening” is your secret weapon. You’ll uncover the exact language your audience uses to describe their pain points. This information is gold for validating your idea and for marketing your course later on.
Your course shouldn’t be based on what you think your audience needs. It should be built on what they are actively telling you they need, often in public forums where they seek help.
So, where do you find these conversations? You don’t need fancy market research tools. You just need to know where to look.
Your Idea Validation Toolkit
Let’s dive into some of the best free places to validate your idea for an online course. Spend some time in each of these digital spaces, searching for keywords related to your topic.
Reddit: Find subreddits related to your niche (e.g.,
r/personalfinance,r/woodworking,r/graphic_design). Look for posts with tons of comments where users are asking for help or sharing frustrations. These are your future course modules in disguise.Facebook Groups: Join groups where your ideal student hangs out. Pay attention to the questions that get asked over and over again. If you see the same problem surfacing weekly, you’ve likely found a strong topic.
Amazon Book Reviews: Look up the top-rated books in your niche and head straight for the 3-star reviews. These often say things like, “The book was good, but it didn’t cover X.” That “X” is your opportunity to create a course that fills the gap.
Quora and AnswerThePublic: These platforms are treasure troves of questions. People go here specifically to ask for solutions. Type in your main topic and see the hundreds of related questions people are asking.
By digging into these platforms, you’re not just guessing anymore. You’re gathering real data about real problems people are desperate to solve.
Test the Waters with a Pre-Sale
Once your research points to a promising idea, it’s time for the ultimate test: asking people to pay for it. This might sound scary, but it’s the only way to truly validate demand. You can do this with a Minimum Viable Product (MVP) or a pre-sale.
An MVP for a course doesn’t mean building the whole thing. It could be a single paid webinar, a short ebook, or a one-hour workshop on a core part of your topic. This small offer tests the market’s willingness to pay for your expertise on the subject.
Another powerful method is a pre-sale. You create a simple sales page outlining your course curriculum and offer a significant discount for “founding members” who enroll before the content is even created. This gives you two incredible benefits:
- Proof of Concept: If people buy, you have concrete proof that your idea is a winner.
- Initial Funding: The revenue from pre-sales can help fund any software or equipment you need to create the course.
Getting real feedback and, more importantly, real commitments from potential students is a game-changer. It transforms the process from a risky guess into a calculated business decision, setting you up for a successful launch.
Structuring Your Course for Maximum Impact
So, you’ve confirmed that people actually want what you’re planning to teach. That’s a huge win, and honestly, it’s the hardest part for many creators. Now comes the fun part: figuring out how to organize all that knowledge into a course that’s engaging and actually delivers results.
Let’s be real, a confusing structure is a fast track to unhappy students and refund requests. A well-organized course, on the other hand, feels like a clear, guided journey. It builds confidence and momentum.
The goal here is to build a transformation, not just dump a bunch of information on your students. When people invest in a course, they’re buying a result, and your structure is the map that gets them there.
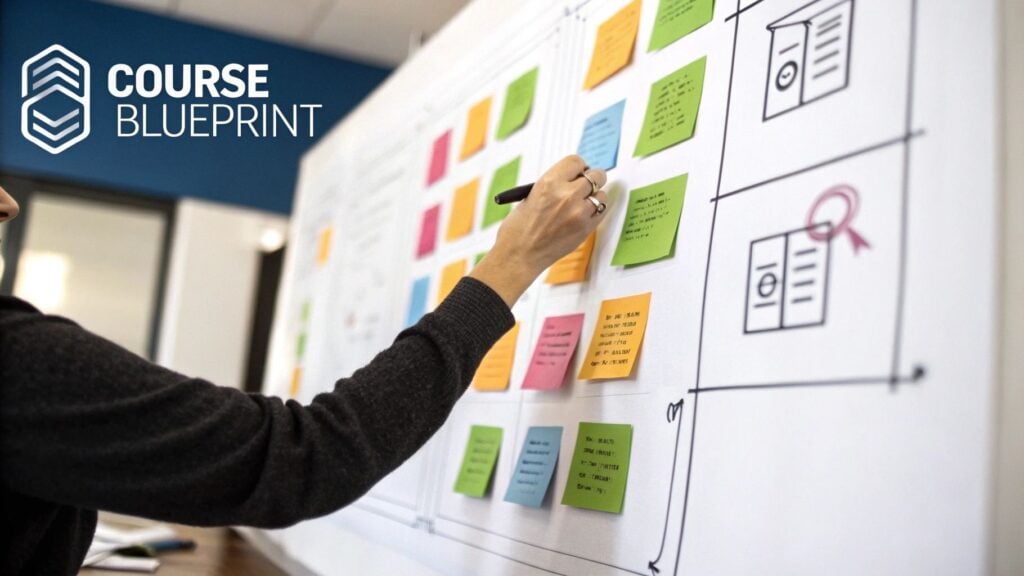
The Brain Dump Method
Before you even think about modules or lessons, I want you to do a “brain dump.” Grab a stack of sticky notes or open a blank document and write down every single thing you could possibly teach on your topic. Seriously, don’t hold back.
Don’t worry about order or organization yet. Just get it all out. What are the key concepts? What are the common mistakes people make? What are the essential skills they need to learn?
This process might feel messy, but it’s the best way to see all your potential content in one place. Once you’re done, you’ll have a mountain of ideas. This is your raw material, and now we can start shaping it into something a student can actually follow.
From Chaos to Cohesive Modules
Now, look at your pile of sticky notes (or your massive document) and start grouping related ideas together. You’ll begin to see natural clusters forming. These clusters are the foundation of your course modules.
For example, if you’re teaching a course on “Introduction to Sourdough Baking,” you might see these groups emerge:
- Module 1: Understanding Your Starter (what it is, how to feed it, troubleshooting)
- Module 2: The Basic Loaf (mixing, folding, proofing techniques)
- Module 3: Baking and Scoring (oven setup, scoring patterns, cooling)
- Module 4: Advanced Shapes and Flavors (boules, batards, adding inclusions)
This approach organizes your expertise into a logical path. Each module should build upon the last, taking the student from a complete beginner to someone who feels confident and accomplished. There are many ways to approach this, and understanding different instructional design models can give you an even better framework for organizing your lessons.
The secret to a great course structure is starting with a quick win. Your first module should help students achieve a small but meaningful result right away. This builds momentum and keeps them excited to continue.
Think about the smallest, easiest thing your student can accomplish that will make them feel successful. That should be one of your very first lessons.
Planning Your Content Delivery
With your modules and lessons outlined, it’s time to think about how you’ll deliver the content. A great course uses a mix of formats to keep things interesting and cater to different learning styles. This is where you can really make your course stand out.
Mixing up your content formats is crucial for preventing learner fatigue. You’re crafting a complete learning experience, not just creating a series of videos. Research shows that online learning can lead to incredible knowledge retention. Some studies find rates as high as 60%, which is significantly more effective than traditional methods.
Below is a quick comparison of different content formats you can weave into your course. Thinking about this now will save you a ton of headaches during production.
Course Content Format Comparison
| Format Type | Best For | Pros | Cons |
|---|---|---|---|
| Video Lessons | Demonstrating processes, explaining core concepts, building personal connection. | Highly engaging, great for visual and auditory learners. | Can be time-consuming and expensive to produce well. |
| Worksheets & Checklists | Reinforcing concepts, providing actionable steps, summarizing key info. | Easy to create, helps students apply knowledge immediately. | Can feel like “homework” if not designed thoughtfully. |
| Quizzes & Assessments | Checking for understanding, boosting confidence, identifying knowledge gaps. | Helps students track progress, reinforces key learning points. | Poorly written questions can cause frustration or confusion. |
| Community Space | Fostering peer-to-peer support, answering questions, building relationships. | Creates a powerful sense of belonging and accountability. | Requires active moderation to stay positive and on-topic. |
| Audio Lessons | Sharing stories, conducting interviews, offering on-the-go content. | Convenient for students to consume while multitasking. | Not suitable for visual topics or complex demonstrations. |
| Live Q&A Sessions | Addressing specific student questions, providing real-time feedback. | High perceived value, fosters direct connection with you. | Can be difficult to schedule across different time zones. |
By blending these elements, you create a dynamic experience that goes far beyond simply watching videos. You’re building a supportive environment that encourages real learning and application, and that’s the ultimate key to your students’ success.
Creating Content Without Breaking the Bank

This is where your course really starts to come to life, but it’s also where a lot of creators get completely stuck. They picture a professional studio, fancy cameras, and a massive production budget.
Let me be clear: that’s a total myth that stops too many great courses from ever seeing the light of day.
We’re going to focus on making high-quality content with tools you probably already own or can get without spending a fortune. Believe it or not, the average cost to create a course is just around $177. That proves you don’t need a huge investment to get started.
Your students care far more about the value and transformation you deliver than they do about Hollywood-level production quality. Let’s make that happen.
Your Simple Home Studio Setup
You don’t need a dedicated room or soundproof walls. A quiet corner of your home is more than enough to get going. My first “studio” was just my desk pushed up against a clean wall.
Here’s what actually matters:
- Good Lighting: Natural light is your best friend. Seriously, just try recording while facing a window. If that’s not an option, a simple ring light makes a world of difference, and you can find great ones for under $30.
- A Clean Background: It doesn’t need to be fancy, just uncluttered. A simple bookshelf, a plant, or even a plain wall works perfectly. You want the focus on you, not the laundry pile in the corner.
- Quiet on the Set: Find a time when your house is quiet. Close the door, silence your phone notifications, and let your family or roommates know you need an hour of uninterrupted time.
That’s it. You’ve just built your first recording studio. The key is to keep it simple so you can focus on what you’re teaching.
The One Piece of Gear Worth a Small Investment
If you’re going to spend money on one thing, make it your microphone.
People will forgive grainy video, but they will not tolerate bad audio. It’s an instant credibility killer that makes your content feel unprofessional and is incredibly frustrating to listen to.
You don’t need a top-of-the-line podcasting mic. A quality USB microphone like a Blue Yeti or a simple lavalier mic that clips onto your shirt can give you crisp, clear audio for a very reasonable price. This single upgrade will elevate the perceived quality of your entire course more than any other piece of gear.
Your smartphone camera is likely good enough for video, but your smartphone’s built-in microphone is not good enough for audio. Prioritize clear sound above all else.
Easy and Affordable Editing Software
The word “editing” can sound intimidating, but modern software makes it incredibly simple. Your goal isn’t to create a cinematic masterpiece. It’s just to trim out mistakes, add some simple text or graphics, and make sure the lesson flows smoothly.
Here are a few user-friendly options I always recommend:
- Descript: This one is a game-changer. It transcribes your video, and you edit the video by just editing the text document. Deleting a word in the text literally removes it from the video. It’s amazing for beginners.
- Camtasia: A bit more advanced but still very intuitive. It’s fantastic for recording your screen and your camera at the same time, which is perfect if you’re doing any kind of software tutorial.
- Canva: Yes, Canva! Their video editor is surprisingly powerful and incredibly easy to use for creating simple lesson videos, especially if you want to add branded graphics or slides.
Choosing the right software is a big step, so it’s worth exploring our guide on the https://learnstream.io/blog/best-authoring-tools-for-elearning/ to find the perfect fit for your specific needs and budget.
Creating High-Value Resources
Your course is more than just videos. Workbooks, checklists, and templates are what help your students actually apply what they’ve learned. This is where the real transformation happens.
You can create professional-looking resources for free using tools like Canva or even Google Docs. Don’t overthink it. A simple, well-designed PDF checklist that summarizes a key lesson can be incredibly valuable to a student who’s feeling overwhelmed.
And while you’re focused on creating great content, don’t forget to implement essential website accessibility best practices. Making your course materials inclusive for diverse learners isn’t just a nice-to-have, it’s critical. Simple things like using clear fonts and adding alt text to images make a huge difference.
Remember, the goal is to make your content as helpful and easy to use as possible for everyone.
Pricing and Launching Your Online Course

You’ve done it. All the hard work of outlining, recording, and creating is finally in the rearview mirror. Now for the exciting part: getting your course into the hands of students and actually getting paid for the value you’re providing.
I know this final stretch can feel like the most intimidating part. Pricing feels like a total guessing game, and the word “launch” can conjure up images of some massive, complicated event. We’re going to simplify both.
My goal here is to make this final phase feel energizing, not overwhelming. Let’s get your course out into the world.
Price Your Course Based on Transformation, Not Time
One of the biggest mistakes I see new course creators make is pricing their course based on its length. They’ll say something like, “Well, it’s only five hours of video, so I guess I can’t charge more than $99.” This is the fastest way to undervalue your work.
You are not selling videos or worksheets. You are selling a transformation.
Your price has to reflect the outcome you provide. If your course helps someone land a new job, start a profitable side hustle, or save ten hours of work every single week, that’s incredibly valuable. Your price tag should match that value, not the number of minutes on a screen.
Choosing the Right Pricing Model
There’s no single “best” way to price a course. The right model really depends on your content, who you’re selling to, and your own long-term goals. Let’s walk through the most common options.
One-Time Fee: This is the simplest model out there. A student pays a single price upfront and gets lifetime access to everything. It’s perfect for foundational courses that teach a specific, evergreen skill.
Payment Plan: This just breaks the one-time fee into smaller, more manageable monthly payments (think three payments of $197 instead of one lump sum of $497). This makes your course much more accessible and can seriously boost your conversion rates.
Subscription or Membership: With this model, students pay a recurring monthly or annual fee. This works best when you’re providing ongoing value, like access to a community, regular live calls, or content that gets updated frequently.
Don’t be afraid to price your course at a premium. A higher price often signals higher quality and attracts more committed students, the kind of people who are serious about getting results. Low-ticket pricing, on the other hand, often attracts less-motivated buyers.
Finding that pricing sweet spot can take a bit of experimenting. For a much deeper dive, check out our guide on how to price your online course for maximum profits, which breaks these strategies down in more detail.
Crafting Your Simple (But Effective) Launch Plan
A “launch” doesn’t have to be some huge, stressful, multi-week event with a dozen moving parts. Honestly, for your first course, simplicity is your best friend. The goal is to focus on a strategy that’s both effective and manageable.
The whole point is to build excitement and momentum before your course is even available. You want people waiting and ready to buy the moment you open the doors.
The Power of a Beta Launch
I’m a huge fan of the beta launch, especially for first-time creators. The idea is simple: you offer your course to a small, select group of people at a significant discount before you release it to the public.
Here’s why this works so well:
- It Validates Your Offer: Nothing beats the confidence boost of getting your first sales and proving that people will actually pay for what you’ve created.
- You Get Invaluable Feedback: Your beta students become your secret weapon. They’ll point out confusing lessons, find typos in your workbooks, and give you ideas for bonus content you hadn’t even thought of. Their feedback helps you polish the course for the full launch.
- You Collect Amazing Testimonials: The success stories from your beta students are pure gold. They become powerful social proof that you can plaster all over your sales page for every launch to come.
Your email list is the perfect place to find this first group of beta students. These are people who already know you, like you, and trust you, which makes them the most likely to jump on your new program.
Of course, to have an email list, you need to attract potential students first. Understanding some lead generation best practices can make a huge difference in building that initial audience and ensuring your launch is a success.
Writing a Sales Page That Truly Connects
Your sales page has one job: to connect with your ideal student’s problems and show them how your course is the exact solution they’ve been searching for. The key is selling the outcome, not listing features.
Start your page by speaking directly to their pain points. What are they struggling with right now? What have they already tried that didn’t work? Show them that you get it.
Then, paint a vivid picture of the transformation. What will their life or business look like after they complete your course? Use the module and lesson breakdown you created earlier to show them the exact path you’ll guide them on.
Finally, sprinkle in those glowing testimonials from your beta launch. They build instant trust and credibility. Your launch is the finish line, a moment to celebrate what you’ve built and the people you’re about to help.
Got a Few Lingering Questions?
Even with a full roadmap laid out, I know there are probably a few nagging questions bouncing around in your head. These are the classic “what ifs” that stop incredibly talented people from ever getting started, so let’s tackle them head-on.
Trust me, you’re not alone in thinking these things. Every single course creator I’ve ever met has wrestled with these exact same doubts at some point.
Am I Expert Enough to Teach This?
This is it. The big one. This is, without a doubt, the #1 question that holds people back. The fear that you aren’t the world’s foremost authority on your topic can feel absolutely paralyzing.
But here’s the honest truth: you don’t need to be.
You just need to be one or two steps ahead of the people you want to help. Your students aren’t looking for a tenured professor with a PhD. They’re looking for someone who has successfully navigated the exact challenge they are facing right now and can show them the path through.
Your personal experience and unique perspective are your greatest assets. They make your teaching relatable and real in a way a textbook never could. You’re not just an expert. you’re a guide who’s been there.
In fact, sometimes being too much of an expert can be a disadvantage. It’s easy to forget the struggles and mindset of a true beginner. Being just a few steps ahead allows you to teach with a level of empathy and clarity that’s incredibly powerful.
How Long Should My Course Be?
There is no magic number here, and please, don’t fall into the trap of thinking longer is better. People don’t buy courses based on the number of video hours. They buy them to get a specific result.
Your course should be exactly as long as it needs to be to deliver on your promise, and not a single minute longer.
Focus on efficiency. Could a student get the same life-changing result in three hours instead of ten? If so, make it three hours. Your students will absolutely thank you for respecting their time. A concise, action-oriented course that delivers a quick win is far more valuable than a sprawling, 20-hour epic that just leads to overwhelm.
What if Someone Steals My Content?
This is a totally valid concern, but I want to encourage you not to let it stop you from sharing what you know. The hard reality is that if someone is truly determined to pirate your content, they will probably find a way to do it.
However, the real value of your course isn’t just in the raw information like the videos or the PDFs. That’s just one piece of the puzzle. The true value comes from everything else you build around it.
- Your unique voice and teaching style. Nobody can copy you.
- The community you build around the course. The connections and support are priceless.
- The direct access students have to you. Think Q&A calls, coaching, or a private forum.
- The updates and improvements you make over time. A pirated course becomes outdated fast.
These are the elements that can’t be easily copied and pasted. Focus on creating an amazing experience that goes far beyond the raw information. The community and support you offer are your best defense against content theft. The best way to learn how to do all this? Just get started.