Online Course Design Best Practices That Actually Work

If you’ve ever started an online course full of excitement, only to lose steam and drop off by the third video, you’re not alone. It’s a common story, and it almost always comes down to one thing: poor design.
I’ve learned that the best online course design is about creating a clear, engaging, and goal-oriented journey for your students. It’s a path so intuitive and valuable that they want to see it through to the end. Forget just uploading a folder of videos. We’re talking about crafting an experience.
Designing A Course That Students Actually Finish
Creating a great online course can feel like a big task, but it doesn’t have to be overwhelming. Think of this guide as your roadmap. We’ll skip the dense academic jargon and focus on the practical, actionable principles that separate a course students forget from one they rave about to their friends.
It really boils down to three simple ideas. You need to give your learners a clear path, keep them engaged along the way, and help them reach their goals.
Why Thoughtful Design Is Everything
What’s the difference between a course with a dismal 15% completion rate and one with a stellar 85% completion rate? It’s almost always the design. When students feel lost, bored, or unsure of what to do next, they check out. It’s that simple.
Good design is the invisible force that prevents this confusion. It builds momentum from the very first lesson, keeping students motivated and moving forward. It’s what makes learning feel less like a chore and more like an adventure. While not directly about courses, many general strategies for improving retention rates share this core principle. You have to keep your user happy, clear on their progress, and feeling successful.
This simple visual breaks down the process. It’s a flow that just makes sense.
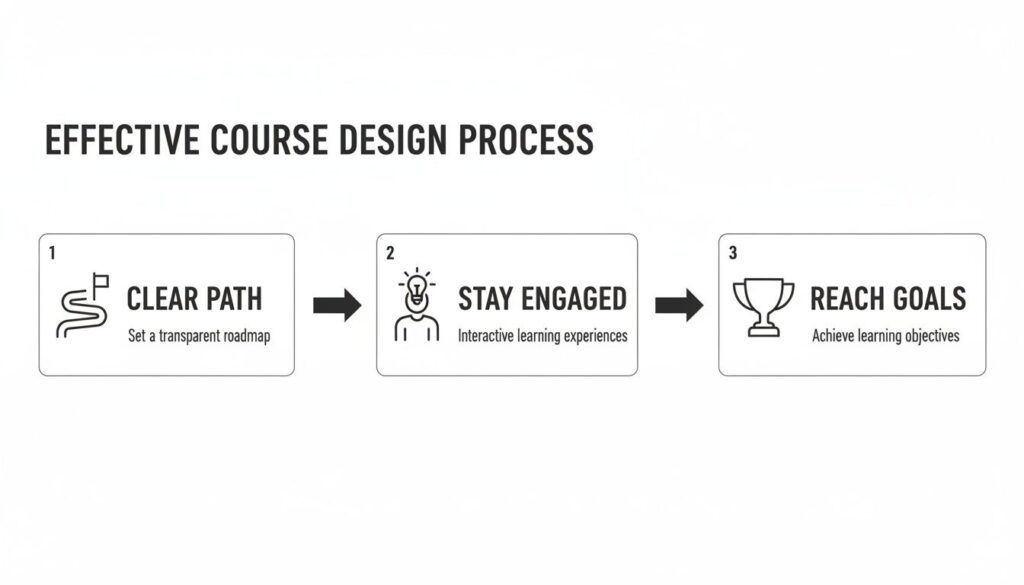
This illustrates that successful course design isn’t random. It follows a clear, logical progression from laying out the path to celebrating your students’ achievements.
Let’s start with the big picture, the core pillars of effective course design. Think of these as the foundation of your entire course. Getting them right from the start ensures every module, video, and quiz you create serves a distinct purpose in your student’s journey.
Here’s a quick look at the foundational best practices we’ll be diving into. This table gives you a snapshot of what truly matters when you’re building a successful online course.
Core Pillars of Effective Course Design
| Pillar | What It Means for Your Course | Why It’s a Game-Changer |
|---|---|---|
| Clear Learning Objectives | Every lesson has a specific, measurable goal. Students know exactly what they’ll be able to do. | Eliminates confusion and gives students a reason to pay attention. They see the immediate value. |
| Logical Learner Journey | Content is sequenced in a way that builds knowledge progressively, from simple concepts to complex applications. | Prevents overwhelm and makes learning feel natural and achievable. It creates “aha!” moments. |
| Engaging Content Delivery | You use a mix of formats (video, text, activities) and chunk information into small, digestible pieces. | Fights boredom and accommodates different learning styles. It keeps learners leaning in, not zoning out. |
| Action & Feedback Loops | The course includes regular quizzes, projects, and activities that let students apply what they’ve learned and get feedback. | Turns passive learning into active skill-building. Feedback solidifies knowledge and boosts confidence. |
These pillars aren’t just nice-to-haves. They are the bedrock of a course that gets results. By focusing on these foundational practices, you’re building on solid ground.
A well-designed course anticipates a student’s questions and answers them before they’re even asked. It makes the learning process feel seamless and supportive, not like a struggle.
When you nail this foundation, everything else falls into place. You’re not just creating content. You’re engineering a transformation for your students.
1. Start with a Blueprint: Your Learning Objectives
Before you even think about hitting record on a video or drafting a quiz question, you need to draw the blueprint for your course. This all starts with one thing: clear, measurable learning objectives.
Simply put, what will your students actually be able to do once they’ve finished your course? This is the promise you’re making to them, and it’s the foundation every other decision rests on. It gives your entire course a spine.

Why Vague Goals Will Sink Your Course
Let’s be honest, we’ve all seen courses with fuzzy goals like “Understand social media marketing.” What does “understand” even mean? You can’t measure it. You can’t see it. A weak objective like this is a recipe for unfocused content and confused, frustrated students.
What we’re aiming for are objectives that are specific, actionable, and observable. This is what turns a random collection of information into a genuine training program that gets people real, tangible results.
A much better objective would be: “Create a 30-day content calendar for an Instagram business profile.” See the difference? It’s concrete. You know exactly what success looks like.
Writing Objectives That Actually Work
So, how do you craft these powerful objectives? The trick is to use strong, action-oriented verbs. You’re describing a performance, not a state of mind. Think about what you want to see your students demonstrate at the end.
Here are a few examples to get your brain moving:
Instead of: Know the principles of graphic design.
Try: Design a basic logo using Canva’s core tools.
Instead of: Learn about project management.
Try: Create a project timeline with clear milestones using a Trello board.
Instead of: Become familiar with email marketing.
Try: Write a 3-part welcome email sequence for new subscribers.
This isn’t just guesswork. There are proven frameworks to help you classify different levels of learning. We’ve put together a full guide on how to use Bloom’s Taxonomy for writing better learning objectives that breaks it all down.
Your learning objectives are the North Star for your entire course. Every video you record, every worksheet you create, and every quiz question you write must directly help a student achieve one of these objectives.
The Power of Alignment in Course Design
This brings us to a concept that’s absolutely critical in instructional design: alignment. It just means that every single piece of your course, like the content, the activities, and the assessments, is directly and obviously tied back to your learning objectives.
When everything is aligned, your course feels cohesive and purposeful. Students can see why they’re doing a particular activity and how it connects to the bigger picture. That clarity is a massive motivator and drastically reduces the odds of them feeling lost or overwhelmed.
Think of it like this. If your objective is to “bake a perfect sourdough loaf,” you wouldn’t toss in a module on making croissants. It’s off-topic and doesn’t serve the goal. In the same way, every element in your course has to justify its existence by supporting an objective. This is your secret weapon for creating a powerful learning journey from start to finish.
Structuring Content with Bite-Sized Microlearning
Ever tried to muscle your way through a two-hour lecture video? It’s a struggle. We’re all juggling a dozen things at once, and our attention has become a precious, finite resource. This is exactly why microlearning is one of the most powerful course design strategies you can use.
The idea is refreshingly simple. Break down your big, complex topics into small, focused, and easily digestible pieces. Think of it like serving a fantastic meal as a series of small, delightful courses instead of dropping one giant, intimidating platter on the table. It’s more manageable, far more enjoyable, and leads to much better retention.
Why Chunking Content Is a Game Changer
“Chunking” is just a fancy term for grouping related information into small units. It’s something our brains do naturally to process and remember new things. By intentionally designing your course this way, you’re working with your students’ cognitive wiring, not against it.
This approach respects their time and makes it incredibly easy for them to squeeze learning into the cracks of their busy lives. They can knock out a lesson on their lunch break, during their commute, or whenever they find a spare ten minutes.
And this isn’t just a “nice-to-have.” The results are real. Structuring content into bite-sized modules, often just 5-10 minutes long, can boost retention rates by up to 80% compared to traditional, long-form lectures. With around 70% of learners now accessing courses on their smartphones, this mobile-friendly format is more critical than ever.
How to Apply Microlearning in Your Course
So, how do you actually do this? It starts by looking at your course outline and hunting for the smallest logical concept you can teach in a single sitting. Each one of these becomes its own micro-lesson.
Here are a few practical ways to structure your bite-sized content:
- Short, Focused Videos: Keep your videos tight, ideally between 5 and 10 minutes. Each one should cover a single, specific skill or idea. If a topic is beefy, break it into a mini-series of short, connected videos.
- Quick Reads: Ditch the dense PDFs. Instead, create short, scannable articles with clear headings, bullet points, and bold text to guide the eye.
- Interactive Quizzes: Use brief, low-stakes quizzes after each micro-lesson. These aren’t about grades. They’re about helping students check their understanding and lock in what they just learned.
- Single-Task Activities: Give students a small, focused task to complete. For instance, if you’re teaching graphic design, a micro-lesson might end with, “Create a color palette with three complementary colors.”
The goal of microlearning is to create a sense of constant progress. Every time a student completes a small lesson, they get a little dopamine hit of accomplishment, which motivates them to keep going.
This approach transforms learning from a grueling marathon into a series of rewarding sprints.
Building Momentum One Piece at a Time
By embracing microlearning, you make your course far more accessible and way less intimidating. Students can see a clear path forward, and each completed lesson builds their confidence and momentum. This is a game-changing strategy for reducing dropout rates and making sure more students actually reach the finish line.
The beauty of this method is its flexibility. It works for almost any topic, no matter how complex. You just have to be willing to break down your expertise into its fundamental building blocks. To dive deeper, check out our complete guide on implementing microlearning best practices for your online course. It’s a powerful technique that creates a better experience for your learners and better results for you.
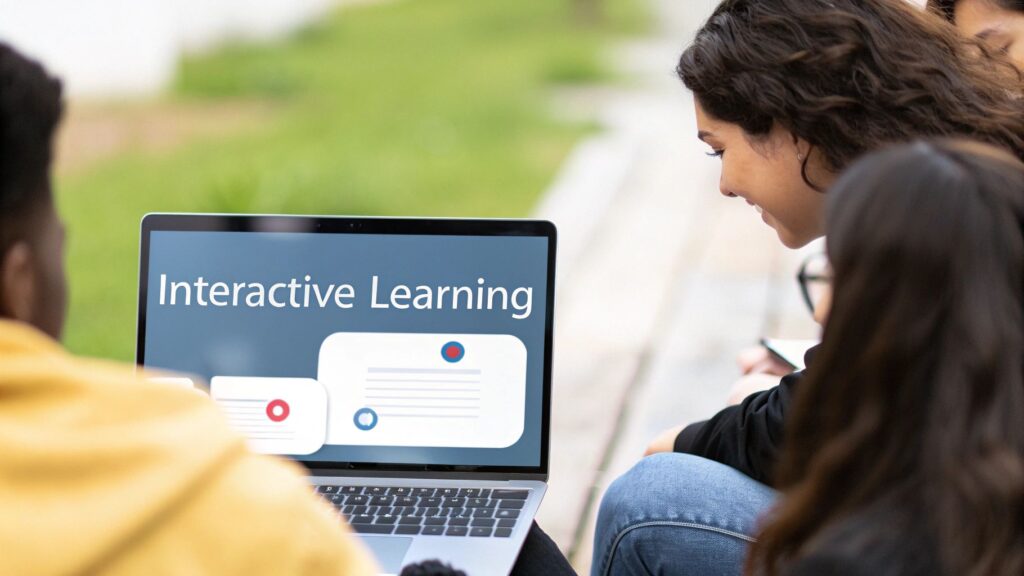
Boosting Student Engagement with Interactive Elements
Just watching videos and reading text gets old, fast. A truly great online course is a dynamic conversation that pulls students right into the material. This is where we get into the fun stuff: making your course genuinely interactive and engaging.
We’re going to look at how to transform your students from passive viewers into active participants. When learners are actively involved, they start to truly understand and apply the material. Think of it as a cornerstone of effective course design.

Go Beyond the Standard Quiz
When most people hear “interaction,” their minds jump straight to quizzes. And while quizzes are great, we can use them for so much more than just a knowledge check at the end of a module. It’s time to start thinking of them as learning tools, not just grading tools.
Frequent, low-stakes quizzes are perfect for cementing key concepts right after you’ve taught them. A quick one-or-two question check-in after a video helps students confirm their understanding on the spot and builds their confidence as they move forward.
Here are a few ways to level up your quizzes:
- Vary your question formats: Mix up the standard multiple-choice with fill-in-the-blanks, matching exercises, or even image-based questions to keep things fresh.
- Give immediate, helpful feedback: Don’t just say “correct” or “incorrect.” Explain why an answer is right or wrong. This simple step turns every single question into a powerful micro-lesson.
- Keep them short and sweet: A quick, focused quiz is far more effective for maintaining momentum than a long, daunting exam.
This approach shifts the whole vibe from stressful testing to supportive learning. It’s a small change that makes a huge difference in how students feel about their own progress.
The real goal of interactivity is to make students think, not just remember. Every interactive element should challenge them to apply, analyze, or evaluate the information you’ve given them.
Spark a Community with Discussion
Learning online can feel like a lonely experience, but it absolutely doesn’t have to be. Building a sense of community is one of the most powerful ways to keep students engaged and motivated from start to finish. Discussion forums are the perfect place to make this happen.
But let’s be honest, a boring, empty forum is worse than no forum at all. You have to be intentional about sparking real conversations. Instead of generic prompts like “Any questions?” try asking open-ended questions that encourage critical thinking and sharing personal experiences.
For example, you could ask students to share a real-world example of a concept you just taught. Or, prompt them to post a challenge they’re facing so they can get feedback from their peers. Your role here is to be a facilitator. Jump in to guide the conversation, answer questions, and encourage students to connect.
Make Learning Active with Projects
At the end of the day, students take your course to gain practical skills. The best way for them to do that? By actually doing things. This is where project-based assignments and simulations come into play.
These activities are what bridge the gap between theory and practice. They give students a safe space to apply what they’ve learned in a meaningful, tangible way.
- Project-Based Assignments: Have students create something they can see and use. If you teach writing, have them write a blog post. If you teach coding, have them build a small app.
- Simulations and Scenarios: Create realistic situations where students have to make decisions under pressure. This is perfect for teaching soft skills, business strategy, or technical troubleshooting.
These active learning methods are incredibly effective. In fact, courses that use active learning and provide multi-modal content can boost student retention and comprehension by as much as 60%. Those that focus on career readiness through scenario-based learning often see 40% higher completion rates. There are so many great interactive learning design ideas you can implement to get these kinds of powerful results.
Making Your Course Accessible and Inclusive
Let’s get into something that separates a good course from a truly great one. We have to make sure every single person who signs up can actually use and learn from your material. This is where accessibility and inclusive design come in, and they’re about way more than just checking off a few technical boxes.
Being an effective educator means creating a learning space where everyone gets an equal shot at success. This isn’t an optional add-on. It’s a fundamental part of great online course design.
What Is Accessibility in Course Design
At its core, accessibility means getting rid of barriers that could stop a student from engaging with your course. Think of it like a building entrance. Stairs work fine for many people, but adding a ramp ensures someone in a wheelchair can get inside, too.
In the digital world, these barriers are often invisible to the creator but can be a massive roadblock for others. A student with a hearing impairment can’t learn from a video that has no captions. Someone who is visually impaired might use a screen reader, which can’t decipher text that’s trapped inside an image.
Here are a few non-negotiable, practical steps you need to take:
- Provide Video Transcripts and Captions: Every video you create must have accurate, synchronized captions. It’s also a fantastic practice to offer a full text transcript they can download and review separately.
- Use High-Contrast Colors: Make sure your text and background colors have enough contrast to be read easily by everyone. You can never go wrong with simple black text on a white background.
- Write Descriptive Link Text: Instead of vague phrases like “click here,” your link text should describe exactly where it’s going. Use “Download the Module 3 Worksheet” so a screen reader user knows precisely what to expect.
Accessibility is about making sure no student gets left behind because of how you built your course. It’s a foundational piece of creating a professional and ethical learning experience.
For a deeper dive, an ultimate website accessibility checklist can provide comprehensive guidance to ensure you’re meeting the highest standards.
Building an Inclusive Learning Environment
While accessibility is about removing the technical roadblocks, inclusivity is about creating a welcoming atmosphere where students from all walks of life feel seen, respected, and valued. This is all about the culture and tone of your course.
An inclusive course doesn’t just open the door to a wider audience. It makes the learning experience richer for every single student by weaving a broader range of perspectives and ideas into the fabric of the course itself.
This is where you, the creator, get to make a real difference. It comes down to being thoughtful about the language you use, the examples you pick, and the viewpoints you present.
Here are a few ways to make your course more inclusive:
- Use Diverse Examples: When you tell stories or share case studies, make sure you’re featuring people from different genders, ethnicities, ages, and backgrounds. Representation matters, and it helps more students see themselves in your material.
- Choose Your Words Carefully: Opt for gender-neutral language whenever you can. Say “everyone” or “they” instead of “guys.” Try to avoid idioms or cultural references that might not land with a global audience.
- Invite Different Perspectives: If your course includes discussions, actively encourage students to share their unique experiences. This simple act transforms the diversity of your student body into a powerful learning tool for the entire community.
By putting a real focus on both accessibility and inclusivity, you’re not just following a set of rules. You’re building a better, more effective, and more welcoming course that genuinely serves all of your students.
Your Course Isn’t Finished When You Launch It
Think of your course launch day not as the finish line, but as the starting line. The best online courses aren’t static. They’re living, breathing ecosystems that evolve. The creators I admire most are always listening, learning, and refining their work. So, how do you know what’s resonating with your students and what’s falling flat?
You have to look at the data.
Most learning platforms give you an incredible behind-the-scenes look at how students are actually engaging with what you’ve built. This isn’t about becoming a data scientist. It’s about being a responsive teacher who uses simple numbers to create a far better learning experience.
The Few Metrics That Actually Matter
It’s way too easy to get lost in a sea of analytics. To keep things simple and actionable, let’s focus on the numbers that tell a clear story about your students’ journey. These are the metrics that give you direct, no-nonsense feedback on your course design.
Here are the big ones I always keep a close eye on:
- Completion Rates: This is the most obvious, but also the most important. What percentage of students who start a lesson or the entire course actually finish it? A low completion rate is a massive red flag that something is broken.
- Time Spent on Lessons: Are students blazing through a lesson in five minutes that you expected would take thirty? Or are they stuck for an hour on a ten-minute video? This metric tells you if your content is engaging, too easy, or maybe just confusing.
- Quiz and Assignment Scores: Looking at average scores shows you where your teaching is hitting the mark and where it isn’t. If everyone bombs the quiz for Module 3, the problem probably isn’t the students. It’s the module.
- Drop-Off Points: This one is gold. Where in a video or lesson are students clicking away? Most platforms can show you the exact moment engagement plummets, pointing to a specific part of your content that might be boring, unclear, or overwhelming.
Your course analytics are not a report card on your performance. They are a treasure map showing you exactly where to dig to find opportunities for improvement.
Turning Numbers into Smarter Decisions
Okay, so you have the data. Now what? The real magic happens when you use these insights to make targeted, intelligent improvements. It’s this cycle of iteration that separates the good courses from the truly great ones.
And this approach is incredibly powerful. Top course creators who meticulously track student engagement metrics are twice as likely to succeed compared to those who don’t. I once heard about an instructor who noticed in their Learning Management System (LMS) dashboard that students consistently skipped long reading assignments but re-watched all the videos.
So, they redesigned the course, swapping those dense text blocks for short, punchy video explainers. The result? Participation shot up by 30%, and quiz scores improved by a whopping 25%. That’s the power of listening to what the data is telling you. You can find more stories and online learning best practices at Mindstamp.
How to Collect and Act on Feedback
Beyond the hard numbers, you also need the “why.” You need to hear from your students in their own words to understand the context behind the data you’re seeing.
Here’s a simple system for gathering and using that qualitative feedback:
- Set Up Automated Surveys: Keep them short and sweet. Trigger a simple survey after a student completes a module or the whole course. Ask what they loved, what they struggled with, and what they’d change.
- Monitor Your Community: Pay close attention to the questions being asked in your discussion forums or community groups. Are people repeatedly getting stuck in the same place? That’s a clear signal to go back and clarify that part of your course.
- Schedule Regular Updates: Don’t try to fix everything at once because you’ll burn out. I recommend scheduling a “course review day” once a quarter. Sit down with your data and student feedback, identify the top two or three biggest opportunities for improvement, and just focus on those.
This continuous loop of launching, measuring, and refining is a core principle of effective online course design. It ensures your course never gets stale and continues to deliver amazing results for every new student who enrolls.
Common Questions About Online Course Design

As you start bringing your course to life, you’re going to have questions. It’s a totally normal part of the process. I’ve been there, and I’ve answered these same questions for countless other creators. Let’s walk through some of the most common ones to give you a bit more clarity and confidence.
What Is the Most Important Part of Online Course Design?
If I had to boil it all down to one single thing, it would be alignment.
This is the golden thread that connects everything in your course. Alignment means every video you record, every activity you plan, and every quiz you write serves a single purpose, helping your students achieve the learning objectives.
When a course is perfectly aligned, the journey feels logical and seamless for the student. They know exactly why they’re watching a certain video or completing a specific project. It all just clicks. Without it, your course can feel like a random collection of content, leaving students confused, frustrated, and much more likely to drop out.
So, before you even think about hitting “record,” get crystal clear on your learning objectives. They are your North Star for every decision that follows.
How Long Should My Online Course Videos Be?
This is one of the best questions you can ask, and the answer gets right to the heart of how people actually learn today. The rule of thumb is to keep your videos short and hyper-focused, ideally somewhere in the 5 to 10-minute range.
This isn’t just a random number. It’s a core principle of microlearning. Shorter videos are a sign of respect for your students’ time and a smart concession to modern attention spans. It’s always better to create a series of five-minute videos, each laser-focused on a single idea, than one long, rambling 30-minute lecture.
Keeping videos concise makes your content more digestible and easier for students to revisit. If they need a refresher on a specific concept, they can find it in a 7-minute video instead of scrubbing through a 45-minute lecture.
This chunked approach also makes it incredibly easy for students to go back and review a concept they’re struggling with. If you have a really complex topic that genuinely requires more time, no problem. Just break it down into a sequence of shorter, connected videos that build on one another. This creates a much more manageable path for your learners.
How Do I Keep Students from Dropping Out?
High dropout rates are the silent killer of many online courses. The most powerful weapon you have to fight this is engagement. You have to move beyond just delivering information and start creating an experience that pulls students in and makes them active participants.
It’s all about building in opportunities for them to interact with the material, with you, and with each other.
Here are a few proven ways to boost engagement and keep students on track:
- Frequent Quizzes: Use regular, low-stakes quizzes as learning tools, not just tests. They help students check their understanding and reinforce key concepts right after they learn them.
- Lively Discussions: Don’t just set up a forum and walk away. Spark real community by asking thoughtful, open-ended questions that get students talking and connecting.
- Meaningful Projects: Design assignments that push students to apply what they’ve learned in a practical, real-world way. This is where the learning really sticks.
Finally, never, ever underestimate the power of your own presence. When students feel seen and supported by you, their motivation skyrockets. Your personal feedback or word of encouragement might be the single biggest reason a struggling student decides to see it through to the end.