Creating LMS Drip Content With Webinars
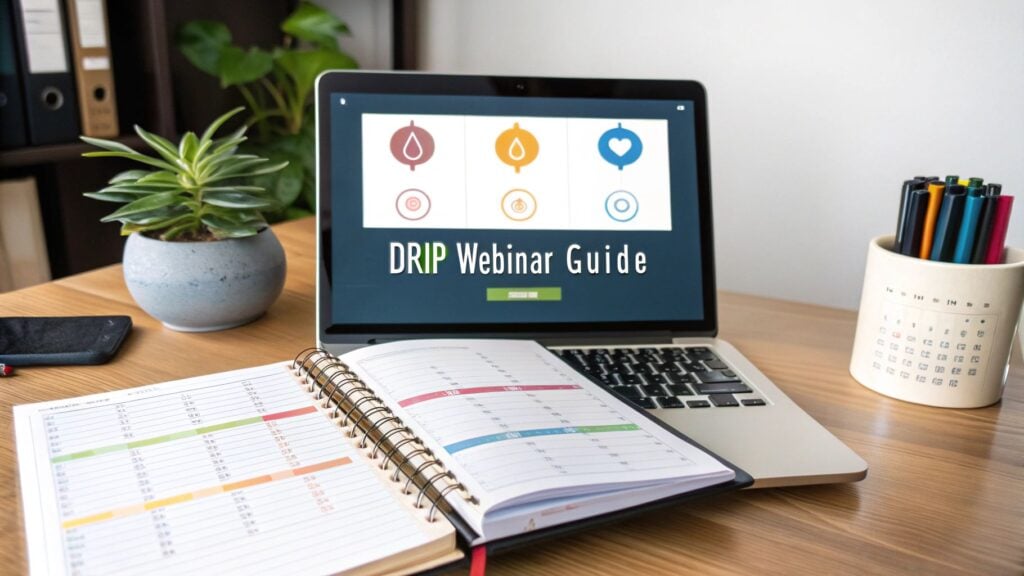
Creating an online course often feels like a balancing act. On one hand, you have structured, self-paced lessons. On the other, you have live, interactive events. The magic happens when you stop seeing them as separate and start blending them together.
Combining drip content with webinars is one of the most powerful ways I’ve seen to keep learners engaged and build a real sense of community. The result is a dynamic learning journey that delivers information and also transforms students and dramatically boosts course completion rates.
Why Webinars And Drip Content Are A Perfect Match
Have you ever logged into a new course, buzzing with excitement, only to be met with a wall of 50 video lessons? It’s completely overwhelming. That’s a surefire way to kill momentum before it even starts.
This is where drip content completely changes the game. Instead of dumping everything on your students at once, you release modules on a set schedule. Maybe it’s a new module every Monday, or perhaps a lesson only unlocks after they ace the previous one.
Suddenly, the experience feels manageable. It prevents information overload and gives students a clear, guided path forward. They know exactly what to focus on each week, which helps them stay on track and actually remember what they’re learning. It’s like turning a giant, intimidating textbook into a weekly magazine they can’t wait to dive into.
The Power of Live Interaction
Now, let’s bring webinars into the picture. Drip content provides fantastic structure, but let’s be honest, it can sometimes feel a little isolating. Webinars are the perfect antidote. They inject that missing dose of live energy, human connection, and shared experience right when it’s needed most.
Students aren’t just watching videos on their own anymore. They’re part of a living, breathing group, learning together in real-time. This is your chance to:
- Answer questions live: Nothing cuts through confusion like a real-time Q&A session, especially after a particularly tough module.
- Build a real community: Students get to interact with you and, just as importantly, with each other. This fosters a sense of belonging that is a huge motivator.
- Create urgency and excitement: A scheduled live event gives everyone a reason to keep up with the drip content so they show up prepared and ready to participate.
A Real-World Success Story
I remember running a corporate training program a few years back. In its first iteration, it was a totally self-paced video course. The completion rates were dismal, hovering around a painful 15%. People would sign up, start strong, and then just fade away.
We decided to blow it up and rebuild it using a drip model paired with bi-weekly live webinars. The first week, everyone got the foundational modules. Then, we hosted a live Q&A webinar to go over the content and tackle their questions. The shift was immediate. Engagement shot through the roof because people knew they had a specific time to connect, get clarity, and interact with the instructors.
The completion rate for that program jumped to over 70%. It was a massive win.
This combination works because it taps into two fundamental human needs in learning: the need for structure and the need for connection. Drip content provides the path, and webinars provide the community.
The data backs this up, too. An analysis by LearnDash found that courses using drip delivery saw engagement rates climb by up to 40%. Even more impressively, students came back 2.5 times more frequently than in courses where all the content was available from day one. It just goes to show that simply pacing your content makes a huge difference in keeping learners hooked for the long haul.
Mapping Out Your Webinar-Driven Drip Sequence
Alright, now for the fun part. Let’s get practical and start building the blueprint for your course. Think of yourself as an architect designing a learning journey. You wouldn’t just throw rooms together randomly, would you? Of course not. You’d map out a logical flow that guides people from the front door right to the best view in the house.
Creating a course that blends webinars and drip content follows the exact same idea. It needs a thoughtful plan that mixes self-paced lessons with live, interactive events. This structure tells a story and makes the entire experience feel intentional, instead of like a collection of random videos and calls.
Start With a Narrative Flow
Before you even think about individual lessons, zoom out and look at the big picture. What’s the story you want to tell? Every great course takes students on a transformation, moving them from where they are now to where they want to be.
Your job is to break that transformation down into key milestones. Each of those milestones can become a module in your drip sequence. A fantastic way to build early momentum is to kick things off with a high-energy “Welcome” webinar. This isn’t for deep-diving into content just yet. It’s for setting expectations, building excitement, and making everyone feel like they’re part of a community from day one.
After that initial live connection, you can transition into your foundational drip content. These are the core concepts and skills that everyone needs to nail down. Release these lessons on a set schedule to keep the whole cohort moving forward together.
This simple process shows how drip content and webinars can work in tandem to really drive engagement.
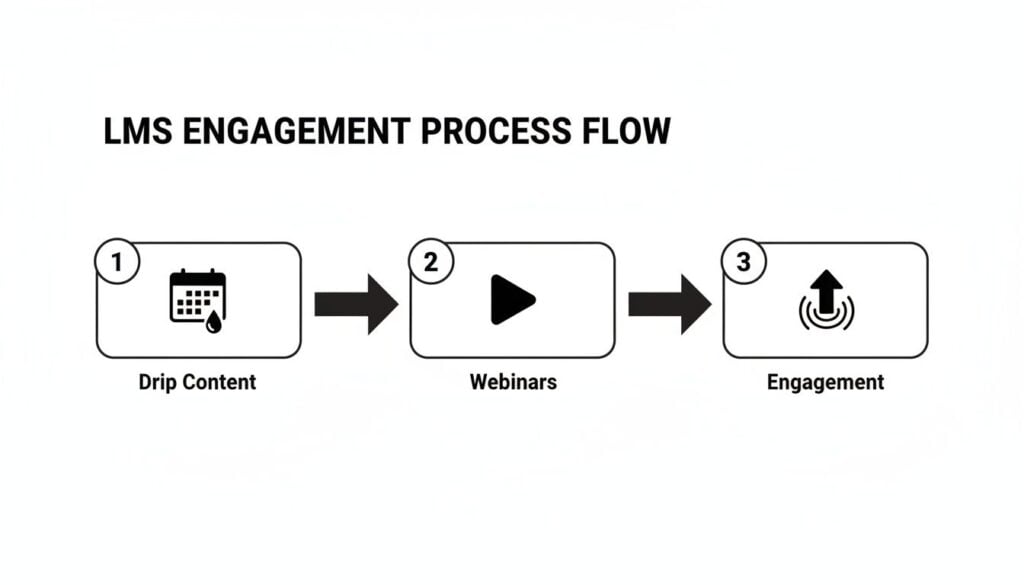
The flow is pretty clear: structured drip content provides the foundation, webinars add that crucial live interaction, and the combination keeps your learners hooked for the long haul.
A Sample 4-Week Course Structure
To make this more concrete, let’s map out a hypothetical four-week course. You can easily adapt this framework to fit just about any topic you can think of.
Week 1: The Foundation. Start with a Kick-Off Webinar on Monday to welcome everyone. For the rest of the week, drip out 2-3 core video modules covering the fundamental concepts. Keep these lessons focused and actionable.
Week 2: Deeper Application. Release more advanced drip content that builds on Week 1. Then, cap off the week with a Live Q&A Webinar. This gives students a chance to ask questions about the first two weeks of material and clear up any confusion before you move on.
Week 3: Expert Insights. This week, your drip content could be a case study or a more complex project. Then, host an Expert Interview Webinar. Bringing in a guest adds a fresh perspective and provides a ton of value.
Week 4: The Wrap-Up. Drip out the final pieces of content. The last live event should be a Capstone Webinar where you celebrate student wins, maybe even showcase their work, and discuss how they can apply what they’ve learned moving forward.
This structure provides a perfect rhythm of learning and interaction. If you’re looking for more ideas on how to structure your lessons, check out our guide on how to create a drip course module.
Choosing the Right Webinar Format
Not all webinars are created equal. The format you choose should directly support the learning goal for that specific part of your course. Mixing things up keeps the experience fresh and prevents your students from zoning out.
Thinking about which format to use and when? Here’s a simple blueprint that connects webinar types to their best placement within a drip sequence.
Webinar Format and Drip Sequence Blueprint
| Webinar Format | Best Placement in Drip Sequence | Primary Learning Goal |
|---|---|---|
| Welcome/Kick-Off | Beginning (Week 1) | Build community, set expectations, generate excitement. |
| Workshop/Tutorial | Middle (after foundational drip content) | Teach a hands-on skill, guide real-time application. |
| Live Q&A | After a complex module (e.g., end of Week 2) | Clarify concepts, resolve confusion, provide direct support. |
| Expert Panel/Interview | Middle-to-End (e.g., Week 3) | Introduce diverse perspectives, add external credibility. |
| Capstone/Wrap-Up | End of Course (Week 4) | Celebrate progress, reinforce key takeaways, outline next steps. |
Pairing the right format with the right moment in the learning journey is what makes this strategy so effective. A well-placed Q&A can be far more valuable than another lecture-style presentation.
When mapping out your sequence, also think about how you can repurpose your recorded webinar content. For instance, you can easily convert video to transcript to create text-based summaries for emails or downloadable resources.
Finally, think about cadence. A weekly webinar might be perfect for an intensive bootcamp, but it could lead to burnout in a longer, six-month program. Don’t be afraid to poll your audience to find a schedule that works for them. The goal is to create a sustainable rhythm that keeps them engaged without feeling overwhelmed.
Connecting Your LMS And Webinar Platform
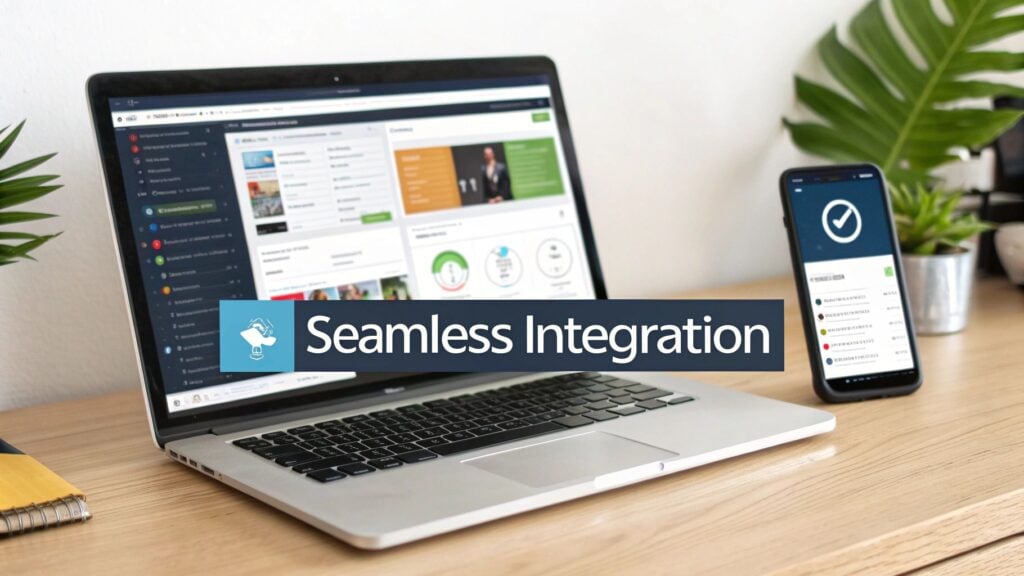
Alright, you’ve mapped out your brilliant course structure. Now it’s time to get into the tech side of things, but don’t worry, we’ll keep it simple. The goal here is to make your Learning Management System (LMS) and webinar platform talk to each other so seamlessly that the whole process feels completely effortless for your students.
This connection is the engine that runs your entire webinar-driven drip sequence. When you get it right, it becomes a hands-off system that automatically handles registrations, sends reminders, and posts replays. This frees you up to do what you do best, which is teaching and engaging with your community.
Choosing Your Core Tools
First things first, you need the right tools for the job. Not all platforms are created equal, especially when you start looking at how well they play with others. You’re looking for an LMS with strong native drip content features and the flexibility to connect easily with other apps.
On the LMS side, platforms built on WordPress like LearnDash are incredibly powerful, giving you full control over your learning environment. If you want something a bit more plug-and-play, all-in-one platforms like Teachable or Thinkific are great options that handle the hosting for you.
Next up is your webinar platform. For many, Zoom is the obvious choice because of its reliability and the fact that pretty much everyone knows how to use it. But other tools like WebinarJam or GoToWebinar offer robust features built specifically for marketing and teaching. If you’re weighing your options, our deep dive on the best webinar platforms for your needs can help you decide.
The Magic of Automation
This is where things get really cool. Manually adding every student to a webinar or sending out reminders one by one is a surefire recipe for burnout. Automation is your best friend here, and the key to unlocking it is a tool that can act as a bridge between your platforms.
Enter Zapier. If you haven’t used it, Zapier is an automation tool that lets you connect different web apps using simple “if this, then that” logic. These little automations are called “Zaps.”
Here are a few essential automations you should absolutely set up:
- Automatic Webinar Registration: When a student enrolls in your LMS course, a Zap can automatically register them for the next upcoming webinar in Zoom. No more exporting and importing CSV files.
- LMS Enrollment from Webinars: You can also run this in reverse. When someone registers for your introductory webinar, Zapier can automatically create an account for them in your LMS, maybe giving them access to a free pre-webinar module.
- Automated Reminders: While your webinar platform already sends reminders, you can create a much more personalized experience by triggering branded reminder emails from your own email marketing service when a webinar is 24 hours away.
Setting up these connections is a one-time task that pays dividends forever. It ensures a professional and seamless experience, making your students feel supported every step of the way without you having to lift a finger for each one.
A Real-World Automation Example
Let’s make this concrete with a common scenario. Imagine you’re using a WordPress site with the LearnDash LMS plugin, and you’re hosting your live sessions on Zoom. Your goal is to get the webinar replay automatically added to the right lesson in your LMS as soon as it’s over, available only to enrolled students.
Here’s how you could build that automated workflow:
Record to the Cloud in Zoom: The first and most critical step is to make sure your Zoom settings are configured to automatically record your webinars to the cloud. This kicks off the whole process.
Set Up Your Zapier Trigger: In Zapier, your trigger will be “New Recording in Zoom.” This tells the automation to start the moment your webinar recording is done processing.
Upload the Replay: The next action in your Zap could be to upload this recording to a video hosting service like Vimeo or a private YouTube link. This gives you more control over the playback experience and keeps your site running fast.
Update the LMS: The final step is where the magic happens. Your Zap’s last action will be to update a specific field on your LearnDash lesson page with the link to the video replay. You can use a plugin that connects Zapier to WordPress to make this happen.
With this simple setup, your webinar replays appear inside your course almost instantly after the live event ends. Your students get timely access without you having to manually download, upload, and embed a single video file. That’s the real power of building a connected system.
Keeping Learners Hooked Before, During, And After Your Webinars
Once your course is mapped out and the tech is talking to each other, the real work begins. A killer webinar-drip strategy lives and dies by one thing: learner engagement. It’s not enough to just schedule a webinar. You have to craft an experience that keeps your students plugged in before, during, and long after the live event wraps up.
Let’s break down how to turn every stage of your webinar into a powerful engagement tool.
Building Hype Before The Webinar
The buzz for your live event needs to start days, or even a week, before you ever hit the “go live” button. The goal is to get students invested and genuinely excited, transforming the webinar from just another calendar entry into a can’t-miss event.
One of the best ways I’ve found to do this is by dripping out some “prep work” through the LMS. This doesn’t need to be a heavy lift. Think a short teaser video, a one-page reading assignment, or a simple survey asking them what they’re most hoping to learn. This simple step gets them thinking about the topic ahead of time, making them far more likely to show up ready to participate.
A solid email sequence is also non-negotiable. The average live attendance for webinars hovers around 35-40%, but you can push that number way up with the right warm-up. In my own campaigns, a simple three-email sequence has consistently boosted attendance by over 18%. This is huge, because when you factor in on-demand replays later, your total audience reach can climb as high as 57%.
Here’s the simple, effective sequence I use:
- Email 1 (The Confirmation): Right after they register, send a confirmation with all the details and a small “sneak peek” of what you’ll cover.
- Email 2 (3 Days Out): Introduce the speaker (even if it’s just you!) and pose a key question or problem you’ll be solving during the session.
- Email 3 (1 Day Out): Send one last reminder. Attach the prep work and include a clear call to action to join the live event.
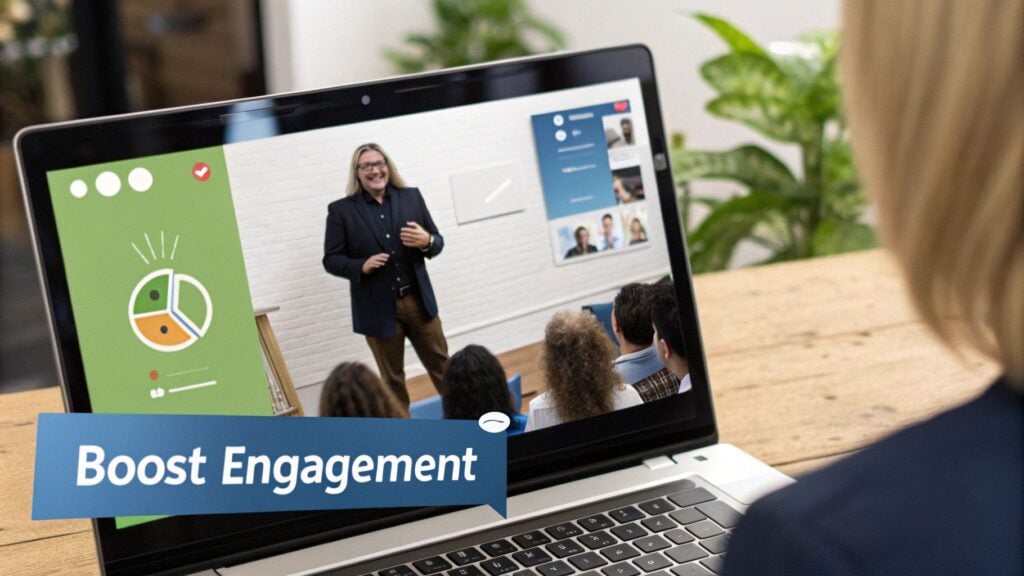
Keeping Them Hooked During The Live Session
When the webinar starts, your main job is to turn passive viewers into active participants. The last thing you want is for your students to be multitasking, with their email open in another window. You’ve got to keep them focused and involved.
This is where interactive elements become your best friend. Please, don’t just lecture for an hour straight. Break up your presentation with the engagement tools built into most modern webinar platforms.
The best webinars feel less like a presentation and more like a conversation. Your role as the host is to spark that conversation and make every single person feel seen and heard.
Try mixing in a few of these activities throughout your session:
- Polls and Surveys: Use them at the beginning to gauge everyone’s experience level, in the middle to check for understanding, and at the end to gather feedback.
- Live Q&A: Don’t save all the questions for the very end. Sprinkle a few Q&A breaks throughout to keep the energy up and address questions while they’re still relevant.
- Breakout Rooms: For longer workshops, splitting the audience into smaller groups for a quick discussion is an incredible way to build peer-to-peer connections.
- Chat Box Prompts: Actively encourage people to use the chat. Ask them to drop in where they’re tuning in from, share an emoji, or answer a quick, simple question.
If you’re hunting for even more ideas to keep your audience captivated, we put together a whole guide on proven techniques to boost your webinar engagement.
Extending The Learning After The Event
The real magic of this whole strategy happens after the webinar is over. This is your chance to take that one-hour live session and spin it into a goldmine of new drip content that reinforces the learning and extends the life of your material.
Whatever you do, don’t just upload the full replay and call it a day. That recording is packed with content just waiting to be repurposed.
Here are a few ways to turn your webinar into fresh drip content for your LMS:
- Create Micro-Learning Videos: Chop up the recording into smaller, bite-sized videos. Each clip can focus on a single key takeaway or answer one specific question from the Q&A.
- Develop a Summary PDF: Pull out the most important slides and concepts and turn them into a downloadable PDF guide or a handy checklist. This is a fantastic value-add that students will refer back to.
- Build an FAQ Module: Go through the chat log and the Q&A segment of your webinar. You can transcribe the best questions and your answers to create a brand new FAQ lesson right inside your LMS.
This approach not only delivers immense value to your students but also makes your own content creation process way more efficient. You’re creating once and using it multiple times, all while making the learning journey for your audience that much stronger.
Monetizing Your Course And Measuring Success

Creating a fantastic learning experience is one thing. Turning it into a sustainable business is a whole different ballgame. Let’s get into the business side of things. We’ll cover how to monetize your hard work and, just as importantly, how to measure what’s working so you can keep making it better.
When it comes to selling your course, you’ve got a few solid models to pick from. A personal favorite of mine is the freemium approach. You offer an introductory webinar completely free, using it as a powerful lead magnet. This gives potential students a real taste of your teaching style and the value you provide, making them much more likely to pull the trigger on the full drip course.
Another way to go is bundling the entire program, all the drip modules and live webinar access, into a single premium package. This works especially well if you’ve already built trust with an audience who knows the quality you deliver.
Setting Up Payments And Gating Content
Once you’ve landed on a model, you need a smooth system for taking payments and protecting your premium content. Thankfully, most modern LMS platforms have built-in integrations with payment gateways like Stripe or PayPal. This makes this part pretty straightforward.
The real magic, though, is in effective content gating. This is all about setting up your LMS to automatically unlock the goods after a successful payment. You can configure it so your advanced modules, webinar replays, or juicy bonus materials only become visible once a student has officially paid up.
This automated unlocking is absolutely critical for a good user experience. The last thing you want is a brand new customer having to email you for access. A properly configured system delivers that content instantly, making the whole purchase feel seamless and professional.
Moving Beyond Vanity Metrics
Alright, let’s talk about tracking success. It’s so easy to get caught up in “vanity metrics” like webinar registration numbers or the total student count. While those numbers look nice on a spreadsheet, they don’t tell you the whole story about the health of your course.
To truly understand what’s working, you need to dig deeper into your LMS analytics. These are the metrics that reveal how engaged your students actually are.
Don’t just count how many people show up. Measure how many people stick around, complete the work, and truly get the transformation you promised. That’s where the real success lies.
Here are the key metrics I always keep a close eye on:
- Course Completion Rates: This is the big one. What percentage of students who start your course actually make it to the finish line? A low number here is a major red flag that something in your content or structure just isn’t clicking.
- Student Engagement: Look at how often students are logging in, jumping into forums, and completing quizzes. This tells you if they’re actively involved or just passively enrolled.
- Module Drop-Off Points: Your LMS reports can show you exactly where you’re losing people. If a huge chunk of your audience bails after Module 3, it’s time to take a hard look at that content.
- Replay View Counts: Are people watching the webinar replays? High replay numbers can mean your live sessions are packed with value, or it might be a hint that your scheduling isn’t perfect for everyone.
These data points are your roadmap for improvement. They take all the guesswork out of refining your course and show you exactly where to focus your efforts. And speaking of metrics, it’s just as important to understand the return on your promotional efforts. When you start monetizing, you absolutely need to know how to measure social media ROI, since that’s often where you’re finding your students.
This is especially true when using webinars as your entry point. The data consistently shows that leads from webinars convert 20-30% higher than those from other channels, making them an ideal way to get people into your LMS drip sequences. For courses built to scale, drip gating your webinar replays behind a payment wall can even yield 25% higher revenue per learner.
By focusing on the right metrics, you can turn a good course into a great, and profitable, one.
Got questions about mixing webinars into your LMS drip sequences? You’re not alone. I get these all the time from people just starting out, so let’s tackle the big ones head-on.
Most of the anxiety boils down to tech, student engagement, and the classic “what if it all goes wrong?” scenario. Let’s clear up some of that uncertainty right now.
What If My Students Have Technical Issues?
This is probably the number one fear, and it’s a valid one. Nothing kills the momentum of a live session faster than a student who can’t log in or get their audio working. My best advice? Get ahead of it.
Before your very first live event, send out a simple “tech check” guide. This isn’t complicated. It’s just a quick email with:
- A link to test their connection on your webinar platform (like Zoom’s test meeting).
- A gentle reminder to use a solid browser like Chrome or Firefox.
- Simple instructions on how to check their microphone and speaker settings.
During the webinar itself, having a co-host or a team member dedicated to monitoring the chat for technical questions is a total lifesaver. This frees you up to actually teach while they play tech support in the background. If you’re flying solo, just take a moment at the very beginning to point everyone to the help resources. Problem solved.
How Much Content Should I Drip Per Week?
Finding the right cadence is everything. Go too fast, and you’ll overwhelm people. Go too slow, and they lose momentum. There’s no single magic number, but I’ve found a sweet spot that works for most courses.
Aim for one to three short video lessons per week. This feels completely manageable for most people, allowing them to make real, steady progress without feeling like they’re drowning in content.
Remember, the point of dripping content is to create a sustainable learning rhythm. It’s far better to deliver less content that actually gets completed than to dump a mountain of material that just sits there unwatched.
Pair this with a single, focused live event. One weekly webinar is usually perfect. Any more than that and you start creeping into “Zoom fatigue” territory, which will absolutely torpedo your attendance and engagement over the long haul. You want each live session to feel like a valuable, can’t-miss event.
Can I Use Pre-Recorded Webinars?
Absolutely! And you definitely should. While live webinars are incredible for that real-time, in-the-moment connection, using pre-recorded sessions is a game-changer for scaling your course. These are often called “evergreen” or “automated” webinars. An evergreen webinar can simulate a live experience, complete with a chat box and scheduled start times, giving you leverage.
Here’s a practical way to blend the two for the best results:
- Run It Live First: Always, always host the webinar live at least once. This is your chance to get real questions, see where people get confused, and capture authentic energy.
- Edit and Repurpose: Take that live recording, clean it up, and snip out any awkward pauses or technical hiccups. You want the polished version.
- Automate for New Students: Now, use this polished recording as an automated webinar for all new cohorts. You can set it to “run” at specific times, giving every new student that same “just-in-time” learning experience without you having to be there.
This hybrid approach gives you the best of both worlds. You get the genuine engagement of a live event and the incredible scalability of an automated system. It’s one of the core strategies for building a webinar-driven drip sequence that can grow right alongside your business.