How to Use WIX to Create a Successful Membership Site

Building a membership site used to require coding skills and expensive developers. You’d either need to learn WordPress, hire a programmer, or settle for basic platforms that didn’t really work for serious businesses.
Wix changed that game completely when they emerged onto the scenes. The platform offers real membership features built right in, plus the drag-and-drop simplicity that makes building websites actually enjoyable instead of frustrating.
I’m going to walk you through exactly how to build a professional membership site using Wix. No technical background needed, no complicated setups, just straightforward steps that get you from idea to live membership site.
Why Membership Sites Are Worth Your Time
Maybe you’re not convinced on membership sites. I mean, they’ve been around for a long time so they might seem “dated”, with online course websites being more attractive these days.
A membership site gives people exclusive content they pay to access regularly. Think of it like a magazine subscription, but for your expertise, community, or resources.
Here’s what makes them different from regular websites:
- Exclusive content that people can’t get anywhere else
- Community features that keep members engaged long-term
- Recurring revenue instead of hoping for one-time sales
- Controlled access to different content based on membership levels
Why build a membership site?
Easy. You get predictable monthly income from subscriptions instead of constantly hunting for new customers. Your audience relationship gets deeper through exclusive content and community interaction. Members typically spend way more with you over time compared to one-time buyers.
Plus you can build communities around your expertise or interests, which creates value that goes beyond just the content you provide.
Okay, I can see you’re convinced! Let’s jump into how you can create a membership site using the popular website builder, Wix.
Step 1: Plan Your Membership Before You Start Building
Look, I know you want to go create your account on Wix and start playing with all the color-pickers and templates. Don’t touch Wix yet. Seriously. Planning your membership structure first saves you hours of rebuilding later.
Choose How You’ll Deliver Content
Drip-feed membership releases content over time, keeping people subscribed longer.
This works great for courses, training programs, or skill-building content where progression matters. People get new lessons weekly or monthly, which gives them reasons to stay subscribed.
All-access membership gives people everything immediately after they join.
This suits resource libraries, templates, tools, or communities where people want to browse freely. Think Netflix for your expertise.
Fixed-term membership runs for specific periods with clear end dates.
Weight loss challenges, skill courses, or seasonal programs work well with this model. People join for 30 days, 90 days, or whatever timeframe makes sense for your content.
Figure Out Your Content Strategy
What exclusive content will you provide that people can’t get elsewhere?
Your content might include detailed tutorials, behind-the-scenes content, templates and resources, live Q&A sessions, or community access with other members.
Making sure your content provides real value that people would actually pay for is the most imporant part of this. Free blog posts and social media content won’t cut it for a paid membership. It has to be valuable.
Set Your Pricing Structure
Research what similar membership sites charge in your space. You can always adjust pricing later, but start with something that feels reasonable for both you and your potential members. Seriously, don’t stress too much on price – you’re allowed to change it.
You’ll want to decide whether you’ll offer multiple tiers with different benefits or keep things simple with one membership level. Simple often works better when you’re starting out.
Quick tip: Most successful membership sites charge between $19-$99 monthly, depending on the value and community size. Start somewhere in that range and adjust based on member feedback.
Step 2: Set Up Your Wix Site
Okay, with that out of the way, let’s get to the part you’ve been looking forward to! Create your Wix account if you don’t have one already. The free plan lets you test things out, but you’ll need a paid plan to remove Wix branding and use a custom domain.
For membership sites, I recommend at least the Combo plan ($14/month) to start. The Business VIP plan ($39/month) includes priority support and some extras that help with professional sites.
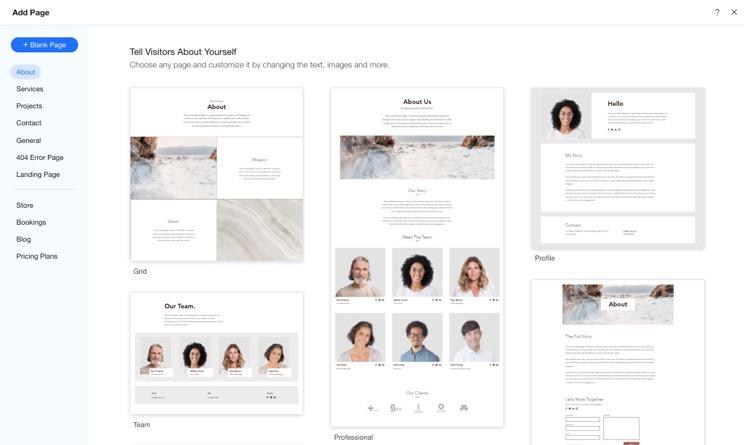
Pick Your Starting Template
Browse Wix’s template library and look for membership or business templates. Don’t stress about finding the perfect match since you can customize everything anyway.
Look for templates with:
- Clean layouts that won’t distract from your content
- Good mobile responsiveness (most people browse on phones)
- Space for the content types you plan to offer
- Professional appearance that matches your brand style
Templates designed for coaches, consultants, or online businesses usually work well for membership sites.
Remember, your template is just a starting point. You can change colors, fonts, layouts, and pretty much everything else once you start customizing.
Step 3: Set Up Your Members Area
Now we get to the fun part. Setting up the actual membership functionality.
Create Member Registration
In the Wix editor, click “Add” and select “Members” from the menu. Choose “Members Area” and add it to your site.
This creates the foundation for member signups, logins, and profile management. Wix handles all the technical stuff automatically.
Customize Your Registration Form
Keep your signup form simple. Name and email are usually enough to start. You can always collect more details later through surveys or profile updates.
Too many form fields scare people away. Simple forms get more signups.
Design the Login Experience
Your login page is the first thing returning members see. Make it look professional and welcoming.
Add your logo, choose colors that match your site, and write copy that reminds people why they joined in the first place.
Test Everything
Before moving forward, test the signup process from different devices. Make sure:
- Confirmation emails arrive in people’s inboxes
- Password reset actually works
- New members can access their content right away
- Everything looks good on phones and tablets
Don’t skip this step! If you sell a membership and things just don’t work, you’ll be issuing that person a refund and they’ll talk trash about your offering to at least one or two other people.
Step 4: Build Your Member Pages and Content Structure
Time to create the pages that only members can access.
Create Members-Only Pages
Add new pages to your site and set their visibility to “Members Only” in the page settings. These pages become invisible to regular website visitors.
Organize your member pages logically:
- A main dashboard where members land after logging in
- Individual pages for different content categories
- Clear navigation so people can find what they need
Structure Your Content
Think about how members will actually use your content. Overwhelming people with tons of options usually backfires.
Consider creating different access levels if you plan multiple membership tiers. Some content might be available to all members while premium stuff requires higher-level subscriptions.
Add Interactive Elements
Use Wix’s built-in features to make your membership area engaging:
- Comment sections for community discussion
- Download buttons for resources
- Video players for training content
- Forms for member feedback
- Zoom or something similar similar for live streams.
Check Mobile Experience
Most members will access your site on their phones. Preview your member pages on mobile and adjust anything that looks cramped or hard to use.
Buttons should be easy to tap, text should be readable without zooming, and navigation should work smoothly on smaller screens.
Step 5: Set Up Payments and Subscriptions
Here’s where your membership site becomes a real business.
Configure Payment Processing
Go to your site settings and set up payment processing. Wix accepts major credit cards and PayPal, making it easy for members to pay and manage subscriptions.
Connect your bank account or payment processor to receive funds automatically. Wix handles the technical stuff, but you’ll need to provide tax information and business details.
Create Your Membership Plans
In your Wix dashboard, find the Subscriptions section and click “Create Plan.”
Set up:
- Your monthly or annual pricing
- What each plan includes
- Any trial periods or introductory offers
- Billing frequency options
- Your refund policy
Pro tip: Offer both monthly and annual plans. Annual plans with 10-20% discounts improve your cash flow while saving members money.
| Plan Type | Typical Discount | Member Benefit | Your Benefit |
|---|---|---|---|
| Monthly | None | Lower commitment | Easier to test pricing |
| Annual | 15-20% off | Cost savings | Better cash flow |
| Lifetime | 50-70% off | One-time payment | Large upfront revenue |
Set Up Trials and Discounts
If you want to offer free trials or launch pricing, configure these in your subscription settings.
Free trials can increase signups, but make sure you have a plan to convert trial members to paying subscribers. Some people will always try to game free trials.
Create promotional codes for launch discounts or referral programs. Wix makes it easy to generate codes with specific discounts and expiration dates.
Test Payment Processing
Run test transactions before launching publicly. Nothing kills momentum like a broken checkout process when someone’s ready to join.
Step 6: Create and Upload Your Content
Time to add the exclusive content that makes your membership worth paying for.
Plan Your Content Creation
Based on your membership model, create content that provides genuine value to members. Your content might include:
- Video tutorials showing step-by-step processes
- Downloadable templates or tools
- Written guides with detailed instructions
- Live recordings from member-only sessions
- Resource libraries organized by topic
Focus on quality over quantity initially. Better to have fewer pieces of excellent content than lots of mediocre material that doesn’t help anyone.
Upload and Organize Everything
Add your content to the appropriate member pages. Use Wix’s media manager to keep files organized.
Make sure that your images load quickly and look professional, videos play smoothly on different devices, downloads work properly, and overall everything is organized logically.
Handle Content Scheduling
For drip-feed memberships, plan your content release schedule. Wix doesn’t have automatic drip features built in, so you’ll need to manually publish content on schedule.
Mark your calendar with content release dates and set reminders so you don’t forget to publish new material.
Keep Quality Standards
Set standards for content formatting, image sizes, video quality, and writing style. Consistent presentation makes your membership feel more professional and valuable.
Step 7: Launch and Start Growing Your Membership

You’re almost ready to go live.
Do Final Testing
Before announcing your membership site, test everything one more time:
- Sign up as a test member
- Navigate through all pages
- Try the payment process
- Check that content displays properly on phones and computers
- Ensure email notifications go through (receipts, updates, etc.)
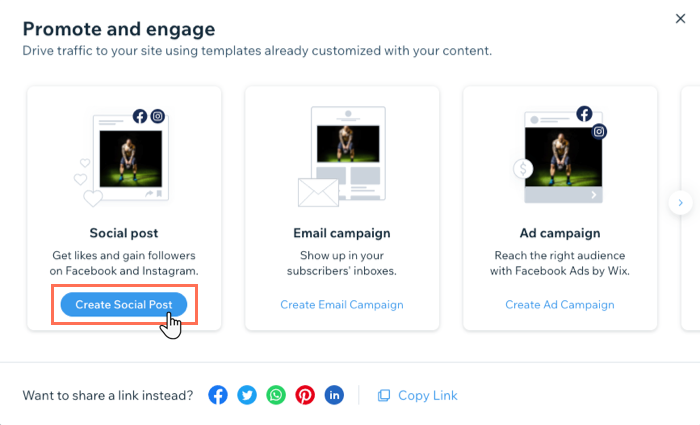
Launch to Your Audience
Announce your membership site to people who already know you through email lists, social media accounts, your existing website, and personal networks
Consider offering launch bonuses or early-bird pricing to encourage initial signups. Creating urgency helps people make decisions faster.
If you’re literally starting from scratch, then you’ll need to figure out a good marketing strategy to build an audience up before trying to sell a membership. Seriously, don’t put the cart before the horse. Save yourself the time and headache of a membership program that will just collect dust. Start marketing!
Don’t just launch once and hope for the best. Build your content, and keep on promoting its benefits across the various channels.
Build Your Community
Engage actively with early members to build momentum. Respond to comments quickly, ask for feedback about what they want to see, and create opportunities for members to interact with each other.
Happy members become your best marketing. They’ll refer friends and provide testimonials that help you attract new members.
Growing and Maintaining Your Membership Site
Once your site is live, focus on keeping members happy and attracting new ones. Add new content regularly, respond to questions quickly, create live events or Q&A sessions, and ask for suggestions about future content.
Member retention matters more than constantly finding new members. It’s much easier to keep existing members happy than to replace ones who cancel.
Use Wix’s analytics to understand which content gets the most engagement, when people tend to cancel subscriptions, how new members find your site, and perhaps what devices people use to access content (sometimes the device they use has a negative impact on their experience). This data helps you make better decisions about content creation and marketing.
In the end, building a successful membership site takes time, but Wix makes the technical stuff manageable so you can focus on creating value for your members. Start simple, test with real people, and improve based on what you learn.