How to Import SCORM Files into LMS
Alright, let’s get right to it. Importing a SCORM file into your Learning Management System (LMS) boils down to one core task: packaging your entire course into a special ZIP file and uploading it. It’s a process I’ve done thousands of times, and it really comes down to just a few key actions.
Why SCORM Still Matters for Your Courses
If you’re creating online courses, you’ve probably heard the term SCORM tossed around. It stands for Sharable Content Object Reference Model, and it’s basically the universal language that lets your e-learning content talk to almost any LMS. Think of it as the USB of the e-learning world, it just works.
This standard has been the bedrock of e-learning for over two decades. It was created way back in 2000 by the U.S. Department of Defense’s Advanced Distributed Learning (ADL) Initiative.
Its stability is why, by 2010, over 80% of corporate training programs had adopted SCORM-compliant platforms. This helped them see much higher completion rates than non-standard formats. You can find more technical details about how this standard is used in enterprise systems at Keeper.io.
Choosing the Right SCORM Version
Before you even think about importing anything, you have to pick a SCORM version. The two you’ll run into are SCORM 1.2 and SCORM 2004. They aren’t interchangeable. The right choice depends on what your LMS supports and the kind of data you absolutely need to track.
- SCORM 1.2 is the older, more widely supported version. It’s incredibly reliable for basic tracking, like completion status and a single, final score.
- SCORM 2004 is the more powerful option. It offers much more detailed reporting, like breaking down individual quiz answers and tracking progress against specific learning objectives.
My rule of thumb is simple. If you just need to know whether someone finished the course and passed the final quiz, SCORM 1.2 is perfect. If you need to see exactly which questions they got wrong on that quiz, you need SCORM 2004.
SCORM 1.2 vs SCORM 2004 Key Differences
To make it even clearer, here’s a quick comparison to help you choose the right SCORM version for your e-learning content based on tracking needs and LMS compatibility. This table breaks down the main differences you’ll care about when you hit that “export” button in your authoring tool.
| Feature | SCORM 1.2 | SCORM 2004 |
|---|---|---|
| Completion Status | Limited to basic states like incomplete or completed. | Offers more detailed statuses like passed, failed, or incomplete. |
| Quiz Data | Tracks only a single, final score for the entire course. | Can track individual question responses and interaction data. |
| Sequencing | Provides very basic navigation control, no forced content ordering. | Allows for advanced rules to guide learners through a specific path. |
| LMS Compatibility | Almost universally supported by every LMS out there. | Widely supported, but it’s always smart to double-check your LMS documentation first. |
Once you understand these foundational pieces and know which version you need, you’re ready to get your course content packaged up. Getting this right from the start saves a ton of headaches later. Next, we’ll dive into exactly how to do that.
Getting Your SCORM Package Ready for Prime Time
Before you even think about hitting that upload button, let’s talk about getting your SCORM file packaged just right. This is where most import errors happen, and trust me, I’ve seen them all.
A small mistake here can cause major headaches down the line, so let’s get this foundational step perfect from the start.
At the heart of every SCORM package is a critical file called imsmanifest.xml. Think of it as the table of contents for your entire course. It tells the LMS what the course is called, what’s inside, and how all the pieces fit together. If this file is missing, corrupted, or in the wrong place, your LMS won’t even know where to begin.
Your Essential SCORM Package Checklist
To make sure everything is in order, I always run through a quick mental checklist before zipping everything up. Your package isn’t just one file. It’s a collection of assets that need to work in harmony.
Here’s a quick rundown of what you absolutely must have inside:
- The Manifest File: As I mentioned, the
imsmanifest.xmlis non-negotiable. It has to be there. - HTML Files: These are the actual pages or slides your learners will see.
- Media Assets: Don’t forget any of your images, videos, and audio files.
- Supporting Files: Any JavaScript (
.js) or CSS (.css) files that control the course’s interactivity and look and feel need to come along for the ride. - Quiz and Assessment Data: All the files that define your quizzes and how they report scores are crucial.
This simple process flow visualizes the core steps you’ll follow. It’s all about getting the export right before you even touch the LMS.
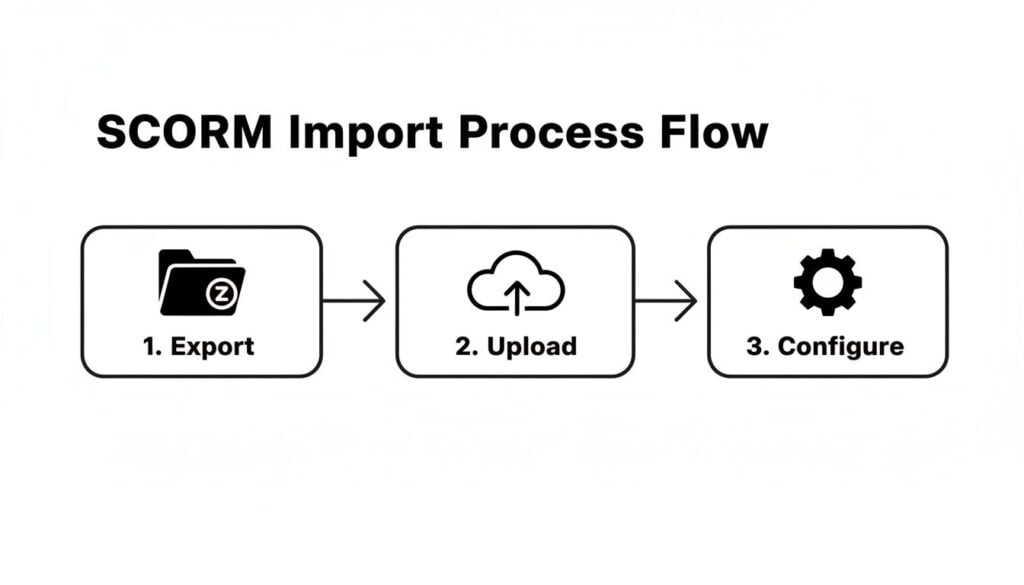
As you can see, a successful import starts long before you upload anything. It starts with a clean export.
My Pro Tip for Zipping Your Files
Now for the most important tip I can give you about packaging. When you create your ZIP file, you absolutely must ensure the imsmanifest.xml file is at the root level. This means it can’t be buried inside any folders.
A classic mistake is zipping the folder containing your course files instead of zipping the files themselves. This tucks the manifest inside a subfolder, and your LMS will almost certainly throw a “Manifest Not Found” error.
Imagine your ZIP file is a suitcase. The manifest file should be the first thing you see when you open it, not hidden away in a side pocket. To do this correctly, select all the individual files and folders for your course, right-click, and then choose the option to compress or send to a ZIP file.
Avoiding Common Packaging Pitfalls
Finally, let’s cover a few simple mistakes that can break your import before it even starts. These are easy to avoid if you know what to look for. Creating a clean, compatible package relies on avoiding a few common pitfalls.
Watch out for these common gremlins:
- Special Characters: Avoid using characters like
&,#,?, or even spaces in your file names. Stick to letters, numbers, hyphens, and underscores to be safe. - Long File Paths: Some systems still have limits on how long file paths can be. Keep your folder structure simple and your file names reasonably concise.
- Incorrect Export Settings: This all begins in your authoring tool. Make sure you’ve selected the correct SCORM version (1.2 or 2004) that your LMS supports. If you’re on the hunt for the right tool, check out our guide on the best authoring tools for e-learning to see what options are out there.
Getting this packaging step right makes the actual process of uploading and configuring your SCORM course incredibly smooth. It’s all about preparation.
A Walkthrough for Importing into Popular LMS Platforms
Every Learning Management System has its own personality, especially when it comes to importing content. The good news? Once you get the hang of one, the process starts to feel familiar across the board.
My goal here is to give you a practical, over-the-shoulder look at how to get your SCORM file into some of the most common systems out there.
Think of this as your map for navigating the specific menus and settings you’ll actually encounter. We’re moving beyond theory and getting into the clicks and configurations you need to get your course live.
Importing SCORM into Moodle
Moodle is a favorite in the academic world, and its process is pretty straightforward once you know where to look. I’ve found it’s all about adding a SCORM package as a course “activity.”
First, you need to head to the course where the content belongs and turn on “Edit mode.” This is a simple but critical step that trips people up all the time. From there, it’s just a few clicks:
- Hit “Add an activity or resource” in the course section where you want the module to live.
- Select “SCORM package” from the pop-up list of activities.
- Give your package a name and a clear description for your learners.
- Drag and drop your ZIP file right into the “Package file” area.
After the upload finishes, Moodle presents you with a ton of settings. You can control how the course launches (in a new window or embedded), whether it connects to the gradebook, and how many attempts a learner gets. For most of my projects, launching in a new, resizable window provides the cleanest experience.
How to Handle SCORM in Canvas LMS
Canvas is another giant, especially in higher education, and its approach is a bit different. It treats SCORM packages as a type of assignment, which is actually pretty smart for integrating with the gradebook.
Statistics show that the vast majority of Fortune 500 companies rely on SCORM-compliant systems. In 2024, import success rates hit over 98% in platforms like Canvas. The system’s SCORM LTI, used by 85% of higher-ed institutions, is a big reason for this reliability. You can discover more insights about how SCORM integrates with top LMS platforms at Docebo.com.
Here’s the typical workflow in Canvas:
- Navigate to your course and find “SCORM” in the left-hand navigation menu. If you don’t see it, you may need to enable it in your course settings first.
- Click the “Upload” button and select your SCORM ZIP file.
- Choose your import type: a graded assignment, an ungraded assignment, or just a simple page.
My advice? Always choose “Import as a graded assignment” if your course has any kind of quiz or scored element. This automatically creates a gradebook column and ensures the score syncs without any extra work. It’s a huge time-saver.
This screenshot shows the import options you’ll see in Canvas after your file is uploaded.
Pay close attention to that “Import Type” dropdown. It’s the most critical decision you’ll make here for ensuring grades track correctly.
Uploading a Course to TalentLMS
TalentLMS is popular in the corporate training space for its clean, user-friendly interface. Thankfully, its import process reflects that same simplicity. I appreciate that you can add SCORM content as a standalone unit right inside an existing course structure.
To get started, just navigate to your course and click “Add”. The steps are minimal:
- Select “SCORM | Tin Can | xAPI” from the list of content types.
- Give the unit a name.
- Click the “Upload a SCORM or Tin Can ZIP file” button and grab your package.
TalentLMS handles the rest in the background. Once it processes, you can tweak settings like completion rules, but the initial upload is refreshingly simple. Choosing the right LMS can make this process even easier, so it’s always worth exploring your options. You might find our deep dive into the 8 best online course platforms in 2025 helpful for seeing which one fits your needs best.
Quick Tips for Any Platform
Regardless of the system you use, I’ve learned a few universal truths that can save you a world of frustration. Always keep these pointers in your back pocket before you click “import.”
- Patience is key. Large SCORM files, especially those packed with video, can take a few minutes to upload and process. Don’t navigate away from the page until you see a clear confirmation message.
- Check the launch window. After importing, always preview the course as a learner would. Make sure it launches correctly and fits within the window or frame without any bizarre scrollbars or sizing issues.
- Confirm the gradebook connection. If it’s a graded course, pop over to your gradebook immediately after importing. You should see a corresponding column or item. If it’s there, you know the connection was made successfully.
Just because your course uploaded successfully doesn’t mean the job is done. I’ve learned this the hard way. Proper testing is a critical step you should never, ever skip. This is all about making sure your learners have a flawless experience from the very first click, and it’s how you catch problems before they do.

Think of this as your personal quality check. A few minutes of testing now can save you hours of support headaches later. The test confirms your course actually communicates with your LMS as expected.
Why SCORM Cloud is Your Best Friend
Before I even attempt to import a new SCORM package into a client’s live LMS, I run it through a free tool called SCORM Cloud. It’s the industry gold standard for debugging, and I consider it an essential part of my workflow.
SCORM Cloud acts as a perfect, neutral testing ground.
The logic is simple. If your SCORM file doesn’t work there, it’s definitely not going to work in your LMS. This helps you isolate whether the problem is with your SCORM package itself or with your specific LMS’s settings. Uploading there first can reveal hidden issues in your manifest file or asset paths that your own LMS might not report clearly.
Basic Debugging with Your Browser
Once your course is in your LMS, you can do some simple checks yourself using your web browser’s developer tools. Don’t worry, you don’t need to be a programmer to do this.
Just right-click anywhere on the page while your course is running and select “Inspect,” then look for the “Console” tab.
This console is where the SCORM course and the LMS “talk” to each other. Keep an eye out for any red error messages. They might look like gibberish, but they often contain clues, like “file not found” or “permission denied,” that can point you directly to the source of a problem.
My go-to move is to launch the course, complete a quiz, and then check the console. If I see a flurry of successful “LMSSetValue” calls related to scores and completion, I know things are working. If I see errors, it’s time to investigate.
As you get deeper into testing, it’s also a great time to think about the bigger picture of learner engagement. For more insights on that, check out these best practices for online courses to ensure your content is not just functional but also highly effective.
Your Essential Post-Import Checklist
To keep things organized, I use a quick checklist to validate every course after an import. It’s a simple process that covers the most common points of failure and ensures a smooth learner experience. This small bit of due diligence makes a huge difference.
Here’s a practical list I run through to make sure a SCORM course is functioning perfectly after it’s been imported.
Common SCORM Testing Checklist
| Test Item | What to Check For | Expected Outcome |
|---|---|---|
| Course Launch | Does the course open correctly in the intended window or frame? | The course should launch smoothly without any display issues or pop-up blocker problems. |
| Completion Status | When you finish the course, does the LMS mark it as “complete”? | The learner’s status should update in the LMS dashboard and any relevant reports. |
| Score Reporting | After passing or failing a quiz, is the score sent to the gradebook? | The correct score should appear in the LMS gradebook or user’s transcript. |
| Bookmarking | If you exit and re-enter, does the course resume where you left off? | The course should prompt you to return to your last viewed slide. |
| Navigation | Do all buttons, links, and navigation elements work as intended? | Every interactive element should be responsive and lead to the correct place. |
By methodically running through these checks, you can be confident that you’re not just uploading a file, but delivering a functional and reliable learning experience. It turns a simple upload into a professional deployment.
Sooner or later, it happens to every single one of us. You spend hours getting your SCORM package just right, hit the upload button feeling pretty good about it, and then… BAM. An error message.
It’s a gut-punch moment, but don’t throw your keyboard just yet. Over the years, I’ve run into just about every import error you can imagine, and the good news is that most of them boil down to a handful of common, fixable mistakes.
Let’s walk through the problems you’re most likely to see and, more importantly, how to get past them. Think of this as your field guide for turning a dreaded error into a quick win.
The “Manifest Not Found” Error
This is, without a doubt, the number one culprit. The LMS throws up its hands and says it can’t find the imsmanifest.xml file, even when you’re staring right at it in your folder. In 99% of cases, the file isn’t missing, it’s just buried.
This almost always comes down to how you zipped the package. Remember my earlier tip about zipping the contents of your course folder, not the folder itself? This is why. When you zip the parent folder, the LMS opens the package and sees just one thing inside: another folder. It doesn’t dig deeper to find the manifest, so it assumes it doesn’t exist.
The Fix: This one’s easy. Unzip your package. Open the folder, select every single file and subfolder inside it (including the manifest!), right-click, and create your new ZIP file directly from that selection. That simple change puts the imsmanifest.xml file right at the top level, exactly where the LMS needs to see it.
Your Course Launches to a Blank Screen
Here’s another classic. The package seems to import just fine, but when you launch it, you get a blank white screen or maybe a “404 Not Found” error. This is almost always a file path problem. Your course is desperately trying to load images, videos, or scripts that it simply can’t locate.
A few things can trigger this:
- Absolute Paths: Your course might be calling for a file using a path like
C:\Users\MyDocs\course\image.jpg. The LMS server has no idea what that means. It needs a relative path likeimages/image.jpg. - Case Sensitivity: Your Windows machine might not care if a file is named
Image.JPGorimage.jpg, but the Linux server your LMS is likely running on absolutely does. They are two different files to the server, and a mismatch will break the link. - Special Characters: File names with spaces or symbols like
#or&can wreak havoc when they’re processed as URLs by the LMS.
The Fix: Head back to your authoring tool and double-check your asset library and publishing settings. Confirm that all file paths are relative. It’s also a great habit to adopt a clean, web-friendly naming convention for everything. Stick to lowercase letters, numbers, and hyphens. No spaces, no funny symbols. Re-export, re-upload, and that frustrating blank screen should be a thing of the past.
Tracking and Completion Issues
Maybe the most maddening problem of all is when the course runs perfectly for the learner, but it refuses to report completion or send a score to the gradebook. This signals a breakdown in the communication pipeline between your SCORM content and the LMS.
The tricky part here is that the course might look fine to the learner. They can click through every slide and answer every quiz question, but the LMS never gets the final “I’m done!” signal.
First, check the export settings in your authoring tool. You have to explicitly define what action triggers completion. Is it viewing a certain percentage of slides? Passing a quiz with a specific score? Reaching the final slide? If that trigger isn’t defined, the course never knows when to phone home to the LMS.
SCORM 1.2, despite being released way back in 2001, is a workhorse that facilitated over a billion learner interactions by 2020 because its tracking is so direct. In modern platforms like Brightspace, the import process is designed to preserve critical learner data like scores and session time. But you still have to do your part by ensuring your export settings are correct. You can dive deeper into how these standards evolved over at SCORM.com.
If your export settings look solid, the next move is to test your package in a neutral environment like SCORM Cloud. If it reports completion perfectly there but fails in your LMS, the problem is likely on the LMS side. Dig into the course settings within your LMS and make sure it’s properly linked to a gradebook item and that the completion tracking rules for that specific module are configured correctly.
Answering Your Top SCORM Questions
Over the years, I’ve fielded a ton of questions about what happens after you get that SCORM package into your LMS. It’s often the little things that trip people up right at the finish line.
So, I’ve rounded up the most common questions that land in my inbox. Think of this as your go-to FAQ for navigating those final hurdles, from making a quick edit to figuring out why a course won’t mark as complete.
Can I Edit a SCORM Package After I Import It?
Generally, the answer here is a hard no. You really have to think of a SCORM package as a sealed, self-contained unit. Once it’s uploaded, the LMS sees it as a finished product, ready to go.
If you spot a typo or need to swap out an outdated video, you can’t just dive into the files inside the LMS and make a change. The right way to do it is to go back to your original authoring tool, whether that’s Articulate Storyline, Adobe Captivate, or something else. Make your edits there, and then export a brand new SCORM package. From there, you just re-upload the new version, which will usually replace the old one.
I’ve seen people try to edit the files manually inside the ZIP package, and it’s almost always a recipe for disaster. It’s a surefire way to break the course’s functionality because you risk corrupting the imsmanifest.xml file, which is basically the brain of the whole operation.
What Is the Difference Between SCORM, xAPI, and cmi5?
It helps to think of these as different generations of e-learning standards, each built for a different purpose.
- SCORM is the old reliable. It’s the most widely supported standard out there and works perfectly for traditional courses that you launch and track from inside an LMS. It’s a workhorse.
- xAPI (also known as Tin Can) is the flexible, modern successor. Its real power is tracking learning experiences that happen anywhere, on a mobile app, in a simulator, or even during on-the-job training. It’s not tied to an LMS.
- cmi5 is a newer spec that acts as a bridge between the two. It takes the formal structure and rules of SCORM and combines them with the powerful flexibility of xAPI. This makes it a fantastic choice for modern, LMS-based learning.
If you want to go deeper on which one is the right fit for your projects, our article comparing SCORM vs xAPI is the perfect next read.
My personal take? SCORM is perfect for straightforward, formal training. But if you need to track a wider range of activities and get a more complete picture of learning, xAPI is where the industry is headed.
My SCORM File Is Too Large to Upload. What Can I Do?
This is a classic problem, especially with courses full of high-quality video. The very first thing to do is check your LMS’s maximum file upload size. You’d be surprised how often a quick message to an administrator can get that limit increased for you.
If that’s not an option, your next move is to optimize the assets inside your course before you export the package.
Here are a few tricks I always use:
- Compress videos heavily. Use a tool like HandBrake (it’s free and amazing) to shrink your video files before you even bring them into your authoring tool.
- Optimize your images. Make sure they’re saved at the correct dimensions and use web-friendly formats like JPEG or PNG with compression.
- Host large videos externally. This is the big one. Upload your videos to a platform like Vimeo or Wistia and then embed them in your course. This slashes the SCORM file size because the huge video file isn’t actually inside the package.
Why Isn’t My Course Reporting Completion to the LMS?
This is probably one of the most frustrating issues, but the fix is usually found in your export settings. Your course doesn’t just magically know when a learner is “finished.” You have to explicitly tell it what that means.
Dive back into your authoring tool and find the publishing or export settings. You’re looking for the completion trigger. You need to define when the course should send that “completed” signal to the LMS. Is it when the learner:
- Views a certain percentage of the slides?
- Passes a final quiz with a specific score?
- Clicks a designated “Complete Course” button on the last slide?
If you don’t define a clear trigger, the course just floats in limbo, never sending that final handshake to the LMS to say, “Hey, we’re done here.”
Once your SCORM course is successfully imported and reporting correctly, you can start thinking about how to make the experience even more engaging by incorporating things like collaborative learning activities within your LMS.