Online Course Drafting That Actually Works
So you have a killer idea for an online course, but turning that vision into a concrete plan feels like a massive hurdle. Where do you even start?
This is where most people get stuck. But I’m going to let you in on a secret. The first step isn’t writing a single lesson, it’s all about strategy. Before you ever open a document to draft content, you need to get crystal clear on who you’re teaching and what you want them to achieve.
This isn’t the glamorous part of course creation, I know. But I promise you, it’s the most important. Nailing this foundation makes the actual drafting process feel effortless. When you know exactly who your student is and what they need, the content practically writes itself. This strategic first step is what separates courses that change lives from those that just collect digital dust.
Defining Your Course Foundation
Let’s break down how to build that solid foundation. We’ll start with the person you’re helping and then translate their goals into a tangible course structure.
Here’s a quick overview of the essential components we’re about to cover. Think of these as the concrete pillars that will support your entire course.
Core Components of Your Course Foundation
| Component | What It Is | Why It Matters |
|---|---|---|
| Ideal Learner Persona | A detailed profile of the specific person your course is designed to help. | It ensures your content speaks directly to your student’s real-world problems and goals. |
| The “Win” | The specific, tangible result a student will achieve after completing your course. | This is your course’s core promise and the primary reason someone will enroll. |
| Learning Objectives | Clear, action-oriented statements about what a student can do after a lesson. | They turn a vague “win” into a series of concrete, achievable skills and milestones. |
Getting these three elements right from the start provides a roadmap for everything that follows, from your module outlines to your final sales page.
Start With Your Ideal Learner
The very first person you need to meet is your ideal learner. I’m not talking about a vague demographic like “millennial entrepreneurs.” I mean a detailed, almost real-life profile of the single person you are creating this course for. In the instructional design world, we call this a learner persona.
Creating a persona helps you step into your student’s shoes. You can get started by asking yourself a few key questions:
- What’s their current skill level? Are they a complete beginner who doesn’t know the lingo, or are they an intermediate learner looking to level up a specific skill?
- What are their biggest frustrations right now? What specific problem keeps them up at night? What have they already tried that didn’t work?
- What does a “win” look like for them? If they could wave a magic wand after finishing your course, what would they be able to do, create, or achieve?
Answering these questions gives your course a purpose. Your content becomes a direct solution to a real person’s problem. If you’re looking for more guidance on turning that initial idea into a real business, check out this helpful guide to creating a profitable digital product.
From Wins to Learning Objectives
Once you understand your learner’s desired ‘win,’ you can translate that into measurable learning objectives. This sounds a bit academic, but it’s really just a simple way to map out the journey. A learning objective is a clear statement of what a student will be able to do after completing a lesson or module.
Think of them as the building blocks of your course. Good objectives always use action verbs. Instead of a vague goal like “Students will understand social media,” a much better objective would be, “Students will be able to write and schedule one week of engaging social media posts.” See the difference? One is passive knowledge and the other is an active, real-world skill.
Our guide on instructional design best practices can give you even more ideas on how to frame these objectives effectively.
By focusing on what your students will be able to do, you are building a results-oriented course from the very beginning. This is the key to creating a program that not only educates but also empowers.
The demand for this kind of focused, skill-based learning is booming. The U.S. is the world’s largest market for online course drafting and delivery, and in 2022, this market was valued at an incredible $100 billion. Business courses are the most popular, making up 30% of completions, which shows that people are hungry for practical skills they can apply immediately. You can discover more insights about these online learning statistics and see just how big the opportunity is.
Building a Clear Course Outline
Once you know your destination, it’s time to draw the map. An outline is, without a doubt, your most valuable tool when you start drafting an online course. The outline keeps you from getting lost in the weeds and ensures a logical, satisfying journey for your students.
Think of it as the skeleton for your course. Without a strong skeleton, everything else just kind of falls apart. Trust me, a well-structured outline makes the actual writing and content creation a thousand times easier because you’re not constantly trying to figure out what comes next. You’re just filling in the pieces.
This initial step is all about defining your course structure, starting with the big picture and then drilling down into the specifics.
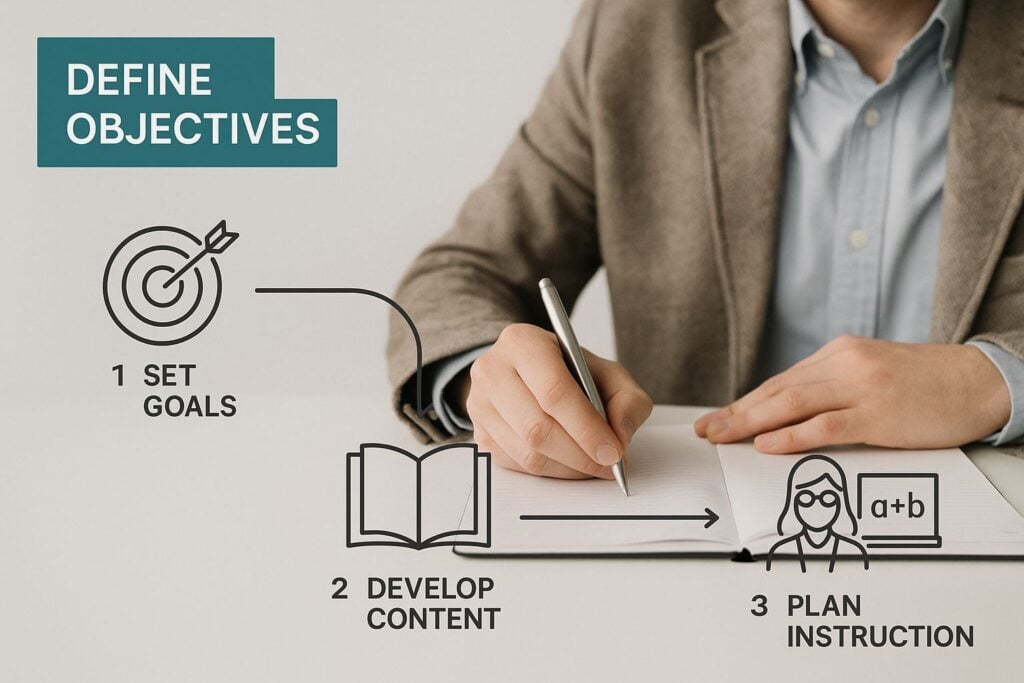
As you can see, every great course starts with clear objectives before you even think about the content itself. This approach makes sure your course is built with purpose right from the very first step.
From Brainstorming to Structured Modules
The first thing I always do is a massive brain dump. I just open a blank document and write down every single topic, idea, tip, or story related to the course subject. Don’t even think about order at this stage. The goal is just to get it all out of your head.
Once you have a giant, messy list, start grouping related ideas together. You’ll begin to see natural clusters forming almost on their own. These clusters are your modules. Modules are the major milestones or key stages in your student’s learning journey.
After you’ve defined your modules, you can break them down further into individual lessons. Lessons are the specific, bite-sized steps a student takes to master the concept of that module.
- Modules: These are your high-level sections. For a course on baking bread, a module might be “Understanding Yeast and Fermentation.”
- Lessons: These are the specific topics within a module. Inside that “Yeast” module, you might have lessons like “Active Dry vs. Instant Yeast” and “Your First Proofing.”
This method turns a chaotic brainstorm into a clear, logical path for your students. If you’re looking for a great starting point, you can even download a helpful and totally free course outline PDF template to get your ideas organized.
Real-World Example: A Beginner SEO Course
Let’s imagine you’re creating a course called “SEO for Absolute Beginners.” Your goal is to take someone from knowing nothing about SEO to being able to confidently optimize their own blog posts.
Here’s how that might break down:
Module 1: The SEO Basics
- Lesson 1: What Is SEO and Why Does It Matter?
- Lesson 2: How Search Engines Actually Work
- Lesson 3: Common SEO Myths to Ignore
Module 2: Finding the Right Keywords
- Lesson 1: What Are Keywords, Really?
- Lesson 2: Brainstorming Your First Keyword List
- Lesson 3: Using Free Tools to Find Keywords
Module 3: On-Page SEO Essentials
- Lesson 1: Writing SEO-Friendly Titles
- Lesson 2: Crafting Meta Descriptions that Get Clicks
- Lesson 3: Optimizing Your Images for Search
Your outline is more than just a table of contents. It’s a promise to your students. It shows them the clear, step-by-step path you will guide them on to achieve their goal.
This organized approach is what students are paying for. They want a clear roadmap, not a pile of random information. And the demand for well-structured courses is only getting bigger. The global e-learning market, valued at $165 billion back in 2014, is on track to hit an incredible $1 trillion by 2028. This proves that the work you put into drafting a polished digital experience is a major part of this massive industry. Your outline is the first step toward creating a professional course that meets this demand.
Drafting Lessons That Truly Engage
Alright, your outline is solid. You know the exact path you want to guide your students on. Now comes the really fun part, turning that blueprint into actual, living, breathing teaching material. This is where your personality and expertise finally get to take center stage.
You should create a genuine learning experience. Think of each lesson as its own mini-story, complete with a beginning, a middle, and an end. Your job is to pull students in, teach them something incredibly valuable, and then show them how to apply it.

Start Each Lesson With A Powerful Hook
Whether it’s a video or a text-based guide, you have maybe ten seconds to grab a student’s attention. If you just dive straight into the technical details, you’ve already lost half your audience. You need a hook that makes them sit up and think, “Okay, I need to pay attention to this.”
Here are a few ways I like to kick off my lessons:
- Ask a provocative question. Challenge a common belief right out of the gate. For instance, “What if I told you everything you know about writing email subject lines is wrong?”
- Share a surprising statistic. Numbers have a way of snapping people to attention. Something like, “Did you know that 80% of online courses are never even finished? Here’s how we’ll make sure this one isn’t one of them.”
- Tell a relatable, quick story. A short personal anecdote that perfectly illustrates the problem you’re about to solve creates an instant connection and makes the lesson feel real.
The goal is simple, you want to pique their curiosity and give them a compelling reason to stick around. It’s a small detail that makes a massive difference in keeping students motivated from one lesson to the next.
Nail The Core Of Your Lesson
Once you’ve got their attention, it’s time to deliver. This is where you unpack the main concept of the lesson. My biggest piece of advice here? Keep it simple and ruthlessly focused. Each lesson should have one, and only one, core learning objective.
Resist the urge to cram too much information into a single session. It’s a classic mistake, and it always leads to overwhelmed and confused students. Instead, break down those big, complex topics into several shorter, more digestible lessons. Remember those learning objectives we set earlier? They’re your north star now.
A rock-solid structure for the body of your lesson is to explain the “what,” the “why,” and the “how.”
- What: Clearly define the concept you’re teaching. No jargon, just plain language.
- Why: Explain why it’s important. How does this piece of the puzzle help them get closer to their ultimate goal?
- How: Give them the step-by-step process or practical, real-world examples of how to apply it.
This simple framework ensures your teaching is clear, relevant, and immediately actionable. If you really want to go deep on structuring a single lesson, our guide on making a lesson plan has some fantastic templates.
Mix Up Your Content Formats
Variety is the secret sauce for keeping students engaged over the long haul. Nobody wants to sit through dozens of identical talking-head videos because it’s exhausting. Plus, different people learn in different ways, so mixing up your content formats is just smart teaching.
Think beyond the video. Your goal is to create a multi-sensory learning experience that feels active and participatory, not passive. A mix of formats respects your students’ time and different learning preferences.
A rich learning experience often includes a blend of different content types. Here’s a look at some different content formats and how they cater to various learning preferences to keep your course feeling dynamic and fresh.
Engaging Content Formats for Different Learners
| Learning Style | Recommended Content Formats | Why It Is Effective |
|---|---|---|
| Visual Learners | Screen recordings, infographics, well-designed slides, and video tutorials. | These learners absorb information best when they can see it demonstrated or laid out in a visual format. |
| Auditory Learners | Audio-only lessons (podcasts), video lectures, and Q&A recordings. | These students learn best by hearing information and can often multitask while listening. |
| Kinesthetic Learners | Downloadable worksheets, interactive quizzes, checklists, and project-based tasks. | These are the “doers.” They need to apply the knowledge through hands-on activities to make it stick. |
By blending these formats, your course stops feeling like a lecture and starts feeling like an interactive workshop. It keeps students on their toes, excited to see what’s coming next. To really make sure your lessons hit home, it’s worth exploring proven strategies for increasing student engagement throughout your course.
The more active you can make the learning, the better the results will be for your students. And at the end of the day, that’s what it’s all about.
Creating Valuable Support Materials
Your core lessons are the main event, but the right supporting materials can turn a good course into a great one. These extras are what help students move from just learning a concept to actually applying it in their own lives. This is a critical step in the course drafting process, and I see so many creators overlook it.
When students feel equipped to take action, their confidence skyrockets, and they get much better results. That’s what we want.

Go Beyond Basic Slide Decks
Let’s be honest, anyone can throw together a slide deck. While slides can be useful for summarizing key points in a video, they’re a passive resource. The whole point of support materials is to encourage active participation.
Instead of just giving students something to read, give them something to do. This is how you make the learning stick.
Here are a few of my favorite types of practical resources:
- Actionable Checklists: If a lesson walks through a multi-step process, a simple checklist is an amazing tool. It breaks everything down into manageable chunks and gives students the satisfaction of checking things off as they go.
- Fillable Templates: Don’t just tell them how to write a great email. Give them a template they can copy, paste, and adapt. Templates completely remove the fear of the blank page and help students get quick wins.
- Guided Workbooks: For more complex lessons, a workbook can guide students through specific exercises. You can include prompts, questions, and space for them to write, helping them process the information and apply it to their unique situation.
These resources transform your course from a one-way lecture into a hands-on workshop. They are the bridge between knowing and doing.
The Power of Swipe Files and Resource Libraries
Two of the most valuable assets I’ve ever created for my own courses are swipe files and resource libraries. Students absolutely love them because they save a massive amount of time and effort.
A swipe file is just a curated collection of real-world examples that students can use for inspiration. For instance, in a copywriting course, a swipe file might include 50 proven email subject lines or 10 high-converting landing page headlines. It’s like giving them a cheat sheet for success.
A resource library is a centralized list of all the tools, articles, books, and other resources you recommend. Instead of scattering links throughout your lessons, you put them all in one easy-to-access place. This becomes a go-to document that students will refer back to long after they’ve finished the course.
These kinds of high-value resources do more than just teach. They position you as a generous expert who is genuinely invested in your students’ success, which is key to building a loyal community.
Storyboarding Your Visual Content
If you plan on creating videos, which most courses do, then storyboarding is a step you absolutely cannot skip. I promise it doesn’t have to be fancy. A storyboard is just a simple visual plan for your video content.
Think of it like a comic strip for your lesson. You can use a simple tool like Google Slides or even just sketch it out on paper. For each “scene” or major point in your video, you’ll want to map out two things:
- The Visuals: What will be on the screen? Will it be your face, a slide with bullet points, a screen recording of a specific action, or an animated graphic?
- The Talking Points: What will you be saying while that visual is on the screen? You don’t need a full script, just the key points you need to cover.
This simple process forces you to think through the flow of your lesson visually. It helps you catch awkward transitions, identify places where a visual aid would be helpful, and ensures your talking points align perfectly with what students are seeing.
Spending just 30 minutes storyboarding before you hit record can easily save you hours of frustrating re-takes and editing later. It’s the secret to creating polished, professional-looking videos without a big production budget.
You’ve done the heavy lifting. The lessons are drafted, the materials are sitting in a folder, and your course is basically all there. It’s a huge milestone, but whatever you do, don’t hit that publish button just yet.
This final stage is where the real magic happens. It is all about refinement, taking your raw material and polishing it until it shines. This is how you turn a good course into one that gets glowing reviews.
Run a Beta Test With Real Students
The single most valuable thing you can do right now is get a fresh set of eyes on your content. You’re way too close to it. What seems perfectly clear to you might be completely confusing to someone seeing it for the first time.
This is where a beta test comes in. Find a small group of people who fit your ideal student profile, maybe 5 to 10 people, and give them early access. Their feedback is pure gold.
You’re not looking for praise here, you’re actively hunting for problems. You want to find every awkward phrase, every confusing explanation, and every single spot where a student might get stuck.
Here’s a quick checklist of what I always ask my beta testers to look for:
- Clarity Check: “Was there any point where you had to re-read or re-watch because the explanation wasn’t clear the first time?”
- Pacing Feedback: “Did any lessons feel too fast or too slow? Were there sections that felt rushed or dragged on?”
- Actionability Score: “After finishing a lesson, did you feel confident you knew exactly what to do next? Were the worksheets and downloads actually helpful?”
- Engagement Level: “Where did your attention start to wander? What was the most engaging part of the course for you?”
Their honest answers will give you a clear, actionable punch list of improvements to make.
Master the Art of Self-Editing
After you’ve collected all that fantastic feedback from your beta testers, it’s time for one final pass of your own. Self-editing is a critical skill, and there are a couple of simple tricks that make a huge difference.
First, read your scripts out loud. This is non-negotiable for me. When you read silently, your brain automatically fixes typos and smooths over clunky sentences. But when you actually speak the words, you’ll immediately hear where the flow is off or where a sentence runs on for way too long.
Second, check for consistency across the entire course. Did you use the same terminology in Module 4 that you introduced back in Module 1? Are the file formats for your downloads consistent? These small details create a seamless and professional experience for the student.
Your final polish is what separates an amateur course from a professional one. The last 10% of effort delivers 90% of the perceived quality and makes students feel like they made a smart investment.
This level of quality is becoming more important as the e-learning world gets more crowded. The market for massive open online courses (MOOCs) alone was valued at around USD 26 billion and has exploded in growth, with learner numbers jumping from zero to 220 million worldwide in just a decade.
This just goes to show how refining your draft to meet high standards is key to standing out. You can read the full research about the MOOC market to see how big this space has become. Taking the time to polish your work ensures you’re creating something that can truly compete.
Over the years, I’ve had countless conversations with creators getting started, and it’s amazing how we all tend to get stuck on the same few hurdles. It’s like a rite of passage.
Let’s tackle some of the biggest questions that pop up during the drafting phase. My goal is to get you unstuck and moving forward with a lot more confidence.
How Long Should My Online Course Be?
This is, without a doubt, the question I hear the most. And my answer is always the same, there is no magic number. A short, focused course that delivers a powerful, specific result will always outperform a long, rambling one.
Your students aren’t looking for more content, they’re looking for a transformation. They want a solution to their problem.
As a rule of thumb, I tell people to aim for 2-5 hours of core video material. Break that down into super digestible lessons, maybe 5-10 minutes each. The real goal is to deliver on your course’s promise as efficiently as you possibly can.
What Tools Do I Really Need to Start?
You can get started with a lot less than you think. Honestly, getting bogged down in the search for the “perfect” software is one of the biggest procrastination traps I see people fall into.
To get your ideas out of your head and onto the page, you only need a couple of simple things:
- For outlining and scripting: A basic document editor is your best friend. Something like Google Docs or Notion is perfect. They’re free, simple, and let you focus on what actually matters, the ideas.
- For storyboarding: You don’t need fancy, complicated software. Presentation tools like Google Slides or Canva work beautifully for mapping out your visuals and talking points before you hit record.
The most important tool you have right now is your brain. Focus on creating a solid structure and clear, compelling content first. You can always level up the tech later.
Don’t let the tools become an excuse. The real work of drafting a great course happens in your head and on the page long before you ever think about pressing record.
How Do I Know My Course Idea Is Any Good?
This is the big one, isn’t it? No one wants to pour weeks or months of their life into creating something nobody will buy. The key here is validation, and you need to do it before you’re too deep in the weeds of creation.
It’s actually pretty simple. You need to talk to the people you want to help. Ask them directly about their biggest struggles related to your topic. You could run a poll in a relevant Facebook group, send a quick survey to your email list, or just jump on a few one-on-one calls.
One of the most powerful techniques I’ve seen work time and time again is to pre-sell your course based on a detailed outline. If people are willing to pay for the concept before you’ve even built the whole thing, you know you’ve got a winner on your hands.
Can I Create a Course If I’m Not an “Expert”?
Yes. A thousand times, yes! You absolutely do not need to be the world’s #1 authority on a subject to teach it well. You just need to be a few steps ahead of your students.
In fact, sometimes being closer to their journey makes you a more relatable and effective teacher. You still remember the confusion, the jargon that made no sense, and the specific hurdles that tripped you up.
Your unique experience and your personal perspective are your greatest assets. Find a niche where you have real, practical knowledge and create your course from that authentic place. Don’t try to be some guru you’re not. Just be the guide who’s a little further down the path.