The Best Camera for Streaming: Expert Setup Tips
You’re probably reading this because your current setup is doing that familiar thing. You join Zoom, open your webinar room, glance at your preview, and immediately look more tired, darker, blurrier, and less engaging than you do in real life.
I’ve been there.
A lot of camera advice online is built for gamers, vloggers, or gear collectors. Educators have a different problem. We need a camera that helps us teach clearly, survive long sessions, and play nicely with Zoom, OBS, and whatever webinar tool sits inside our course platform.
That changes the buying decision quite a bit.
The best camera for streaming isn’t automatically the one with the fanciest spec sheet. It’s the one that helps your students read your expressions, follow your demos, and stay focused instead of getting distracted by muddy video, lag, or awkward setup problems.
Your Camera is Your Digital Body Language
A few months ago, a colleague told me she felt flat on live sessions even though her slides were solid and her teaching was sharp. The issue wasn’t her content. It was her laptop webcam.
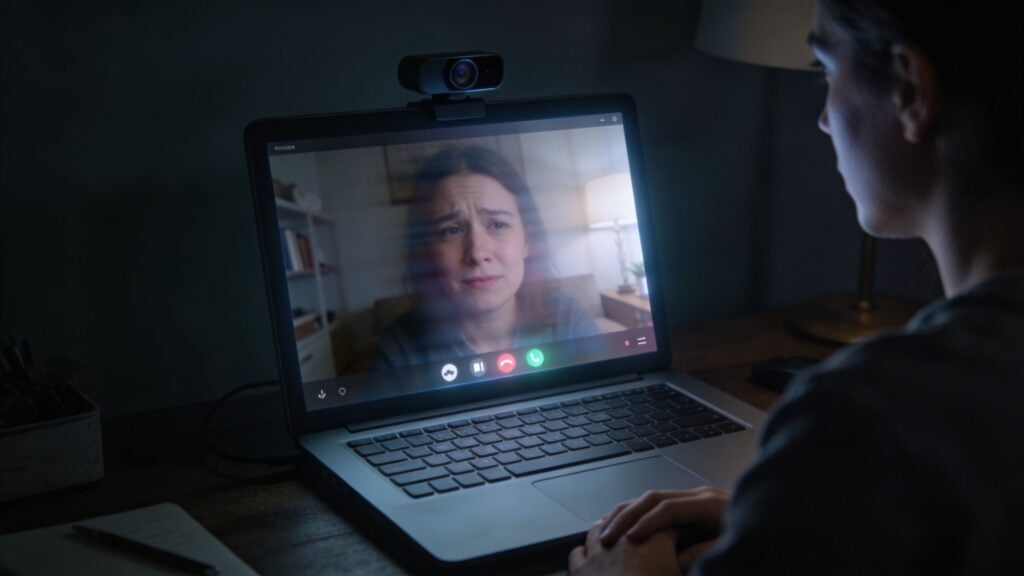
Her office lighting was uneven. The image looked grainy. When she held up a workbook page, the camera hunted for focus and turned everything into a soft blur. Students could still hear her, but the session felt more distant than it should have.
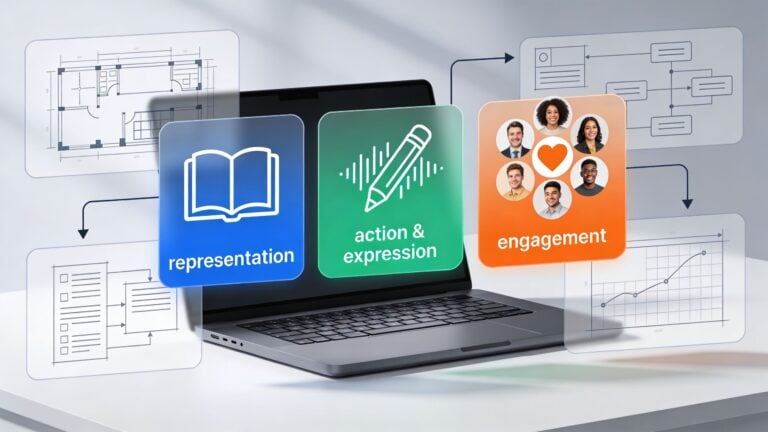
That’s why I think about cameras less as video gear and more as part of teaching presence. In a physical classroom, students read your face, eye contact, posture, and small gestures. Online, the camera carries all of that for you.
If the image is dim or muddy, your delivery feels weaker than it really is.
If the image is clear and stable, students trust the experience faster.
Your video feed becomes the online version of standing at the front of the room. Students decide very quickly whether it feels polished, calm, and worth paying attention to.
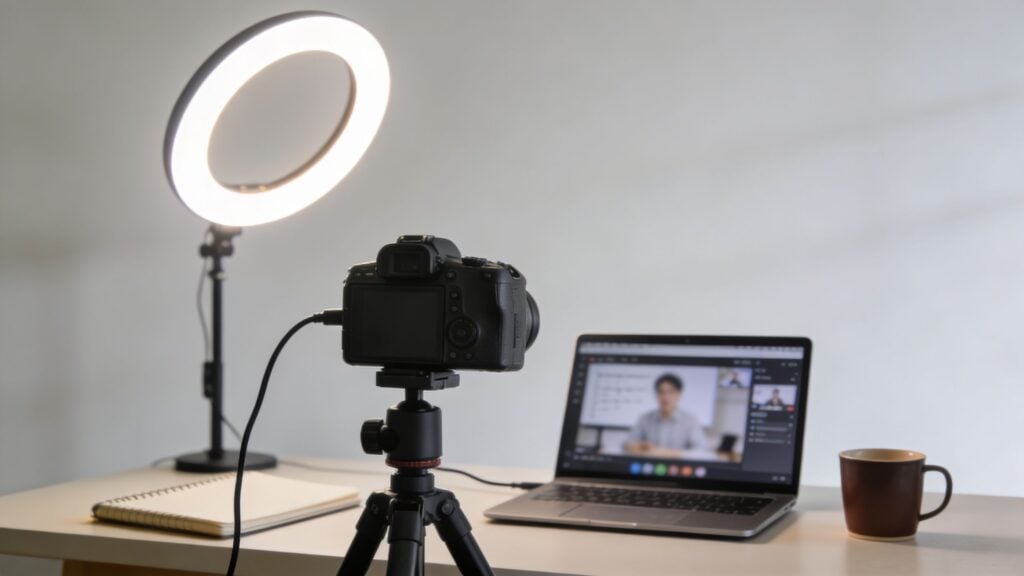
This doesn’t mean you need a film set. You don’t need cinematic lighting or a shelf full of lenses. You need enough quality that your face looks natural, your motions look smooth, and your camera doesn’t become a teaching obstacle.
Here’s the practical shift that helps many streamers. Stop asking, “What camera has the most features?” Start asking, “What camera makes me easier to learn from?”
That question usually leads to a much better purchase.
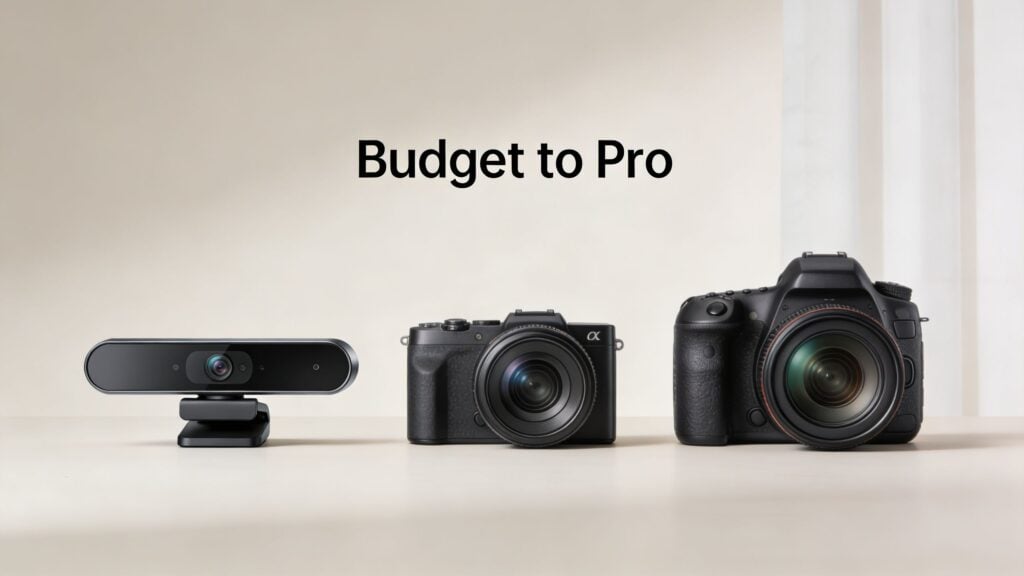
Webcam vs Mirrorless vs Camcorder Explained
The easiest way to understand camera categories is to think of them like vehicles.
A webcam is the reliable sedan. It starts fast, it’s easy to park, and it handles daily use without drama.
A mirrorless camera is more like a sporty wagon. Better performance, better looks, more flexibility, but you need to learn a few controls.
A camcorder is the work van. It’s built for long sessions, steady operation, and getting the job done with minimal fuss.
Webcams for simple reliable teaching
If you want the fastest path from box to classroom, a webcam is hard to beat. You plug it in, pick it in Zoom, and start teaching.
That simplicity matters more than many people admit. If you host office hours, weekly coaching calls, or internal training, the main value of a webcam is that it removes friction.
Webcams are a strong fit when you:
- Teach from one desk setup and don’t want to rewire things every session
- Share slides more than physical objects, so ultra-shallow depth of field isn’t important
- Need quick startup for frequent meetings, feedback calls, or community sessions
The trade-off is control. A webcam usually gives you less room to shape the image, less lens flexibility, and less forgiveness in poor lighting.
Mirrorless cameras for a big visual upgrade
Mirrorless cameras are where many educators go when they want their setup to look more polished. They offer cleaner subject separation, stronger low-light performance, and a more professional feel.
If a webcam is like teaching in a well-lit office, a mirrorless camera is like stepping into a room that was designed around you. Your face stands out. Background clutter softens. The whole frame feels calmer.
That said, mirrorless cameras ask more from you.
You may need HDMI output, a capture card, external power, and some patience during setup. If that sounds annoying, it can be. But for educators who record lessons, run webinars, and sell premium training, the quality jump can be worth it.
Practical rule: If you want “plug it in and forget it,” buy a webcam. If you want “this looks like a real studio,” mirrorless is usually the better lane.
Camcorders for long form reliability
Camcorders don’t get as much attention in creator conversations, but they still make sense for some educators. They’re often built for long recording sessions and can feel more predictable for extended teaching blocks.
If you run day-long workshops, training events, or classroom-style broadcasts, a camcorder can be a dependable option. It’s the category I’d compare to a workhorse vehicle. Less glamorous, very practical.
Here’s a quick way to choose:
| Camera type | Best for | Watch out for |
|---|---|---|
| Webcam | Fast setup, low stress live teaching | Less flexibility in lighting and framing |
| Mirrorless | Premium look, better low light, stronger image quality | More accessories and setup steps |
| Camcorder | Long sessions, stable operation, event-style teaching | Bulkier feel, less common in creator tutorials |
If you’re stuck, I’d use this shortcut. Start with a webcam if simplicity is your top priority. Move to mirrorless if presentation quality is becoming part of your brand.
What Resolution Frame Rate and Sensor Size Mean for You
Most camera spec pages read like they were written by people who’ve never had to teach a class. The terms matter, but only if you translate them into classroom effects.
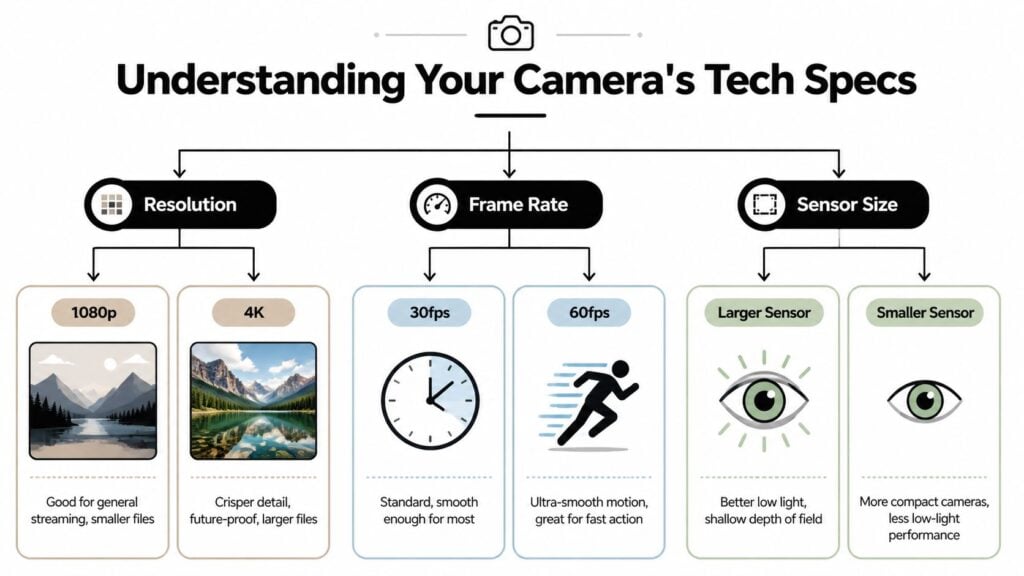
Resolution affects detail
Resolution is the amount of visual detail the camera captures.
Imagine writing on a whiteboard with a thicker marker compared to a finer one. Both can communicate the lesson, but one preserves small details better.
A lot of streaming cameras offer 4K at 30fps or 1080p at 60fps. That choice comes up often with teaching setups because it changes what viewers experience. A breakdown from this video on 1080p60 versus 4K30 streaming trade-offs explains that 4K@30fps captures about 3.2x more pixels per image, while 1080p@60fps often uses comparable bandwidth in the 8 to 12 Mbps range, but spreads information across twice the motion updates.
For teaching, that means:
- 4K at 30fps helps when you show printed materials, product demos, handwriting, or detailed visuals
- 1080p at 60fps feels smoother when you move around, gesture a lot, or switch rapidly between physical explanations and screen content
If most of your lessons are talking-head lectures, either can work. If you teach with motion, 60fps tends to feel more natural.
Frame rate affects smoothness
Frame rate is how many still images the camera shows each second. More frames means motion looks smoother.
I explain this to colleagues like a flipbook. A flipbook with more pages looks fluid. One with fewer pages looks jumpier.
That’s why 1080p at 60fps can feel better than 4K at 30fps for fast hand movements, quick camera pans, or energetic instruction. In practical teaching terms, smoother motion lowers distraction. Students spend less mental effort decoding visual jitter and more effort following the lesson.
This matters most for:
- Whiteboard teaching
- Craft, lab, or tool demos
- Coding instruction with frequent gestures
- Any presenter who moves a lot while talking
Sensor size affects how forgiving your room is
If I could get educators to pay attention to one spec beyond resolution, it would be sensor size.
The sensor is the part of the camera that gathers light. A larger sensor is like using a bigger bucket in the rain. It catches more of what’s available.
A useful benchmark in current streaming gear is the 1/1.28-inch sensor with an f/1.8 aperture. According to this overview of webcam sensor performance, that kind of setup can gather about 2 to 3 times more light than a typical 1/2.5-inch sensor found in budget webcams.
That has a direct classroom benefit. You don’t need to turn your office into a studio just to look clear and awake on camera.
Here’s the simple version:
- Larger sensor means cleaner video in ordinary rooms
- Smaller sensor usually needs better lighting to avoid grainy results
- Wider aperture like f/1.8 helps the camera work better when your space isn’t ideal
What I tell instructors: a good sensor buys you breathing room. It won’t replace good lighting, but it can stop your office from looking like a dim basement on a rainy afternoon.
Autofocus saves your lesson flow
Autofocus is easy to underestimate until it fails. If you ever hold up a book, worksheet, microphone, or product and the camera locks onto the background instead, you already know the pain.
Good autofocus acts like a quiet teaching assistant. It keeps attention where it belongs without you thinking about it.
For educators, autofocus matters most when you:
- Move in your chair instead of staying perfectly still
- Show objects to the camera
- Teach standing up
- Switch between your face and demo materials
When people say a camera feels “easy,” autofocus is often the hidden reason.
The Best Streaming Cameras from Budget to Pro in 2026
Let’s get concrete. If someone asked me for the best camera for streaming as an educator, I wouldn’t hand them a giant spreadsheet. I’d ask how they teach, how much technical hassle they can tolerate, and whether they need a webcam-simple setup or a studio-style image.
Best for most educators who want easy setup
The Logitech Brio is the one I’d point most busy educators toward first.
It supports 4K at 30fps, 1080p at 60fps, and 720p at 90fps according to Wayin.ai’s Logitech Brio roundup. That gives you flexibility without forcing you into a complicated workflow. You can teach in 1080p60 for smoother motion or keep 4K available when you want the sharpest possible source image.
What I like most is that it behaves like a classroom tool, not a hobby project.
You connect it by USB-C, select it in your software, and move on. The same source notes that setup can take under 5 minutes, which is a huge advantage if you don’t want your camera to become a weekly troubleshooting ritual. It’s also listed at $200, which places it in that useful middle ground where it’s clearly better than a built-in webcam without dragging you into a full studio build.
A few more reasons it works well for teaching:
- HDR support helps in mixed lighting situations
- 5x digital zoom gives you some framing flexibility
- 90-degree field of view can handle solo instruction or a slightly wider setup
- Noise-canceling omnidirectional mic is available as a backup, though I’d still use a separate mic if possible
For the educator persona, I’d call this the “I need to look good on every call without becoming a camera nerd” option.
Best value mirrorless pick for course creators
If you’re ready for a stronger image and don’t mind a more involved setup, the Sony ZV-E10 is the standout choice in this group.
According to NearStream’s streaming camera guide, it offers 4K video at 30fps and 1080p at 120fps, along with unlimited recording time. That last part matters a lot more to educators than it does to many creators. Long webinars, workshops, and teaching sessions can run for hours. A camera that stays steady for long sessions removes a lot of background stress.
NearStream also says its testing across 12 budget options ranked the ZV-E10 #1 for value. I can see why. It has several features that help instructors, not just influencers:
- Vari-angle screen for self-monitoring
- Clean HDMI output for OBS-style workflows
- Real-time eye AF to keep your face sharp while you move
- Product Showcase mode that shifts focus from face to object
That last feature is especially useful if you teach with physical props, books, devices, or printed materials. NearStream notes that Product Showcase mode can reduce manual adjustments by up to 70% during interactive demos. For anyone who’s tried to hold up a marker set or workbook on camera while the autofocus panics, that’s a very real benefit.
The same source also notes that the ZV-E10 can be paired with an Elgato Cam Link 4K for $130, and that total setups can come in under $800. That’s a meaningful threshold. It puts a mirrorless upgrade within reach for educators building a serious course business without jumping straight to high-end cinema territory.
Here’s the educator profile I’d match to it:
You run paid webinars, record course modules, want a softer background and stronger low-light image, and you’re willing to learn a few setup steps to get there.
A short visual demo can help if you’re comparing tiers and trying to see the gap in real-world image quality.

Which one I’d choose for specific teaching styles
Rather than give you a fake top ten list, I’d choose based on teaching style.
| Teaching style | Better fit | Why |
|---|---|---|
| Weekly Zoom lectures and coaching | Logitech Brio | Minimal setup friction |
| Recorded courses plus live webinars | Sony ZV-E10 | Better image quality and stronger focus tools |
| Object demos and hands-on instruction | Sony ZV-E10 | Product Showcase mode is a real advantage |
| Corporate training across many rooms | Logitech Brio | Easier deployment and predictable setup |
My honest recommendation
If you’re upgrading from a laptop webcam and want a clear win without extra complexity, I’d buy the Logitech Brio.
If video quality is becoming part of your teaching brand and you want your setup to feel closer to a proper studio, I’d buy the Sony ZV-E10.
I wouldn’t frame this as beginner versus advanced. I’d frame it as friction versus finish. The Brio wins on convenience. The ZV-E10 wins on image quality and creative control.
That’s the main choice most educators are making.
Getting Your Camera’s Video into Zoom and OBS
Many people encounter difficulty at this point. Buying a camera is the easy part. Getting it to appear properly inside Zoom, OBS, Teams, or a webinar tool inside your LMS typically presents the first headaches.
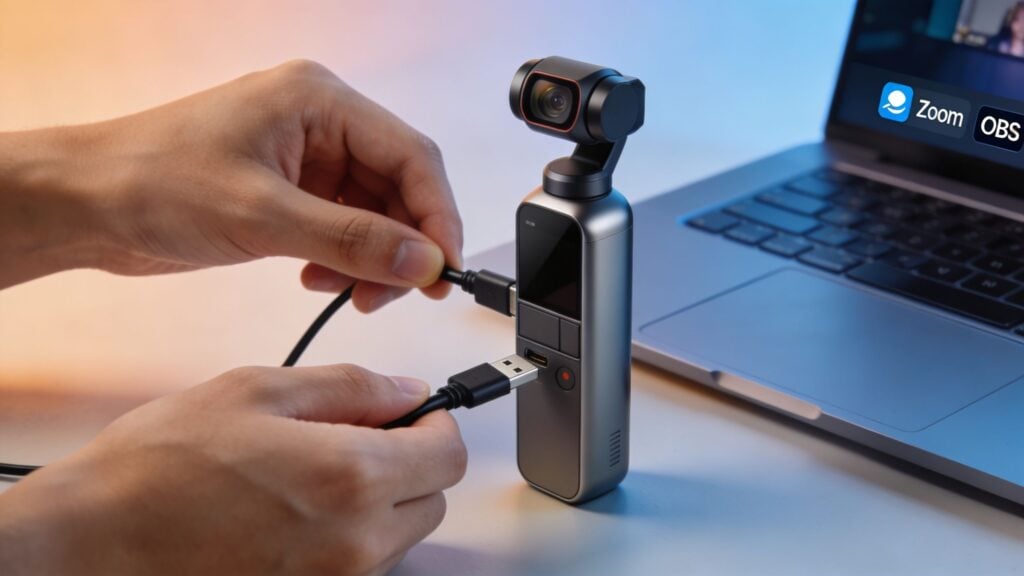
USB is the cleanest path
With a webcam, the process is usually simple. Plug it into your computer. Open Zoom or OBS. Pick the camera from the video settings list.
That’s why webcams stay popular with educators. They behave like a regular computer accessory, not a separate production device.
If you want fewer surprises before class starts, USB is your friend.
Mirrorless cameras need a translation layer
Mirrorless cameras often speak in HDMI, while Zoom and most course-platform webinar tools expect something that looks like a webcam. You need a bridge between those two worlds.
That bridge is usually a capture card.
A capture card takes the HDMI video coming out of your camera and converts it into a format your computer can recognize as a camera source. Its role is comparable to an interpreter at a meeting. Without it, both sides may be capable, but they don’t naturally understand each other.
There’s also one phrase you need to know before buying a mirrorless camera for teaching. Clean HDMI.
Clean HDMI means the camera can send video out without all the extra overlays like battery icons, focus boxes, and recording symbols. If the output isn’t clean, your students may see your camera interface during class.
Where educators run into trouble
This is the part generic streamer guides often skip. Educators don’t just stream to Twitch. We use Zoom, embedded webinar tools, membership platforms, and LMS integrations that can be picky about video devices.
A 2025 survey found that 68% of educators faced compatibility issues with non-USB cameras on membership platforms, leading to 20% to 30% higher dropout rates in live sessions from lag, according to Skylum’s streaming camera article. That tracks with what I hear from course creators. The camera may work beautifully in one app and then act strangely inside another.
Common failure points include:
- The camera appears in OBS but not in Zoom
- The feed shows up with delay
- Your LMS webinar room doesn’t detect the capture card
- Audio and video get out of sync
- The camera shuts off or sleeps mid-session
Before any paid webinar, test your full path. Camera to cable to capture card to software to webinar room. Don’t assume that because it worked in one app, it’ll work in the platform your learners actually use.
A practical setup path
If you want the least stressful route, I’d follow this order:
- Start with a USB webcam if live teaching reliability matters more than image quality.
- Choose a camera with clean HDMI if you want to move into mirrorless.
- Add a known capture device such as the Cam Link line if your camera needs HDMI conversion.
- Test inside your actual platform, not just in OBS.
- Create a backup plan, usually a secondary webcam or your laptop camera.
If you use OBS regularly for scene switching, lower thirds, or mixing slides and camera feeds, this guide to hosting webinars with OBS Studio is a helpful next read because it focuses on the handoff from production software to an actual webinar environment.
The big takeaway is simple. A better camera doesn’t automatically mean a better class. Integration is part of the camera decision.
Dialing in Your Settings for a Professional Look
Once your camera is connected, a few settings make a huge difference. You do not need to become a cinematographer for this. You just need to stop letting the camera guess everything.
Fix white balance first
If your skin tone looks too orange, too blue, or strangely gray, white balance is usually the culprit.
Auto white balance can drift during a session, especially if window light changes or a screen shifts color in front of you. I prefer locking it once the room looks right.
Think of white balance like telling the camera what “normal paper white” looks like in your room. If it gets that reference wrong, every other color follows it off course.
Try this:
- Turn on the lights you will use
- Open your webinar software preview
- Set white balance manually if your camera allows it
- Leave it alone once skin tones look natural
Control exposure so your face looks steady
Exposure is brightness. Too much and you look washed out. Too little and you look like you’re teaching from a cave.
I’d rather have slightly dim but natural video than bright, blown-out skin. Auto exposure often chases changes in the background, especially if you have a window or a lamp in frame.
A simple checklist helps:
- Face first. Expose for your face, not your bookshelf.
- Background second. Let the background be a little darker if needed.
- Avoid mixed light if possible. Window light plus warm lamp light can confuse the image.
If you’re building out your room from scratch, this beginner-friendly guide to webinar studio equipment for beginners gives a solid foundation for balancing camera, mic, and lighting choices.
Use focus modes that support teaching
For most educators, continuous autofocus is the safe default. If your camera has eye autofocus or face tracking, use it.
If you regularly hold up books, tools, or worksheets, test whether your camera has a subject demo mode like Sony’s Product Showcase feature. Those modes reduce the awkward dance where you wave an item around waiting for the camera to notice it.
A polished teaching video usually comes from stable settings, not fancy ones. Lock the basics. Then leave them alone.
Keep your workflow realistic
A lot of creators make setup advice sound like everyone needs LUTs, multiple key lights, and a color-managed editing pipeline. Most educators don’t.
What helps more is a repeatable routine. Save your camera settings. Mark your tripod position. Keep your lights in the same place. If you also repurpose lessons into video content, some of these AI tools for YouTube creators can help with the post-production side after your live session is done.
I like simple systems because teaching already requires enough mental bandwidth. Your camera settings should support your lesson, not compete with it.
Putting It All Together for Your Next Lesson
A good streaming setup changes how your teaching feels on the other side of the screen. Students don’t usually say, “Great sensor size” or “excellent clean HDMI workflow.” They just feel that the lesson is clearer, easier to follow, and more professional.
That’s the main point.
If you’re choosing between options, remember the pattern. Webcams win on simplicity. Mirrorless cameras win on image quality. The right choice depends on how much setup you’re willing to manage before class starts.
My advice is to make one upgrade before your next session. That might mean buying a better webcam. It might mean moving a lamp so your face is evenly lit. It might mean finally testing your full Zoom or OBS workflow before learners arrive.
Small improvements compound.
And if you want to polish the visual side of your teaching space even further, this guide to setting up a green screen for professional webinars is a useful next step.
Common Questions About Cameras for Online Teaching
Can I just use my smartphone
Yes, you can. For some educators, it’s a perfectly workable starting point.
The catch is workflow. A phone camera can look surprisingly good, but mounting it well, keeping it powered, and getting a stable feed into your teaching software can be more fiddly than people expect. If you use a phone, treat it like a real camera setup. Give it a tripod, steady light, and a connection method you’ve tested before class.
Do I need 4K if I stream at 1080p
Not always, but it can still help.
A 4K camera gives you a sharper source image to work from, even if your final stream is lower resolution. That can be useful when you crop slightly, reframe, or want cleaner detail before the platform compresses everything. If your teaching is mostly face-to-camera and you value ease, a strong 1080p setup is still a smart choice.
What matters more, camera or lighting
If your current camera is decent, lighting usually changes the result faster.
A better camera helps, especially with focus and low-light performance. But even a strong camera can struggle in a dim room with uneven light. If you’re on a tight budget, I’d improve the light hitting your face before chasing a more expensive camera body.
Should I buy a mirrorless camera right away
Only if you’re willing to handle the extra setup.
Mirrorless cameras can look fantastic, but they often bring HDMI, capture cards, power management, and compatibility testing into the picture. If that sounds like a distraction from teaching, start with a good webcam and upgrade later.