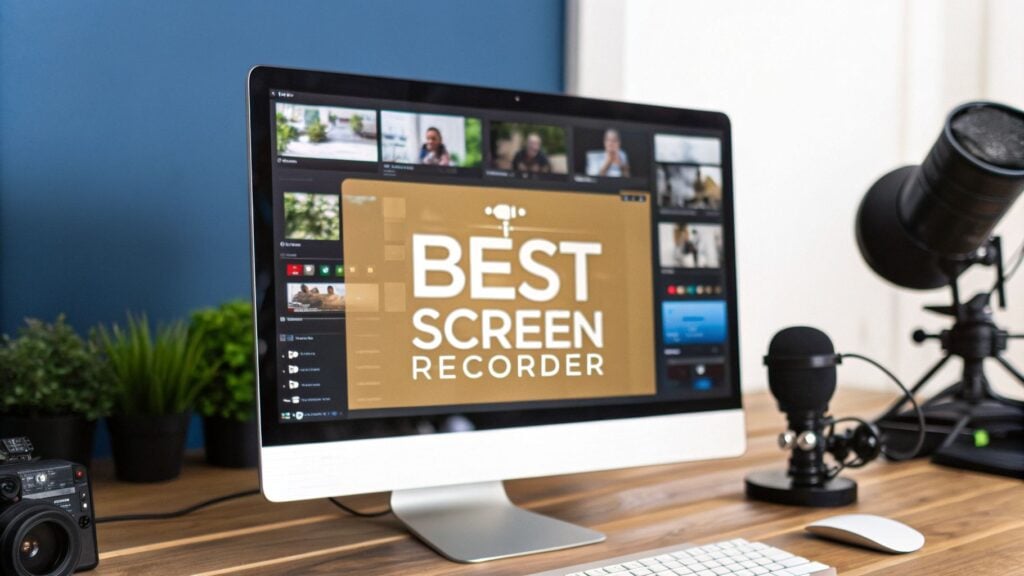
Best Screen Recording Software for Course Creators in 2026
If you’re a course creator, you know your screen recorder is more than just a tool. It’s the bridge between your expertise and your students. But let’s be honest, picking one feels like a chore. You’ve got options like Camtasia for its all-in-one power, Descript with its wild text-based editing, and Loom for just getting it done fast.
They all get the job done, but the right one for you depends entirely on what kind of course you’re building and how you like to work.
Finding the Right Screen Recorder for Your Courses
When you’re translating what’s in your head into a clear, engaging lesson, your screen recorder is your most critical partner. It captures every click, every explanation, and every “aha!” moment you want to share. With so many choices out there, though, it’s easy to get lost in feature lists and marketing hype.
That’s what this guide is for. I’m cutting through the noise to focus on what actually moves the needle for course creators: crystal-clear audio, editing that doesn’t make you want to pull your hair out, and seamless webcam integration.
The market for this software has absolutely exploded, which is great news for us. It hit USD 1.6 billion in 2024 and is on track to reach USD 3.5 billion by 2033, according to research from DataHorizzon. All that growth means more competition, which leads to better, more affordable tools for everyone.
My goal is simple: to help you find a recorder that fits your budget and actually makes your life easier, not more complicated.
Your screen recorder shouldn’t be a technical hurdle. It should be a creative partner that helps you share your knowledge effectively and build a real connection with your students.
Ultimately, a great tool helps you follow the fundamental best practices for online courses by making your content clearer and more professional without a steep learning curve. We’ll dive into my top picks and break down exactly why they stand out.
Let’s find the software that will make your course content shine. And remember, a screen recorder is just one piece of the puzzle. You can explore other essential eLearning content creation tools in our guide.
What Features Actually Matter for Course Creators
When you start shopping for screen recording software, it’s easy to get lost in a sea of feature lists. Every tool seems to do a million things, but let’s cut through the noise. We need to talk about what you really need to create a fantastic online course.
I’m focusing on the features that will actually make a difference in your day-to-day workflow. This is about finding the app that makes your job easier so you can focus on what you do best: teaching.
The Non-Negotiables for High-Quality Lessons
First, let’s nail down the absolute essentials. Without these, producing a professional-looking course turns into a massive headache. You want a tool that handles the basics flawlessly so you’re not constantly fighting with the software.
Here are the core features you should demand:
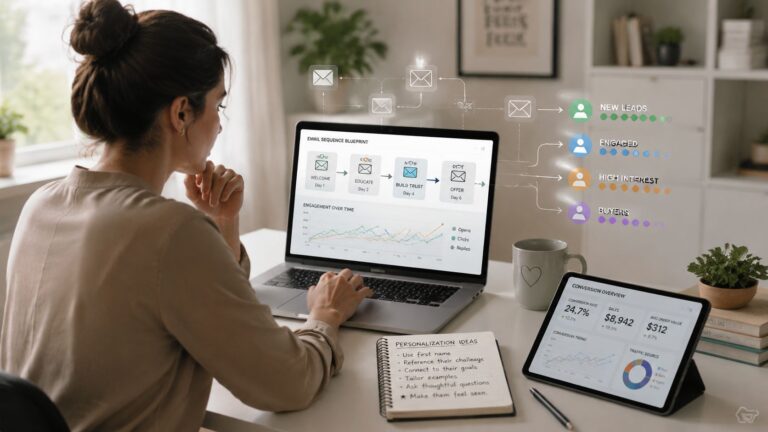
- Multi-Track Audio Recording: This is a genuine lifesaver. It records your microphone audio and your computer’s system audio on separate tracks. If a dog barks or you cough while a video is playing in your lesson, you can edit your voice out without touching the video’s sound.
- High-Quality Webcam Recording: Showing your face, even in a small corner of the screen, is critical for building a connection with students. Look for software that captures your webcam in at least 1080p. Anything less just looks blurry and unprofessional.
- A Clean, Simple Editor: You don’t need Hollywood-level editing power. You just need to easily trim mistakes, add some text, and combine a few clips. A complicated timeline will slow you down, so find a tool with an editor that feels intuitive to you.
Getting these three things right forms the foundation of a smooth course creation process. It means you can produce polished, clear lessons without spending all your time fixing problems in post-production.
The real job isn’t just to “record a video.” It’s to cleanly capture your screen, your voice, and any on-screen audio in one take, with as little friction as possible.
Features That Elevate Your Course
Once the basics are covered, a few extra features can seriously level up your course quality and save you a ton of time. These are the things that separate an average course from a great one.
Think about tools that make your lessons more engaging and accessible:
- Built-in Annotation Tools: The ability to draw arrows, add shapes, or highlight text directly on your screen while recording is huge. It makes your tutorials so much clearer because you can visually guide your students’ attention exactly where you want it.
- Automated Captions: This is a massive win for both you and your students. Good software can auto-generate captions, making your course accessible and helping students who prefer to read along. This one feature can save you countless hours of manual transcription work.
- Green Screen Effects: Want a more professional background but don’t have a perfect home office? A green screen (or virtual background) feature lets you replace your real-world background with any image you want, giving your lessons a polished, consistent look.
Choosing the best screen recording software for course creators means prioritizing features like these. The ones that directly improve your workflow and your students’ learning experience.
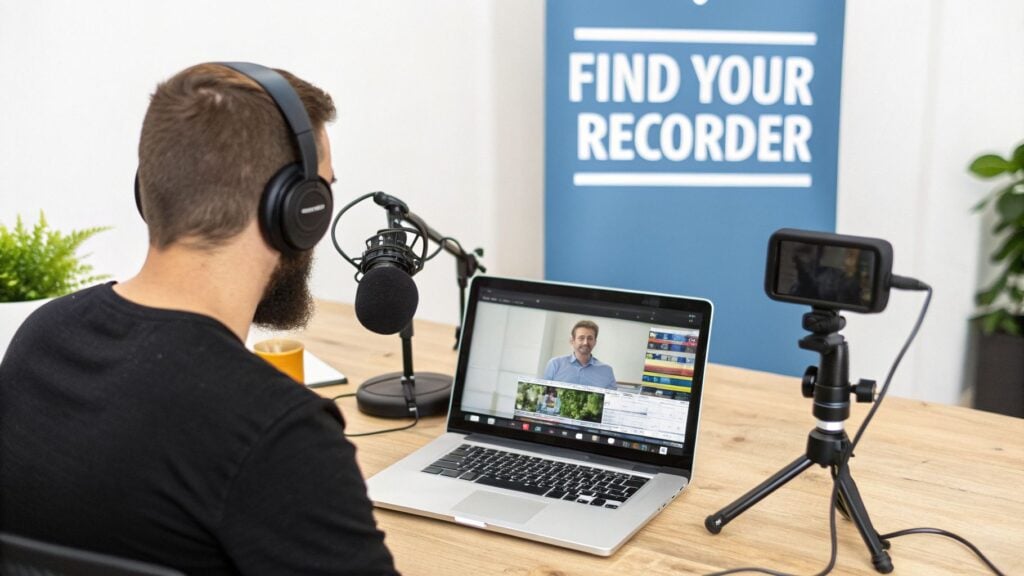
Comparing the Top Screen Recorders Head-to-Head
Alright, let’s get down to the brass tacks. It’s time to put the most popular screen recorders side-by-side to see how they actually perform when you’re building a course. I’m zeroing in on the big four: Camtasia, Loom, Descript, and OBS Studio.
Each of these tools can absolutely get the job done, but they feel completely different in practice. The right one for you boils down to your technical comfort, your budget, and the kind of learning experience you’re trying to create.
In the world of online courses, screen recording software is foundational. The market is seeing explosive growth for a reason: these tools are essential for us. Battle-tested software like the free OBS Studio and the paid leader Camtasia are behind a massive productivity boom, with 81% of companies reporting boosts from using them. You can dig into more of these screen recording statistics on StreamRecorder.io.
Camtasia: The All-in-One Powerhouse
If you’re looking for a single piece of software to handle everything from hitting record to the final export, Camtasia is almost certainly on your list. I think of it as the reliable, time-tested workhorse of the course creation world.
The recording part is dead simple. You pick your screen area, select your microphone and webcam, and press the big red button. It just works, every time.
But the real magic of Camtasia is its editor. It’s a traditional, timeline-based editor that will feel instantly familiar if you’ve ever touched any kind of video editing software before. Having multiple tracks for your video, audio, and graphics gives you an incredible amount of control over the final product.
Camtasia is at its best when you’re creating detailed, polished tutorials. Its zoom-and-pan effects, annotations, and built-in quizzes are perfect for making complex topics easy to digest.
For a 30-minute software demo, this is my go-to. The power to add callouts, blur sensitive on-screen info, and even bake interactive quizzes right into the video is a massive advantage for building professional learning content. It’s a complete, self-contained package.
Loom: The Champion of Speed and Simplicity
Now let’s shift gears completely. Loom is built for one thing: speed. Its entire purpose is to help you record and share a video as quickly as humanly possible.
If you need to create quick micro-lessons, give personalized student feedback, or just explain something without typing a novel, Loom is your best friend. You click the extension, hit record, and the second you’re done, a shareable link is copied to your clipboard. No rendering, no exporting, no uploading.
This workflow is an absolute game-changer for short-form video. The trade-off? The editor is extremely basic. You can trim your video and add a call-to-action, but that’s pretty much it.
- Best for: Quick updates, student feedback, and short, informal micro-lessons.
- Not ideal for: Polished, long-form tutorials that require significant editing or combining multiple clips.
If Camtasia is a fully stocked workshop, Loom is a perfectly sharpened screwdriver. It does one thing, and it does it exceptionally well.
Descript: The Revolutionary Text-Based Editor
Descript is a different animal altogether. Yes, it’s a screen recorder, but its true superpower is its text-based video editor. After you record, Descript automatically transcribes every word you say.
To edit your video, you just edit the text. It’s that simple.
Want to remove a section where you fumbled your words? Just find the sentence in the transcript and delete it. The corresponding video and audio are snipped out automatically. It feels like editing a Google Doc, and for many people, it’s a far more intuitive way to clean up recordings.
Descript’s “Studio Sound” feature is also borderline magic, making a cheap microphone sound impressively professional with a single click. It’s also fantastic for pulling out clips for social media just by highlighting a block of text. This is perfect for creators who are more comfortable with words than with complex video timelines.
OBS Studio: The Powerful Free Option
Finally, there’s OBS Studio. I have to include it because it’s completely free, open-source, and unbelievably powerful. This is the software that drives a huge portion of live streams on platforms like Twitch and YouTube, and it’s more than capable of recording top-notch course videos.
With OBS, you have total control. You can set up different “scenes” with various combinations of your screen, webcam, images, and text, and switch between them on the fly as you record.
However, all that power comes with a notoriously steep learning curve. The interface isn’t built for beginners, and getting everything configured just right can be a frustrating process of trial and error.
OBS is the best choice if you’re on a zero budget but are willing to put in the time to learn. It gives you professional-level control without costing a penny.
Crucially, you need to know that OBS is only a recording tool. It has no built-in editor. You’ll need to pair it with separate video editing software like DaVinci Resolve (which also has an amazing free version) to actually assemble your lessons. This adds an extra step, but it’s a workflow that gives you maximum power for zero cost.
Feature Showdown: The Best Screen Recorders for Course Creators
To really see where each tool shines for course creators, let’s put their core features side-by-side. I’m focused on which one has the right features for specific teaching styles and workflows, not just the longest feature list.
| Feature | Camtasia | Loom | Descript | OBS Studio |
|---|---|---|---|---|
| Primary Strength | All-in-one recording and advanced editing suite | Instant sharing and speed for quick communication | Editing video by editing text; powerful audio tools | Powerful, free, and highly customizable recording |
| Learning Curve | Medium | Very Low | Low | High |
| Built-in Editor | Advanced, timeline-based | Basic trimming | Innovative, text-based | None |
| Best Use Case | Polished software tutorials and in-depth, evergreen courses | Quick feedback, micro-lessons, and team comms | Talking-head lectures, interviews, and podcast-style video | Live webinars, complex recordings, and users on a tight budget |
| Price | Premium (One-time purchase) | Freemium/Subscription | Subscription | Free |
Ultimately, choosing the best screen recording software for course creators comes down to matching the tool to your personal style and the demands of your content. There’s no single “best” option, only the one that gets out of your way and lets you create more effectively.
Choosing Software for Different Course Creation Scenarios

Not all course videos are the same. The tool you’d grab to record a quick, informal lesson is probably the wrong choice for a polished, in-depth software tutorial. Matching your software to the job saves a ton of headaches down the line.
Let’s break down a few common scenarios course creators face. I’ll give you my specific recommendations for each, so you can pick the right tool for the right task and work smarter, not harder.
The demand for these tools is exploding as creators meet the need for remote learning. The market is projected to hit USD 10.84 billion in 2025 and is expected to reach USD 12.3 billion by 2026. For us, that means having tools that can slash production time by up to 40% is a massive advantage. You can dig into these trends over at The Business Research Company.
For In-Depth Software Tutorials
Are you teaching something complex like Photoshop, Excel, or a programming language? Your students need to see exactly what you’re doing, right down to the specific menu option you’re clicking. This is where a tool with serious post-production muscle really shines.
My top pick here is Camtasia.
Its zoom-and-pan effects are fantastic for guiding your student’s eye to a specific button or function. You can add callouts to explain what’s happening, highlight your cursor so it’s easy to follow, and even blur out sensitive information on the screen. These little details make dense, technical content so much easier to digest.
For this kind of course, you don’t just need a recorder. You need a proper video editor. Camtasia bundles both into one package.
The goal of a software tutorial isn’t just to show your screen. It is to direct your student’s attention and make complex actions feel simple and approachable.
For Quick Micro-Learning and Student Feedback
What if you just need to record a quick five-minute video? Maybe you’re creating a short micro-lesson, answering a student’s question, or giving some personalized feedback. In these situations, speed is everything.
The undisputed champ for this is Loom.
Loom is built from the ground up for speed. You hit record, make your point, and the second you stop, a shareable link is copied to your clipboard. There’s no rendering, no exporting, and no uploading. It just works.
This workflow is perfect for creating bite-sized content that keeps students engaged without overwhelming them. Once your video is recorded, you’ll need a place to put it, which is where our guide on video hosting platforms for online courses comes in handy.
When picking your software, it helps to start with your budget. This simple decision tree shows how your options narrow down pretty quickly.
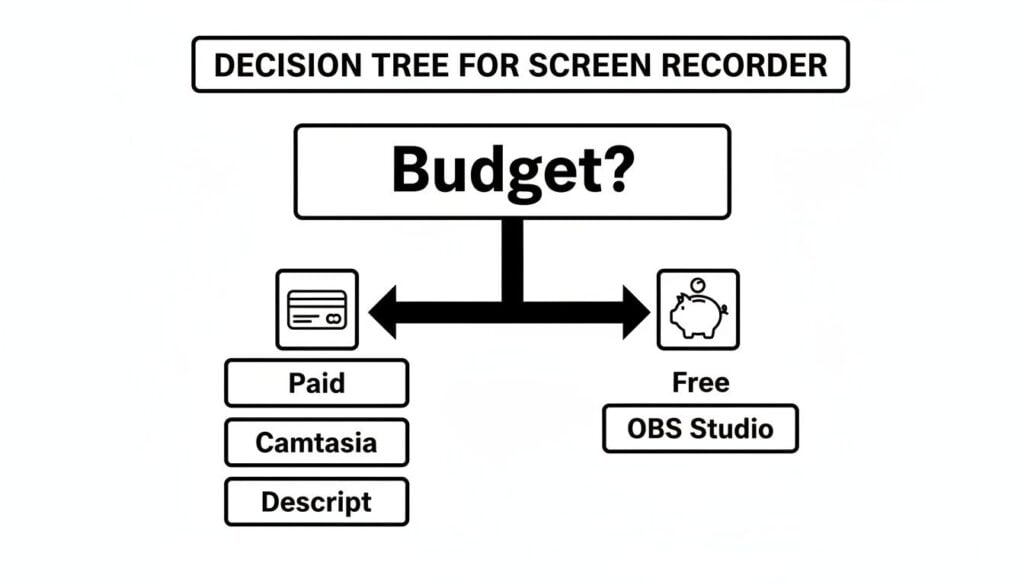
As you can see, investing a bit of money opens up powerful, all-in-one solutions, while the free route leads to a very capable, but more hands-on, tool.
For Polished Talking-Head Lectures
If your course is more lecture-based with you on camera, the editing challenge is totally different. You’re trying to cut out all the “ums,” “ahs,” and awkward pauses to make the lesson flow smoothly.
For this job, I strongly recommend Descript.
Its text-based editing is an absolute game-changer for lectures. Instead of hunting through a video timeline, you just edit the auto-generated transcript. When you delete a word or sentence in the text, Descript automatically snips out the corresponding video and audio. It’s an incredibly intuitive way to clean up your recordings.
Descript also has a feature called “Studio Sound” that can make your audio sound crisp and professional with a single click. Of course, your screen recorder choice might also depend on where you plan to host your content, so it’s worth exploring the best course creation platform options out there.
My Workflow Tips to Create Courses Faster

Having the best screen recording software is a great start, but it won’t magically churn out your course for you. The real gap between successful creators and those who get stuck isn’t the tools. It’s the workflow. It all comes down to small, repeatable habits that save you from hours of headaches down the line.
Over the years, I’ve refined my own process to eliminate wasted time and creative friction. These aren’t some complicated industry secrets, just practical, battle-tested steps that will help you produce better video content, way faster.
Prepare Before You Press Record
The most common mistake I see is creators just firing up their software and hitting “record” without a plan. A few minutes of prep work makes the entire recording and editing process smoother than you can imagine. Trust me on this, your future self will thank you.
Before you even think about starting, run through this quick checklist:
- Create a Bullet-Point Outline: You don’t need a word-for-word script. Just jot down the main points for each lesson. This keeps you focused, prevents you from rambling, and makes your content much tighter.
- Clean Up Your Desktop: Close every single tab, app, and notification that isn’t essential for the lesson. A cluttered screen is distracting for students and makes you look unprofessional.
- Do a Quick Audio Check: Record yourself saying a few sentences and listen back with good headphones. Is your voice crisp and clear? Is there a weird background hum? Fixing an audio issue now takes seconds. Fixing it in post-production can take hours.
This pre-flight check takes maybe five minutes, but it can easily save you an hour of painful editing later.
Record Smarter, Not Harder
Once you’re prepped, the goal is efficiency. It’s about creating a system that makes the recording process feel less intimidating and more like an assembly line. This helps you nail a perfect one-take wonder.
My single biggest time-saver is batch recording. Don’t record one lesson, edit it, and upload it before starting the next. Set aside a solid block of time to record several lessons for an entire module all at once. This gets you into a creative flow state and helps maintain momentum.
Your goal is consistency, not perfection. A finished course is always better than a perfect one that never gets launched. Focus on creating clear, helpful content, and don’t get hung up on tiny mistakes.
After you have a few videos in the can, you can move on to editing in a separate time block. I find that dedicating specific days to “recording” and other days to “editing” is far more productive than constantly switching between the two mindsets.
Streamline Your Post-Production
Editing is where most course creators get bogged down, but it really doesn’t have to be a time sink. With a few smart shortcuts, you can fly through your post-production work without sacrificing quality.
My best piece of advice is to create reusable templates. Almost every lesson you make will have a similar intro and outro. Set up a template in your video editor with your intro music, title card, and outro screen already in place. This way, all you have to do is drop your new lesson content right into the middle.
Also, take 30 minutes to learn the key keyboard shortcuts for your editor. Knowing how to quickly cut a clip, add a transition, or adjust audio levels with your keyboard instead of your mouse can literally cut your editing time in half. You can find more tips on how to structure your lessons in our guide on how to create engaging online course videos.
By building these habits, you’ll stop fighting with your software and start shipping more courses.
Alright, let’s land this plane. We’ve torn apart features, workflows, and pricing, and now it’s time to make a call. The truth is, the “best” screen recorder for you boils down to your specific style, budget, and the kind of courses you’re building. There’s no single magic bullet, but there are absolutely clear winners for certain jobs.
My goal here is to give you a clear, confident recommendation so you can stop researching tools and get back to what actually matters: creating incredible learning experiences for your students. Here’s how I see it.
Best All-Around Workhorse for Serious Creators
For most course creators building polished, in-depth video tutorials, my top pick is Camtasia. It’s the one I come back to again and again.
It just hits that perfect sweet spot between professional-grade power and a learning curve that won’t make you want to pull your hair out. The timeline editor feels intuitive, the recording itself is rock-solid, and the annotation and zoom features feel like they were designed by someone who actually makes instructional videos. It’s a true workhorse that can handle pretty much anything you throw at it.
Best for Moving Fast and Breaking Things
If your world is more about quick-hit videos, micro-lessons, or firing off student feedback instead of polished epics, then Loom is your undisputed champion.
Nothing else even comes close to its speed. Recording your screen and having a shareable link ready in seconds is an absolute game-changer for productivity. It completely removes the friction that stops most people from making videos, encouraging you to communicate visually without getting stuck in a clunky editing process. For quick, informal content, it’s unbeatable.
The best tool is the one you actually use. Don’t get lost chasing the most powerful features if a simpler tool fits your workflow and helps you publish consistently.
Best for Bootstrappers with More Time Than Money
If you’re on a tight budget and don’t mind getting your hands a little dirty with a steeper learning curve, then the answer is OBS Studio.
It’s mind-blowing that a tool this powerful is completely free. It gives you a professional level of control over your scenes and recordings that paid tools charge a fortune for. But, and this is a big but, it’s a recorder only. You’ll need to pair it with a separate video editor like DaVinci Resolve (which also has a great free version). This combo gives you an incredibly powerful production suite for exactly $0.
Common Questions & Straight Answers
As you get closer to picking a tool, a few questions always come up. These are the practical, “what-does-this-actually-mean-for-me?” kind of questions I hear all the time. Let’s cut through the noise and get you some clear answers.
Is a Free Screen Recorder Good Enough?
This is the big one, and it really comes down to a simple trade-off: time versus money.
A free tool like OBS Studio is a workhorse. It’s incredibly powerful, and you can’t beat the price. But it has a notoriously steep learning curve and comes with absolutely no video editor. If you have more time on your hands and are willing to patch together a DIY workflow, it can work.
Paid tools like Camtasia or Descript are designed to save you time. They’re built for creators who need an efficient, repeatable process. The price tag gets you things that quickly become non-negotiable as you grow:
- No Watermarks: Your videos look professional, branded to you and only you.
- Unlimited Recording: You can record a 90-minute expert interview without worrying about a cutoff.
- An Integrated Editor: This is the game-changer. Editing right where you record saves you hours of exporting, importing, and syncing files between different programs.
When you’re just testing the waters with a mini-course, a free tool is perfectly fine. But the moment your course becomes a real part of your business, a paid tool is an investment that pays for itself in saved hours and fewer headaches.
Do I Really Need a Separate Video Editor?
This depends entirely on the recorder you choose and how polished you want your final lessons to be. Some of the best screen recording software for course creators are true all-in-one studios, while others are just one piece of the puzzle.
If you go with an all-in-one solution like Camtasia, you get a complete, timeline-based editor built for creating detailed courses. Descript offers its unique text-based editor, which is a dream for anyone recording lecture-heavy content. With these, you absolutely do not need another editor.
On the other hand, a tool like Loom is built for speed and quick sharing, not deep editing. Its features are basic by design. And OBS Studio is a pure recording engine, it doesn’t have an editor at all. If you pick one of these, you’ll need to pair it with a dedicated video editor like DaVinci Resolve to actually assemble your lessons.
Your workflow is what matters here. If you want a single, streamlined process from hitting record to hitting export, an all-in-one solution is your best bet. If you already love a powerful, dedicated editor, then a simple recorder is all you need.
How Much Video Quality Do I Actually Need?
It’s tempting to chase after 4K video, but for an online course, it’s often more trouble than it’s worth. Your goal should be the sweet spot between crisp, professional quality and a file size that doesn’t frustrate your students.
For almost every online course, recording and exporting in 1080p (Full HD) is the gold standard.
This resolution is perfectly sharp for reading text on a screen and looks fantastic on laptops, tablets, and phones. It’s the professional benchmark without the significant downsides of higher resolutions.
Recording in 4K creates massive files. They take forever to upload and process. More importantly, they can be a buffering nightmare for students with slower internet connections. You don’t want a student’s learning momentum killed by a spinning load icon.
When you export your final video, aim for a bitrate between 8-12 Mbps for a 1080p video. This keeps your course looking sharp without punishing your students’ bandwidth.