How to Create Rubrics: A Guide for Effective Feedback
You’re probably here because grading has started to feel messy.
You know strong work when you see it. You can spot a thoughtful argument, a clear explanation, or a polished project pretty quickly. But turning that judgment into feedback students can use is harder. By the fifth paper, you’re writing the same note again. By the tenth, you’re second-guessing whether the difference between one score and another is really clear enough to defend.
That’s where a good rubric changes the job.
When I think about how to create rubrics, I don’t start with points. I start with communication. A rubric should help students see what quality looks like before they submit the work. If it only appears after grading, it’s doing half the job.
Beyond Justifying the Grade
I’ve seen this pattern over and over. An instructor builds a detailed rubric, attaches it to the assignment, and assumes students will use it like a checklist. Then the submissions come in, and the same problems show up anyway. Missing evidence. Weak structure. Vague claims. The rubric exists, but it didn’t shape the work.
That’s not a student problem alone. It’s often a design problem.

A lot of rubrics are built as scoring grids first and learning tools second. That sounds harmless, but it changes everything. Students glance at the boxes, see a bunch of point values, and treat the rubric like a receipt they’ll get later rather than a guide they can use now.
That gap shows up in the data. Recent 2025–2026 data from the Enterprising Education Initiative shows that 68% of rubrics used in online courses are analytic and point-heavy, yet only 22% of students report using them to improve their work before submission according to Indiana University’s rubric creation guidance. That’s a pretty clear sign that many rubrics aren’t pulling their weight as feedback tools.
What a useful rubric actually does
A useful rubric does at least three jobs at once:
- Sets expectations early: Students can see what matters before they start.
- Makes feedback repeatable: You don’t have to rewrite the same explanation on every paper.
- Reduces avoidable disputes: When criteria are visible, grades feel less mysterious.
Imagine a recipe card. If I hand someone a finished cake and then explain why it didn’t turn out right, that’s helpful, but late. If I hand them the recipe first, with notes on texture, timing, and ingredients, their odds of success go way up.
A rubric works best when students use it before submission, during revision, and after grading.
That’s also why I like pairing rubrics with assignment examples. If you use performance assessment examples in your course design, rubrics become much easier for students to interpret because they can connect the language to actual work.
Why most rubric frustration is predictable
When instructors tell me they hate rubrics, they’re usually reacting to bad ones. Rubrics become annoying when they’re too long, too vague, or too obsessed with tiny deductions. Students ignore them. Instructors resent them. Nobody wins.
The fix isn’t to abandon rubrics. The fix is to design them for learning first.
Choosing Your Rubric Blueprint Holistic vs Analytic
Before I write a single criterion, I choose the basic shape.
That decision matters because a rubric is like a blueprint for a house. If you pick the wrong structure at the start, everything you build after that gets harder. A purpose-driven process starts with selecting the rubric type that matches the assessment’s goals, as explained in Voyager Sopris’s rubric design guide.
Two common options
A single-score rubric gives one overall judgment about the work.
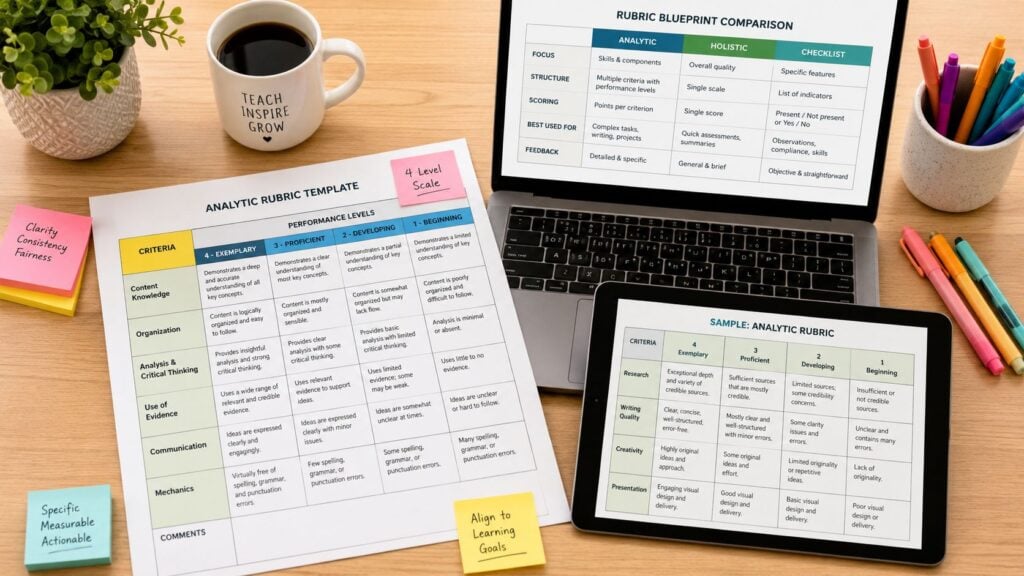
An analytic rubric breaks the work into parts and scores each part separately.
If I’m grading a quick discussion post or a short reflection, I might use a single-score rubric because I want speed and a broad judgment. If I’m grading a research paper, presentation, or capstone project, I usually choose analytic because students need feedback on different dimensions of the work.
| Feature | Holistic Rubric | Analytic Rubric |
|---|---|---|
| Feedback style | One overall description of quality | Separate feedback on each criterion |
| Grading speed | Faster | Slower, but more detailed |
| Best fit | Short tasks, low-stakes work, global impressions | Complex assignments, skill-building tasks, revision-focused work |
| Student usefulness | Helpful for broad expectations | Better for targeted improvement |
| Scoring detail | Limited | High |
When I use each one
I keep the choice simple.
For a rubric evaluating the assignment as one complete piece, I ask myself whether it’s being judged mainly as a whole. A speech, for example, sometimes lands or doesn’t land in an overall sense. A short participation task can also fit that model.
For an analytic rubric, I ask whether students need feedback on separate moving parts. That’s common in online teaching, where one assignment may involve content accuracy, structure, evidence, audience awareness, and mechanics.
Practical rule: If you want students to revise the work meaningfully, analytic usually gives them a better map.
The tradeoff most people miss
Rubrics that evaluate the work as a whole are efficient, but they can leave students wondering what to fix.
Analytic rubrics take longer to build, but they tend to make the assignment feel less mysterious. Students can see where they’re strong and where they need work. That’s why I often recommend analytic rubrics for anyone learning how to create rubrics for courses with projects, portfolios, written work, or demonstrations of skill.
The key is not to choose the most detailed option by default. Choose the one that helps the learner most.
Defining What Matters with Clear Criteria
This is the part where a rubric either becomes sharp or falls apart.
If your criteria don’t match the learning outcomes, students end up chasing the wrong target. They focus on surface features because the rubric rewards surface features. That’s why I always build criteria by working backward from what students are supposed to learn.

Start with outcomes, not assignment parts
A common mistake is using criteria that describe sections of the task rather than evidence of learning.
For example, “Introduction,” “Body,” and “Conclusion” are not very helpful criteria on their own. They describe parts of a paper. Better criteria would be things like:
- Develops a clear claim: The central argument is easy to identify.
- Uses evidence effectively: Examples or sources support the main points.
- Organizes ideas logically: The reader can follow the progression from one point to the next.
Those criteria tell students what good performance looks like.
If you need help sharpening outcomes before you write criteria, I’d revisit Bloom’s Taxonomy learning objectives. It’s much easier to write a strong rubric when your outcomes use action verbs you can observe.
Keep the number of criteria under control
One of the best guardrails I know is this. Optimal analytic rubrics contain 5–7 criteria, and exceeding this threshold reduces clarity for students and increases grading time according to Online Network of Educators.
That number matters because too many rows create the same problem as too many ingredients in a recipe. You stop tasting the dish and start managing the list.
Here’s how I narrow criteria down:
- Circle the essential learning outcomes. What must students demonstrate?
- Combine related skills. If “grammar” and “sentence clarity” always travel together in your feedback, they may belong in one criterion.
- Remove compliance items unless they matter educationally. “Submitted on time” is a policy issue, not always a learning criterion.
- Check for overlap. If two rows could both apply to the same weakness, revise them.
A quick before-and-after example
Weak criteria often sound like this:
- Organization
- Content
- Creativity
- Effort
Those are broad enough that two instructors might score the same work differently.
Stronger criteria sound more like this:
- Presents ideas in a logical sequence with clear transitions
- Explains concepts accurately and completely
- Uses examples or evidence that strengthen the response
- Adapts content for the intended audience and purpose
That shift makes grading more consistent and revision more realistic.
If you want a feel for what clear standards look like in practice, it helps to practise with real mark schemes. Seeing how criteria are phrased in completed examples can help you separate vague labels from observable performance.
A short explainer can help make this concrete:

The litmus test I use
I ask one question for every criterion.
Can a student point to evidence in their work that matches this row?
If the answer is no, the criterion probably needs revision.
Writing Performance Levels That Coach and Guide
Once the criteria are set, I write the performance levels. At this stage, many rubrics drift into fuzzy language.
You need enough levels to show progression, but not so many that the distinctions become tiny and confusing. Effective rubrics define exactly 3 to 5 distinct performance levels, and the descriptions should be clear, specific, and written in parallel structure, according to NC State’s rubric best practices.
Keep the scale simple and distinct
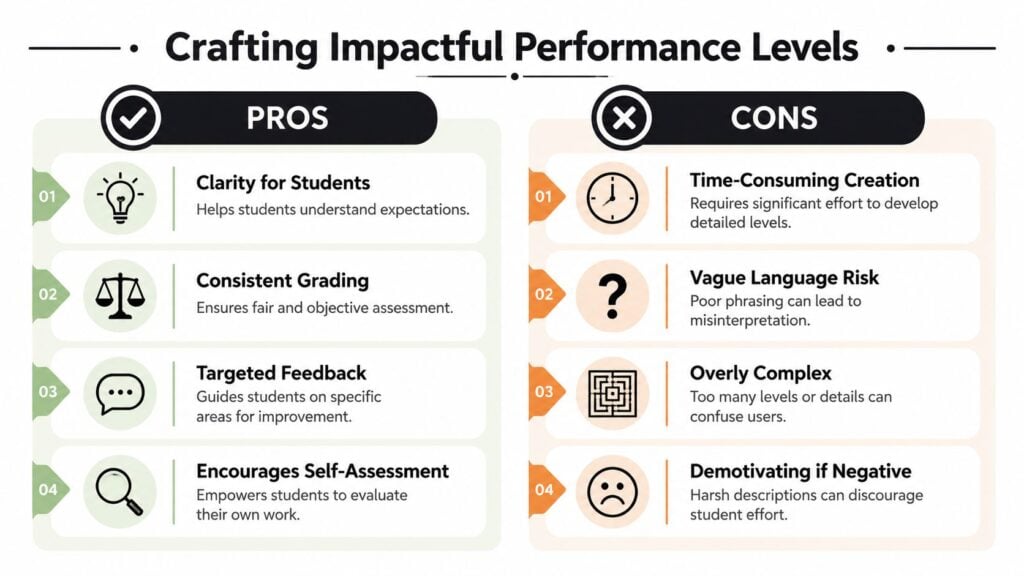
I usually prefer four levels because they force a clearer judgment. A middle-heavy scale can encourage vague scoring. Four levels also create a natural progression such as:
- Needs Improvement
- Acceptable
- Good
- Excellent
What matters most is that each level is meaningfully different from the next. If your descriptions differ only by words like “somewhat,” “mostly,” or “very,” the rubric won’t hold up well.
Use parallel structure so students can compare
Parallel structure means each level follows the same pattern. That makes side-by-side reading easier.
Here’s a weak example for a criterion about evidence:
- Excellent: Uses excellent evidence and explains it very well.
- Good: Has enough evidence.
- Acceptable: Some evidence is included.
- Needs Improvement: Lacks sources.
Those descriptions vary in style, specificity, and focus.
Here’s a stronger version:
- Excellent: Selects relevant evidence and explains clearly how it supports the main claim.
- Good: Selects relevant evidence and explains most connections to the main claim.
- Acceptable: Selects some relevant evidence but explanation of the connection is limited.
- Needs Improvement: Includes evidence that needs clearer relevance or explanation.
Each row starts with the same kind of action. Students can scan across and see the difference.
Good performance levels read like coaching notes, not verdicts.
Write for improvement, not punishment
This part is easy to overlook. The wording of your levels affects how students receive the feedback.
Negative labels like “poor” or “inadequate” tend to shut students down. In contrast, language that points toward growth is easier to act on. That same coaching mindset shows up outside education too. If you’ve ever read advice on player growth in sports, you’ll notice the strongest feedback names what to improve without making the person feel defeated.
A few swaps I make regularly:
| Less helpful phrasing | Better coaching phrasing |
|---|---|
| Fails to support claims | Supports claims inconsistently and needs stronger evidence |
| Poor organization | Organization needs clearer sequencing and transitions |
| Does not cite sources | Work needs complete and consistent citations |
| Weak analysis | Analysis needs more explanation of why the evidence matters |
A quick writing pattern that works
When I draft performance levels, I use this formula:
verb + quality + support
For example:
- Explains the concept accurately with clear supporting detail
- Explains the concept with minor gaps in clarity or detail
- Explains part of the concept but needs more accurate supporting detail
- Attempts explanation but needs clearer and more accurate detail
That pattern keeps the language stable and easier to score.
From Design to Action Scoring and Implementation
A rubric on your laptop won’t help anybody.
Once the wording is solid, I move into practical setup. I usually draft the rubric in Google Sheets, Microsoft Excel, or a simple table in Word first. That makes it easier to spot uneven language, adjust row order, and check whether the whole thing still fits on one page.
Decide how scores will work
Not every rubric needs a complicated point system.
Some instructors assign a simple value to each level and total the rows. Others weight certain criteria more heavily because they matter more to the outcome. Both approaches can work if students can understand the logic.
I use three basic questions:
- What matters most? Give more weight only where the learning goal justifies it.
- Can students explain the score back to you? If not, the system may be too complex.
- Does the grade reflect the feedback? A rubric should make the final mark easier to understand, not harder.
Keep the language supportive inside the gradebook
This matters more than many people realize. Using objective, positive indicators for performance levels from the bottom up, like “needs improvement” to “excellent,” can increase student effort and engagement by up to 18% because learners perceive the feedback as supportive rather than punitive, according to the University of Florida’s guidance on high-quality rubrics.
That means implementation isn’t just technical. It’s emotional too. The labels students see inside your LMS shape how they interpret the result.
If a student opens the gradebook and immediately feels judged, the rubric has lost part of its teaching value.
Build it where you can actually use it
After the draft looks right, I transfer it into the LMS. In Canvas, Moodle, Blackboard, and similar platforms, rubric tools usually let you recreate the rows and levels directly. I still recommend building outside the LMS first because editing inside those systems can be clunky.
I also tell instructors to share the rubric with the assignment, not after. If you care about improvement, the rubric belongs in the learning process. That same idea connects closely to measuring training effectiveness, because better feedback design improves what learners do before the assessment is finished.
Test Driving Your Rubric and Avoiding Common Pitfalls
No rubric is finished on the first draft.
I treat every new rubric like a car I haven’t driven yet. On paper, it might look great. Once you put it on real student work, all the hidden issues show up. One row overlaps with another. A performance level feels too broad. A phrase that seemed clear to you gets interpreted three different ways by three different people.
That’s why testing matters.
Run a small pilot before live grading
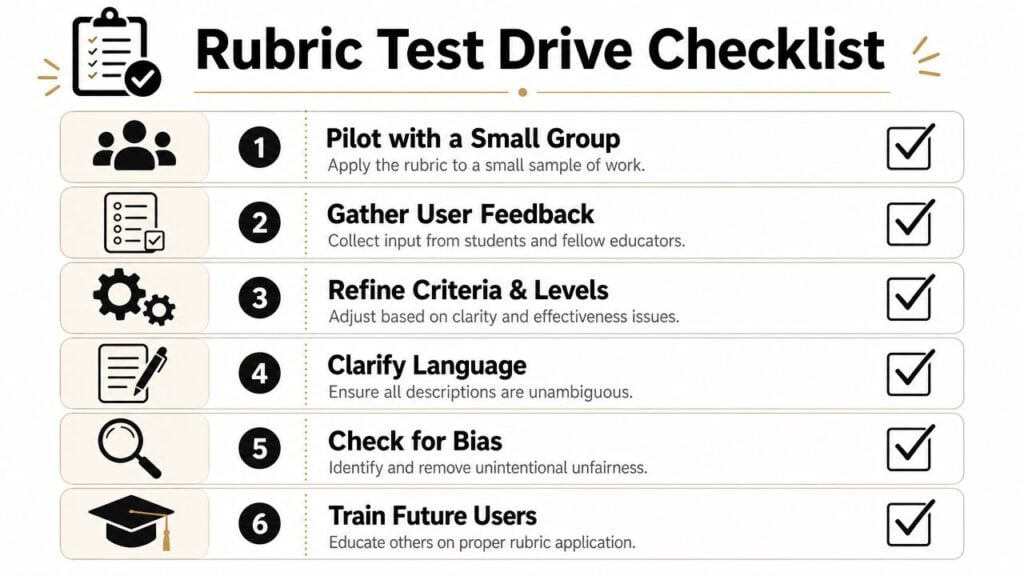
The most useful check is simple. Ask another instructor, TA, or colleague to score the same sample work with your draft rubric. Then compare results.
The “Test and Tweak” phase is a critical milestone where multiple raters use the draft rubric to compare scores. If ratings don’t overlap, the language is too subjective and needs revision according to Autism Classroom Resources.
That idea matters even if you’re the only grader. If another person can’t follow the rubric consistently, students probably can’t use it consistently either.
Common trouble spots
I see the same problems again and again:
- Subjective adjectives: Words like “interesting,” “creative,” or “strong” need explanation.
- Negative phrasing: Students can’t improve much from labels that only describe failure.
- Overlapping rows: If “organization” and “clarity” blur together, scoring gets messy.
- Too many details: A rubric can become so packed that nobody reads it well.
- Hidden expectations: If you value something important, it should appear in the rubric.
A quick cleanup pass helps. Read each row and ask, “Could a student underline the evidence for this?” If not, revise the wording.
Give students the rubric early and use it with them
This last part is where the rubric becomes a learning tool rather than a private answer key.
Hand it out with the assignment. Use it on a sample submission. Ask students to self-check before they turn in the final version. When possible, have them explain where their work meets each criterion.
That small shift changes the relationship. The rubric stops being a mystery document and becomes part of the learning process.
A rubric students never practice with is just a grading sheet with better formatting.
When instructors ask me how to create rubrics that help, that’s my shortest answer. Build for clarity. Write for growth. Test before launch. Then put the rubric in students’ hands early enough that it can still change the work.