Zoom-in Videos for Online Courses
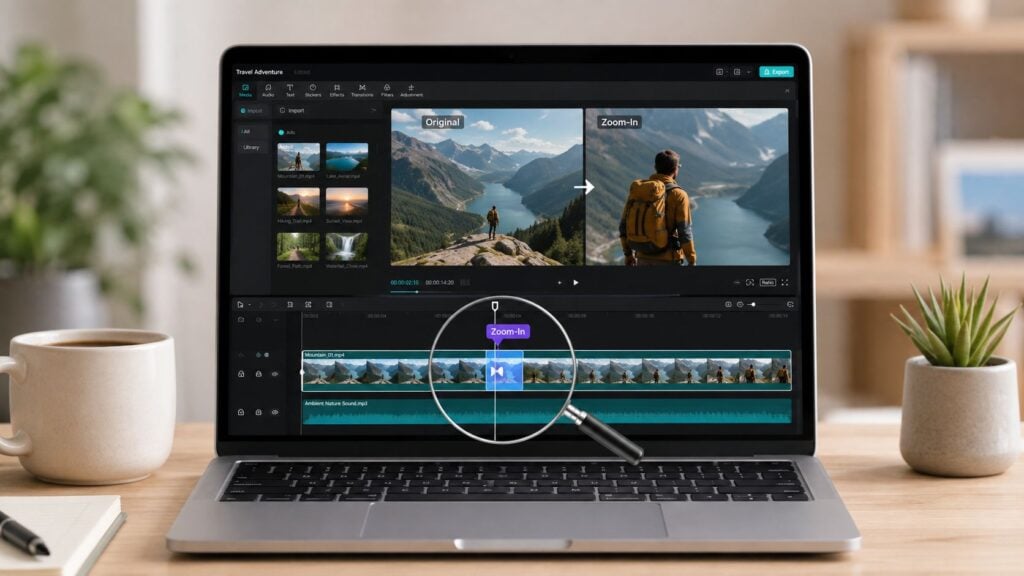
192,600 enterprise customers and a 3 to 5 point zoom plan tell you the practical answer. If you start from 4K source footage, a controlled zoom can preserve roughly 95% sharpness up to 300%, and that gives you enough room to guide attention without turning a lesson into a shaky effect.
I’ve seen the same pattern across course videos, demos, and webinar replays. A student misses a label on a chart, the playback feels too wide, and the next comment is always about visibility, not the lesson itself. That’s where zoom in videos starts doing real instructional work.
Why Zooming Matters for E-Learning Engagement
A student opening a course lesson on a phone or laptop often won’t complain about “cinematography.” They’ll say the spreadsheet cell was too small, the UI label disappeared, or the whiteboard note was unreadable. That’s the practical problem zooming solves, and it’s why the best creators treat framing as part of teaching, not decoration.
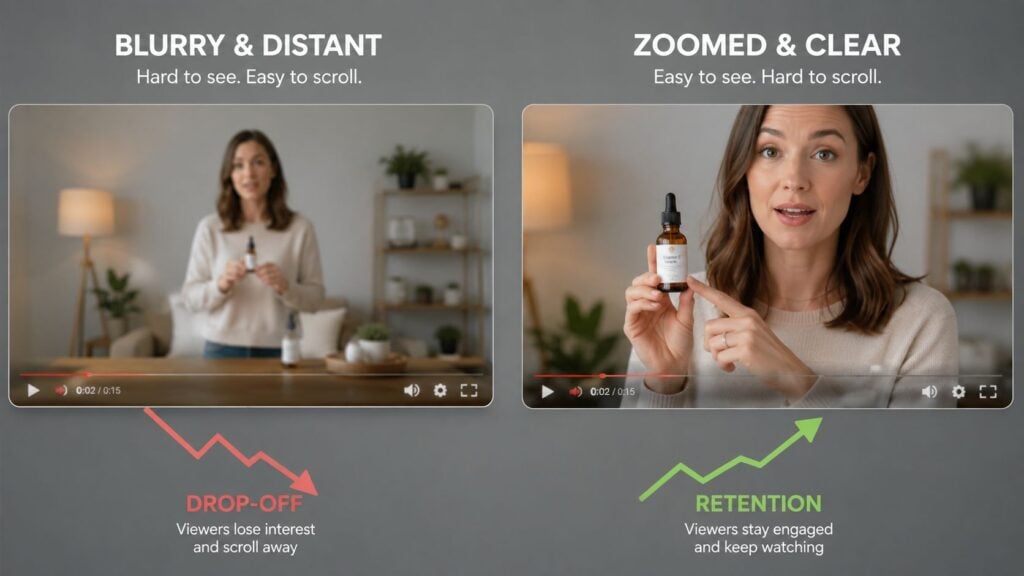
Modern video platforms now track total views, watch time, unique viewers, completion rates, and engagement interactions at the recording and channel level, which makes zoom decisions more measurable than they used to be, as Zoom’s analytics documentation shows in its video analytics feature set (Zoom video analytics). That matters because a wide shot can look fine to you while still losing learners at the exact moment the content becomes detailed.
Practical rule: if the learner needs to inspect a small object, text, or interface element, a well-timed zoom is a teaching move, not an editing flourish.
In my own course work, the biggest improvement usually comes from zooming at the moment the explanation turns specific. A broad shot establishes context, then a tighter frame keeps eyes on the exact thing being discussed. That simple shift reduces the “what am I supposed to be looking at?” problem.
The reason this works is easy to understand. A zoom removes visual noise and narrows the learner’s focus to a single instructional target. It also makes your pacing feel more intentional, because the frame changes when the lesson changes.
Zooming only becomes distracting when it’s random. If the frame moves because the speaker got bored, learners notice the edit. If the frame moves because the concept changed, the zoom feels invisible.
Manual Keyframe Zooming for Controlled Results
A manual keyframe workflow gives you the most control over a zoom. You decide when the frame moves, how far it moves, and whether the motion supports the teaching point or distracts from it. For e-learning, that matters more than visual flair, because the frame should follow the lesson, not compete with it.
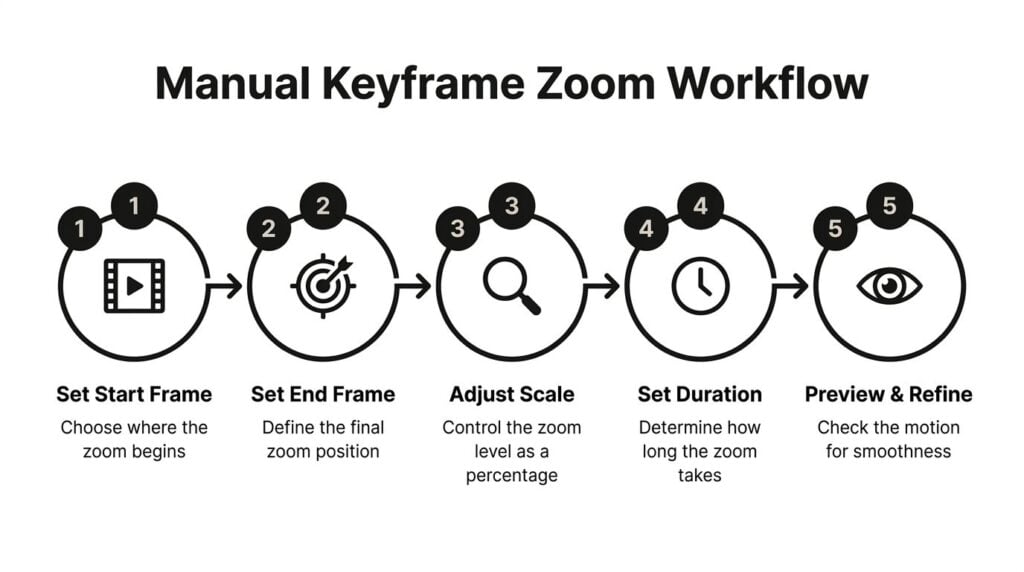
Start with 4K source footage whenever possible. Set the first keyframe at 100% scale, then build toward roughly 150% to 300% scale while you adjust position so the subject stays centered. Strong source footage holds up best under that kind of crop, and the true test is whether the learner can still read the detail after the move, especially on small text, diagrams, or interface elements (SmoothCapture on pro zoom techniques).
Keep the move small when the teaching point is small
A subtle punch-in often teaches better than a dramatic one. I usually stay around 100% to 120% when I want to guide attention to a face, a cursor, or a small on-screen detail, then go tighter only when the lesson needs that extra focus. That approach uses the same Scale and Position controls most editors rely on for manual reframing, so the zoom stays tied to the instructional beat instead of feeling decorative (AICut on zoom mechanics).
A fast zoom can work for emphasis, but it can also make learners feel rushed.
I also limit how often the frame changes. Three to five key zoom points in a lesson is usually enough to keep attention moving without making the video feel nervous or over-edited. If the content includes a dense interface, a chart, or step-by-step software work, fewer deliberate zooms usually do more for comprehension than constant motion.
Avoid the stretched look
Some editors let width and height drift separately, and that creates a warped frame. Descript’s Clip Inspector handles that by using the W and H controls, where 100% is the original video and the Link button keeps the aspect ratio locked while you zoom (Descript zoom guide). I check that every time, because even a slight stretch on a face or interface panel makes a course look careless.
I also preview the zoom at full speed and again at half speed. The first pass shows whether the move lands on the right moment. The second pass shows whether the pacing still feels natural for a learner who is trying to follow every step closely.
AI Auto-Reframing Tools for Faster Workflows
AI auto-reframing is the right choice when you need speed and consistency. It’s especially useful for talking-head lessons, interview-style recordings, and multi-episode course batches where hand-building every zoom would eat the schedule.
The strongest advantage is simple. The software tracks faces or points of interest, then shifts the frame for you. That saves time on long recordings and keeps the subject centered without forcing you to keyframe each move manually.
The trade-off is precision. A machine can follow a speaker well, but it can still choose a frame that hides text, trims a chart, or reframes too aggressively for a teaching moment. That’s why I treat auto-reframing as a helper, not a final pass.
If you’re comparing tools, look at what each one does with zoom and pan rather than assuming they’re interchangeable. Adobe Premiere Pro supports smooth zoom-style reframing through keyframes and motion controls, Descript offers width and height controls with aspect-ratio protection, and Riverside emphasizes crop changes that help hide cuts and keep motion natural. For a broader production stack, LearnStream’s guide to best screen recording software for course creators is useful when you’re deciding which recording setup will give you the cleanest source before editing.
Review auto-reframed footage frame by frame if the lesson includes text, dashboards, slides, or fine interface detail.
That review step is essential in educational content. One missed label can turn a polished shortcut into a confusing moment for the learner.
AI tools work best when the content is mostly conversational and the learning goal is maintaining presence. Manual keyframes still win when the frame has to land on one exact object at one exact moment.
Keyboard Shortcuts for Live Recording Zooms
Live recording is where zooming gets harder, because you’re teaching and operating the gear at the same time. A shortcut that feels elegant in rehearsal can feel awkward once the recording starts and your attention is already split.
Zoom itself includes auto-framing features that keep you centered and can zoom in slightly when you move. That’s useful for live teaching because it reduces the number of things you have to manage while presenting. For screen recordings, many tools also offer a keypress that triggers a digital zoom or follows the cursor, which is handy when you need to focus attention without stopping the session.
The key is to rehearse the motion before the actual lesson. I test every shortcut on a dummy recording, because fumbling with frame controls during an explanation breaks momentum fast. If the shortcut takes thought, it’s too early in the workflow.
I also plan the zoom moments in the script. When a cue lands on a sentence I’ve already marked, the move feels like part of the teaching rather than a technical interruption. That’s especially true for webinars, where the audience will forgive a rough sentence faster than a random camera jump.
For live rigs, a resource like the ATEM Blackmagic guide is useful if you’re building a more controlled switching setup and want to understand how external hardware fits into the workflow.
For course creators who want a recording stack that supports this kind of control, the right camera and screen setup matters as much as the zoom shortcut itself. A tighter live zoom can’t fix a muddy source feed, and digital zoom will always show the limits of the original image sooner than a better native capture will.
Quality Best Practices and Export Settings
Quality comes first because zooming exposes weak footage fast. A shot that looks clean at 100% can turn soft the moment you enlarge the framed area, so the original source is the safeguard, not the export preset.
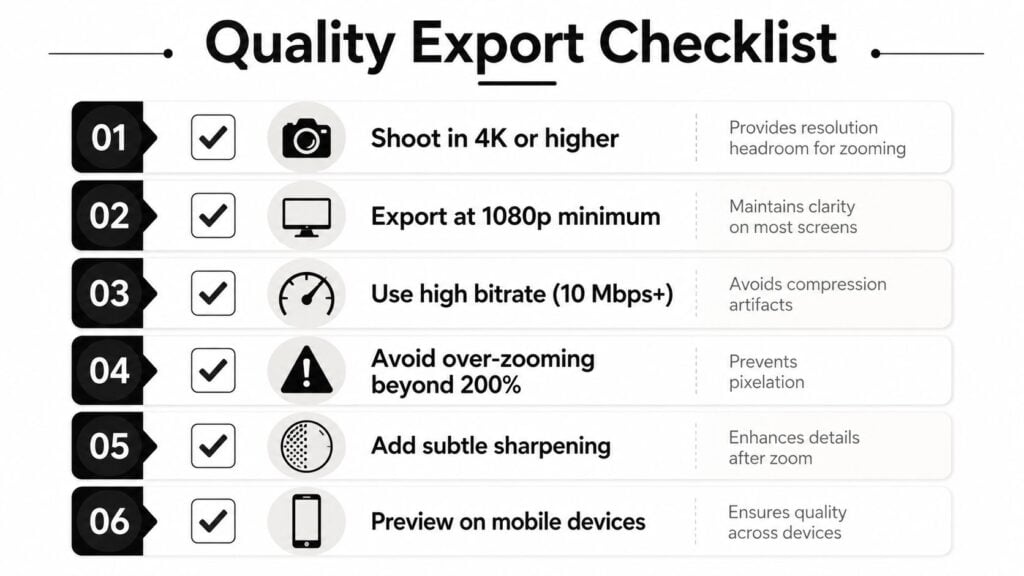
The safest approach is to start with the highest capture quality your setup supports. If you plan to zoom on 1080p, wide pushes will soften detail quickly. For lessons that need tighter framing, record in 4K or higher so you have room to crop without making text or interface elements look muddy.
A good export also depends on the teaching goal. If the zoom is there to guide attention in an LMS lesson, the file needs to stay readable on small screens as well as larger ones, which is why I usually pair a clean H.264 export with a bitrate that matches the platform instead of chasing the smallest possible file. For a broader production workflow, the same logic applies in course video production planning, where capture quality, edit decisions, and delivery settings all have to work together.
Match the export to the platform
For online courses, a clean H.264 export is a practical default. Keep the bitrate high enough for your delivery platform, and avoid re-encoding the same file more than once because each extra pass can soften detail. For a course video hosted on an LMS, a high-bitrate export is usually safer than a heavily compressed one.
The published guideline I trust most puts the optimal zoom range at 75% to 125% magnification for typical screen viewing (MapLibrary on viewer perception and zoom level). That range is a useful reminder that not every lesson needs a dramatic push. A restrained crop often keeps learners oriented instead of making the frame feel over-controlled.
Best check: preview the final file on a phone and a laptop before you publish, because zoomed detail can look fine on one screen and muddy on another.
Keep accessibility in mind
Zooming can improve readability, but only if the frame still leaves enough context. Crop too tightly, and learners lose the surrounding cues that help them understand the demo or diagram. Crop too loosely, and the thing they need to see stays too small.
I also like to add a small amount of sharpening after export when the platform allows it, but only as a finishing move. Heavy sharpening makes text edges look harsh and can make the lesson feel over-processed. The goal is clarity, not a glossy effect.
The best checklist is simple. Shoot high, zoom modestly, export cleanly, and test on real devices before you publish.
Choosing the Right Zoom Approach for Your Content
A course lesson, a live demo, and a talking head update ask for different zoom decisions. The best choice is the one that matches the learning outcome, not the one that looks clever in the editor.
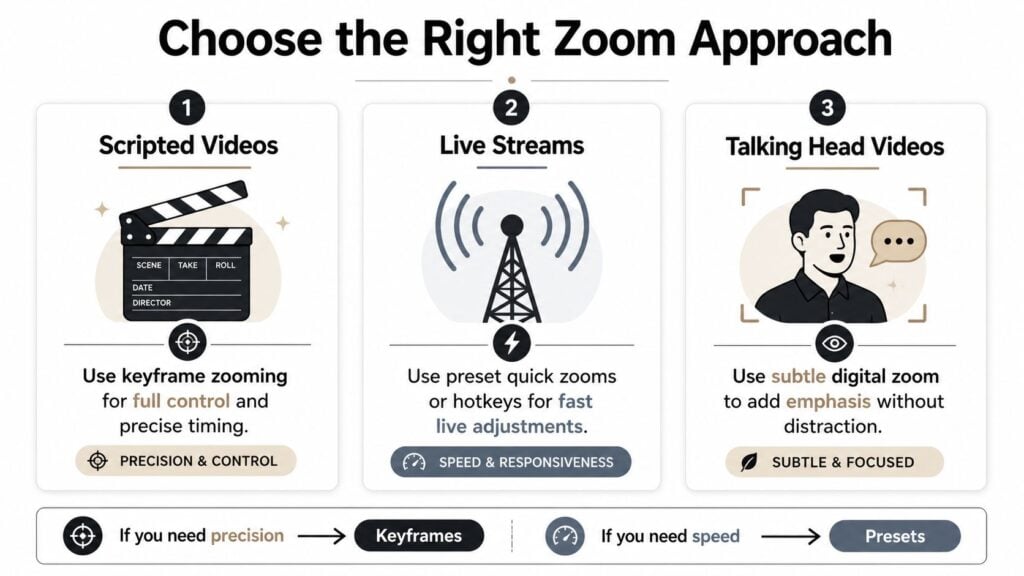
For scripted videos, manual keyframes usually give the cleanest result because the lesson already has a planned structure. Each zoom can land on a specific teaching beat, which keeps the frame aligned with the explanation instead of distracting from it. That control matters when you are teaching software steps, diagrams, or any sequence where the viewer needs to stay oriented.
For live streams, speed matters more than perfect framing. Quick zoom presets, hotkeys, or camera controls let you respond in the moment without breaking the flow of the session. If you are comparing live recording tools, a practical breakdown like Riverside FM vs Zoom for recording course interviews can help you decide which setup gives you more control before you even start the lesson.
For talking head videos, a subtle digital zoom works well when the speaker’s presence matters more than on-screen detail. A small push-in can help a lesson feel more direct, especially when the visuals are simple and the main job is to hold attention through explanation.
The decision rule is straightforward. Use keyframes if you need precision and want each zoom to support a specific instructional moment. Use presets if you need speed and are recording live. Start from a higher-resolution source if the lesson depends on screen detail, then zoom only where the viewer needs extra focus.
In practice, the strongest courses use zoom with restraint. The frame changes when the learner’s attention should change, and that gives the movement a teaching purpose instead of a decorative one.
Before you publish, watch one full draft with the sound off. If the zooms still make sense without narration, the framing is doing real instructional work.