My Guide for an Effective Virtual Classroom Setup
The most common virtual classroom setup problem shows up before the first lesson starts. A teacher is ready, slides are open, and the room is quiet, then one student can’t get in, another hears echo, and someone else is staring at a spinning wheel while the lesson clock keeps moving.
That mess usually gets blamed on the platform. In practice, it’s a setup problem, and setup has to be treated like an infrastructure project. If the network, devices, firewall rules, storage, and classroom norms aren’t ready, even a strong platform will feel fragile.
Why Most Virtual Classroom Setups Fall Apart Before Class Starts
I’ve seen virtual classes fail in the exact same way across schools and training teams. The session starts, the instructor speaks, and the first minute is spent fixing audio instead of teaching. Then someone joins on a weak connection, the file share is blocked, and the whole room slides into troubleshooting mode.
The data around school adoption explains why this matters so much. In spring 2020, 77% of U.S. public schools moved classes to online distance-learning formats and 73% of private schools did the same, according to NCES, but that shift built on an already growing base because in 2017–18 about 21% of public schools and 13% of private schools offered at least one course entirely online (NCES Fast Facts). In other words, the modern virtual classroom didn’t appear overnight, it expanded fast on top of existing digital delivery.
Start with the environment, not the software
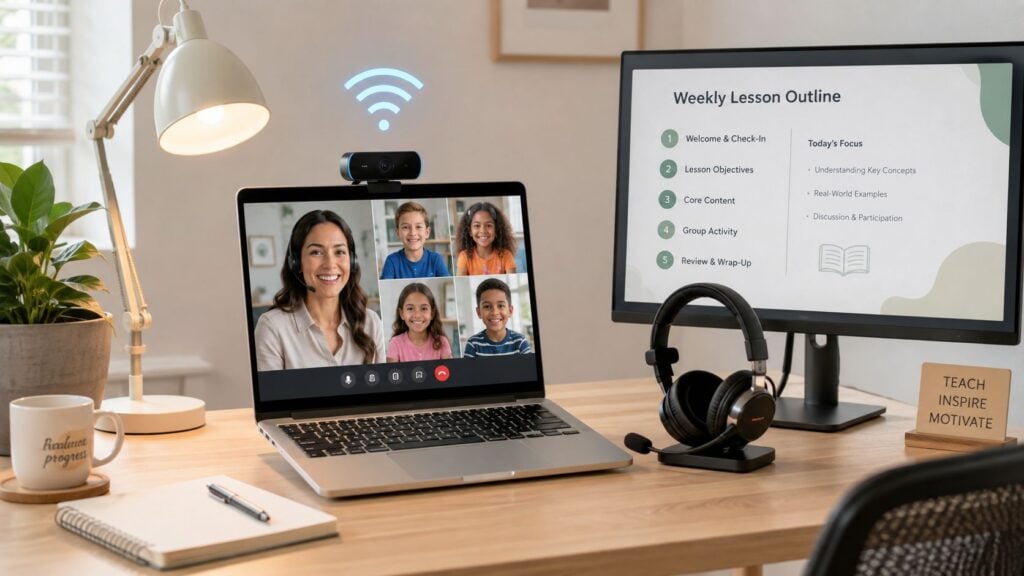
A workable virtual classroom setup needs a stable internet connection, a computer or laptop, a hosting platform, and audio-video hardware like headphones, a microphone, and a webcam (basic setup requirements). That sounds obvious until you watch a lesson break because someone is using laptop speakers in a noisy kitchen or trying to teach from a room with no privacy.
Practical rule: If you can hear your own voice coming back, the audio setup isn’t ready for class.
I always start by checking bandwidth, devices, firewall rules, and storage before I think about teaching features. Then I look at the room itself. A separate low-distraction space, good lighting, and a schedule that works for both teacher and students are part of the setup, not extras.
Small gear choices matter on day one
Headphones almost always beat laptop speakers because they cut echo and reduce the background noise that derails discussion. A USB headset is usually easier to manage than Bluetooth if reliability matters more than mobility, while Bluetooth can be fine for instructors who move around a lot. I also place the webcam at eye level, because a low-angle camera makes the session feel less natural and less attentive.
A second monitor helps more than many expect. One screen can hold the lesson plan, slides, or LMS dashboard, while the other stays on the room. That lets the instructor watch chat, attendance, and hand raises without constantly switching tabs.
For a plain-language overview of what a virtual classroom is and how the main pieces fit together, the LearnStream guide to virtual classrooms is a useful reference.
If the lesson depends on everything working live, the setup should be tested under the same conditions learners will face, not in a quiet office with perfect Wi-Fi.
Picking the Right Platform and LMS Stack
Platform choice works best when it follows the teaching model, not the other way around. A synchronous-heavy cohort that meets live every week needs different tools from a course that mixes recorded lessons, assignments, and occasional live reviews. I usually start by deciding what must happen in real time, what can happen asynchronously, and where the gradebook or completion record needs to live.
A simple way to narrow the stack is to separate the meeting layer from the course layer. Zoom, Teams, Google Meet, and Webex handle the live room. An LMS handles course content, assignment submission, and progress tracking. When schools try to force one tool to do all of it, the result is usually more admin work and more confused learners.
Choose by use case, not by feature count
If your sessions rely on breakout rooms, recorded lessons, and a stable live room, Zoom is often the easiest fit. If your organization already lives inside Microsoft or Google, Teams or Google Meet may reduce adoption friction. Webex can work well where security and enterprise controls matter more than simplicity.
The core question is whether you need a lightweight platform plus a standalone LMS, or a tighter suite with deeper integration. A standalone LMS like Teachable or Thinkific can be a good match for asynchronous content, while the live class platform handles the immediate teaching. That split is often cleaner than trying to make the live platform hold every course asset.
For a broader decision framework on course delivery, the LearnStream LMS selection guide is worth bookmarking.
Keep the stack simple unless integrations solve a real problem
Integrations matter when they remove manual work, like syncing rosters, storing recordings, or passing completion data. They do not help much when they just add another place to troubleshoot. A cleaner stack is usually easier for instructors to run, especially when support is limited.
One option worth noting here is Learning Stream, which includes virtual meeting integration for Zoom, GoToWebinar, and Teams, along with tools that connect event registration to live sessions. That kind of setup makes sense when registration and delivery need to stay closely linked.
The main trade-off is control versus convenience. A simpler stack is faster to launch, while a more integrated stack can reduce admin later if the connections are stable and used by staff.
Configuring the Technical Layer Before Launch
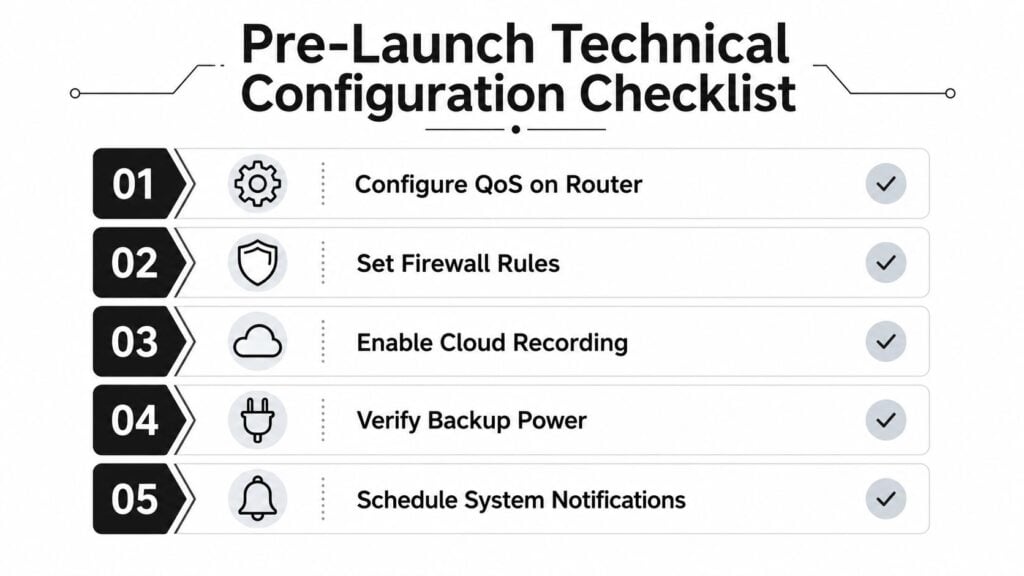
Treat the platform like infrastructure
The technical layer needs to be configured before anyone attends a live class. That means enabling QoS to prioritize audio and video traffic, whitelisting the required UDP and WebRTC ports, and setting up SSO plus role-based defaults such as waiting rooms, restricted recording, moderated chat, and controlled file sharing. Those settings turn the room into a managed environment instead of a free-for-all.
I also make sure security and participation settings are aligned with the class model. If learners should only speak at certain times, the moderator should control chat and the host should control screen sharing. If recordings are part of the course, that needs to be locked down before launch, not improvised mid-session.
Test the room under real load
The most important benchmark is to run load testing at expected peak concurrency before launch (deployment guidance). That means testing with the number of participants you expect at the busiest time, not just a single login from a clean office network. I’ve seen rooms behave perfectly in a quiet test and fail once a full class joins from mixed devices and home networks.
Real-world check: A platform that works in a calm demo can still fail when screens are shared, chat is active, and recordings are turned on at the same time.
Device testing should cover every target endpoint, including low-bandwidth joins, screen readers, mobile cellular connections, and Chromebook constraints. It’s also worth testing edge cases like permissions, storage limits, and LMS syncs, because the most annoying failures usually come from integration points rather than the video window itself.
Designing Sessions That Keep Learners Engaged
Once the room works, the teaching rhythm matters. Live sessions hold attention better when they move through 8 to 12 minute active-learning blocks, with instructor input followed by polls, peer review, or problem solving (Engageli guidance). Long stretches of uninterrupted lecture are where most virtual classrooms start to sag.
Build the session around repeated input and activity
I keep uninterrupted exposition to 10 to 12 minutes at most, then I force a learner action. That can be a poll, a breakout discussion, a short prompt in chat, or a quick problem-solving task. The point is to make the class feel like a sequence of interactions, not a broadcast.
A moderator helps a lot here. The instructor can stay focused on teaching while the moderator handles chat, technical questions, and pacing cues. That division keeps the session moving and prevents the teacher from getting trapped in support tasks.
Set participation rules before the live room opens
Clear norms reduce confusion faster than reminders during class. Microphones stay muted unless someone is speaking, video stays on during lectures, and learners know how to respond when they’re called on. Breakout rooms should show up at least once in every session, because small-group interaction is where many learners become willing to participate.
For practical etiquette rules that work well in live meetings, the virtual meeting etiquette rules resource from Headset Army is useful to share with teams before launch.
A live class needs rhythm. If the instructor talks for too long, the room stops feeling like a classroom and starts feeling like a recording session.
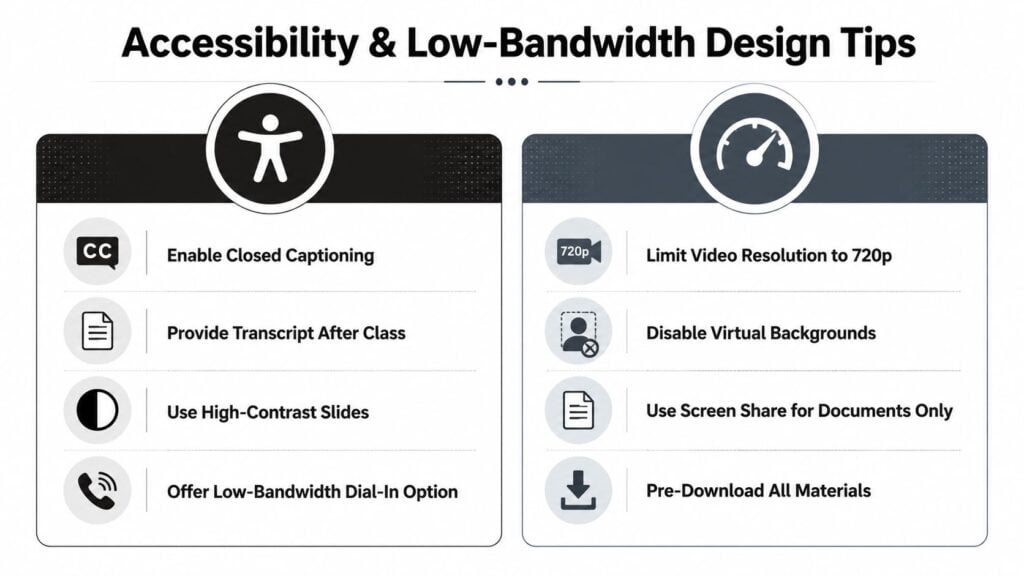
Accessibility and Low-Bandwidth Design
Accessibility gets too often reduced to captions, and that’s a shallow fix. Inclusive virtual classrooms need explicit procedures for every feature, frequent learner or family check-ins, scaffolded materials, quiet time options, read-alongs, and alternative response modes (inclusive classroom guidance). The goal is to make the setup usable for disabled and neurodiverse learners without forcing them to fight the platform.
Design for more than the ideal learner
Keyboard navigation, screen-reader support, live captions, adjustable text, and consistent routines should all be part of the default experience. If a learner needs a different way to answer, they should have one built into the class, not as a special favor. That’s especially important in live rooms, where fast pacing can punish anyone who needs more processing time.
I’ve also found that predictable routines matter as much as features. When learners know what happens first, what happens during discussion, and how to signal confusion, they spend less energy decoding the format. That frees up attention for the actual lesson.
Build for weak connections as a normal condition
A lot of virtual classroom content assumes stable broadband and a laptop-first setup, but that’s not the reality for every learner. Guidance on closing the digital divide points to the need for asynchronous options, while technical setup advice warns that ordinary household traffic can interfere with conferencing if bandwidth isn’t managed (flexible learning guidance). That makes low-bandwidth design a core part of the build, not a fallback.
Practical choices help here. Use screen share for documents instead of heavy media where possible. Keep file sizes light. Give learners a way to continue when video quality drops, because a class that only works when video is perfect doesn’t work for everyone.
Testing, Launch Checklist, and Troubleshooting Playbook
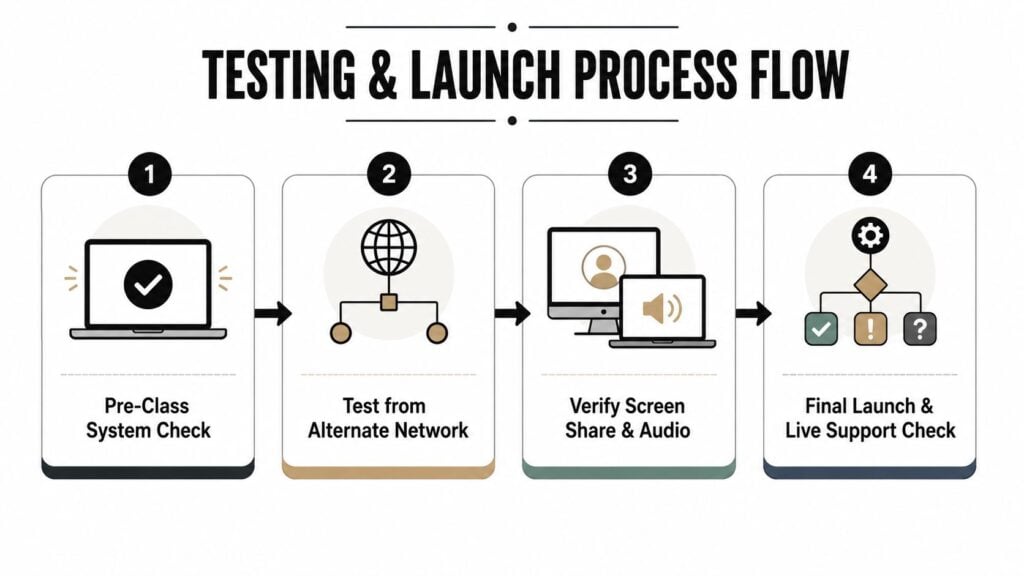
A clean launch comes from a boring checklist. Join from a different network, test screen sharing, verify recording permissions, check breakout room assignment, and confirm that LMS integrations are syncing. Those are the moments where hidden problems tend to show up.

Run the first test like a learner would
I always test from outside the main office network if I can. That exposes issues with login, permissions, and bandwidth that a local staff device might hide. Screen sharing should be tested with the exact content you plan to use, not a blank desktop, because file permissions and display settings can change the result.
The last thing I check is the LMS connection. If recordings, attendance, or assignment links are supposed to appear in the course shell, they need to arrive where learners expect them. The LearnStream LMS implementation checklist for small teams is a helpful reference when you’re tying the live room to the course site.
Troubleshoot by symptom, not by guesswork
Dropped media streams usually point to bandwidth pressure, device strain, or too many live features running at once. Permission misconfigurations often show up as blocked recording, missing screen share controls, or learners who can’t join a breakout room. LMS integration issues usually mean sync settings, authentication, or role mapping needs another pass.
Launch-day support should be visible and calm. If the class is important, have someone monitoring the room, someone watching the integration side, and someone ready to handle learner questions. That split keeps the instructor free to teach while the support team absorbs the inevitable first-week friction.
Keeping Your Setup Sharp After the First Month
The best virtual classroom setups get better after real use exposes the weak spots. After a month, I look at which tools were used, where learners dropped off, how audio and video performed under load, and whether accessibility accommodations worked the way they were supposed to. A setup that looked polished in testing can still feel clumsy once real people use it.
Review the room with the people who used it
One straightforward retrospective goes a long way. Ask instructors what slowed them down, ask learners what felt confusing, and check whether the session design matched the original intent. If the moderator barely touched the chat or breakout rooms were rarely used, that tells you something about the way the class is structured.
A simple review should track attendance, engagement, and completion. If those numbers or patterns drift, the platform choice or session design may need another pass. That doesn’t mean the whole build was wrong, it means the classroom is telling you where the friction lives.
Keep the maintenance list short and specific
After launch, I revisit firewall and privacy settings, recording storage, and session archiving on a regular cycle. That keeps the room secure and prevents old permissions from lingering longer than they should. If the class grows or the audience changes, platform and LMS decisions should be reopened without hesitation.
Practical rule: A virtual classroom setup stays healthy when someone owns the review, not when everyone assumes it’s already done.
The easiest way to think about it is simple. The first month reveals what the platform can support, and the next round of changes should follow that evidence instead of habit.
If you’re building or cleaning up a virtual classroom setup right now, start with the infrastructure checklist, then test it under real load before the first live session. Review your platform, LMS, and accessibility choices after the first month, and keep tightening the room based on what learners and instructors experience.