How to Create Interactive Online Lessons That Work
You’ve probably built one of these lessons before. The slides are polished, the recording is clear, and the quiz sits neatly at the end. Yet by the middle of the video, learners are checking email, skipping ahead, or leaving the tab open while they do something else.
The hard part of learning how to create interactive online lessons isn’t adding more buttons. It’s creating a sequence of decisions, practice opportunities, feedback, and pauses that keeps learners doing meaningful work from beginning to end.
Why Most Online Lessons Lose People So Fast
At 11 p.m., an adult learner opens a course after a full day of work. The first slide explains a concept. The second adds a definition. By the fourth minute, another browser tab is open, a work notification appears, and the learner is technically present but no longer processing the lesson.
A passive lesson gives the learner very little to do with the information. They can listen, scroll, and watch, but they rarely have to retrieve an idea, make a prediction, or decide what should happen next. That makes it easy for attention to drift and difficult for the learner to notice that they’ve stopped understanding.
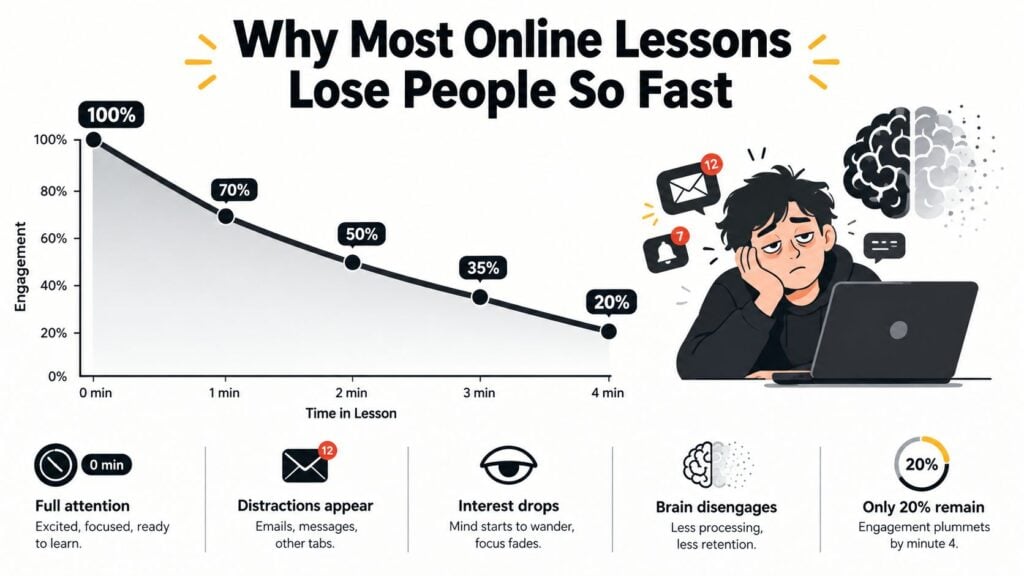
A choice changes the learner’s role. Ask them to predict whether a chemical reaction will speed up, sort examples into categories, or choose the safest response to a customer complaint, and the same content becomes something they must handle rather than merely receive.
Attention needs a job
Interactivity works best as attention insurance. A low-stakes question in the middle of a lesson gives learners a reason to pause and check their thinking. A branching scenario makes consequences visible. A short sorting task exposes a misconception before the learner builds more knowledge on top of it.
The cost of disengagement isn’t limited to boredom. You may spend hours redesigning a course, supporting learners who missed a key concept, and investigating why people abandon a module. For a practical way to compare audience behavior across different delivery formats, review these benchmarks for every platform before deciding how much content to place in one uninterrupted sequence.
Practical rule: Every meaningful stretch of explanation should lead to a learner action.
The history of online learning points in the same direction. Distance learning began long before modern course platforms, from a known distance-learning course in 1728 to Sidney Pressey’s electronic learning machine in 1924. Computer-based education appeared in the 1960s, the internet arrived in 1969, LMS adoption spread in the 1990s, and the term eLearning entered use in 1999. MIT launched OpenCourseWare in 2002, while MOOC entered the field in 2008. These milestones show how teaching moved from automated feedback toward multimedia, reusable modules, and scalable interaction through the history of eLearning.
Designing Learning Objectives Before Anything Else
Start with the outcome, not the authoring tool. If you open Storyline or H5P before deciding what learners must do, the available features will become your curriculum.
“Learners will understand customer service” is too vague to guide design. A usable objective might say, “By the end of this segment, the learner will be able to classify a customer complaint, choose an appropriate response, and explain the reason for that choice.” Now you can select interactions that test classification, judgment, and explanation.
Turn broad intentions into visible actions
Use action verbs such as classify, compare, apply, calculate, diagnose, sequence, and troubleshoot. These verbs describe behavior you can observe and assess.
For example, “learn about percentage calculations” could become, “By the end of this segment, the learner will be able to calculate the correct tip at three different tax rates.” That wording points toward a calculator interaction, a worked example with missing steps, or a branching check where the learner chooses an answer and sees the consequence.
Keep each lesson segment focused. I usually write two to four objectives for a substantial lesson, then divide them into smaller segments if one objective requires too much explanation or practice. Each objective should connect to at least one assessment item.
Use this simple mapping exercise before authoring:
- Write the objective.
- Choose the learner behavior that proves it.
- Select the interaction that creates that behavior.
- Decide what feedback the learner receives.
- Remove anything that doesn’t support the outcome.
| Objective Verb | Best Interactive Element | Example Lesson Use |
|---|---|---|
| Classify | Sorting activity | Sort customer requests into urgent and routine categories |
| Compare | Choice matrix or paired examples | Compare two investment options and identify the relevant difference |
| Apply | Calculator or worked problem | Calculate a tip using different tax rates |
| Troubleshoot | Simulation or branching scenario | Diagnose why a machine or software process has failed |
The interaction should also appear in your assessment plan. A drag-and-drop exercise that looks attractive but tests only visual memory has little value if the objective requires troubleshooting. A short-answer prompt may be better when learners must justify a decision.
You can use a Bloom’s taxonomy learning objectives guide to choose verbs that match the level of thinking you want to assess.
Design check: If you can’t point to the objective an interaction serves, cut it.
Choosing Interaction Types That Actually Work
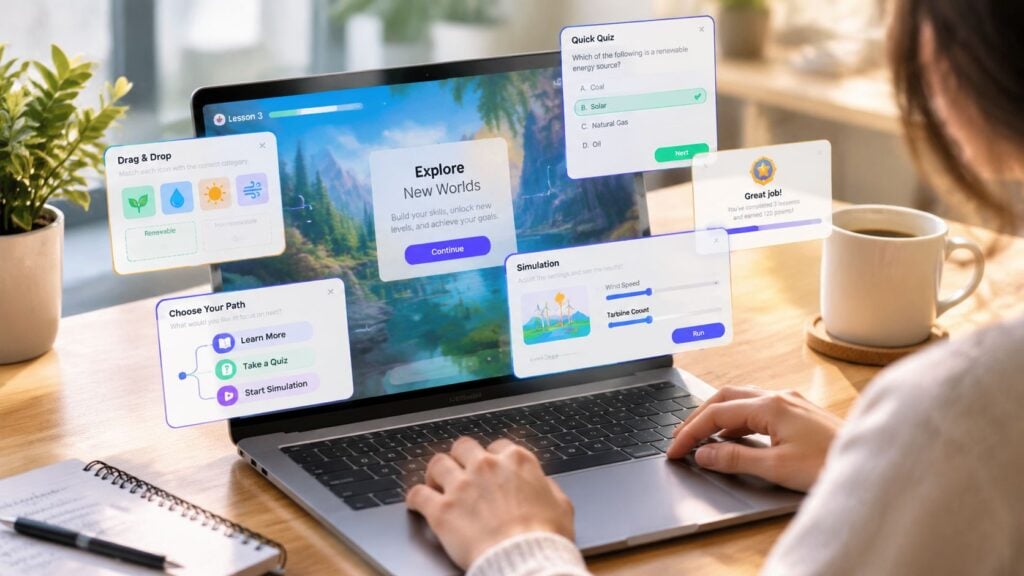
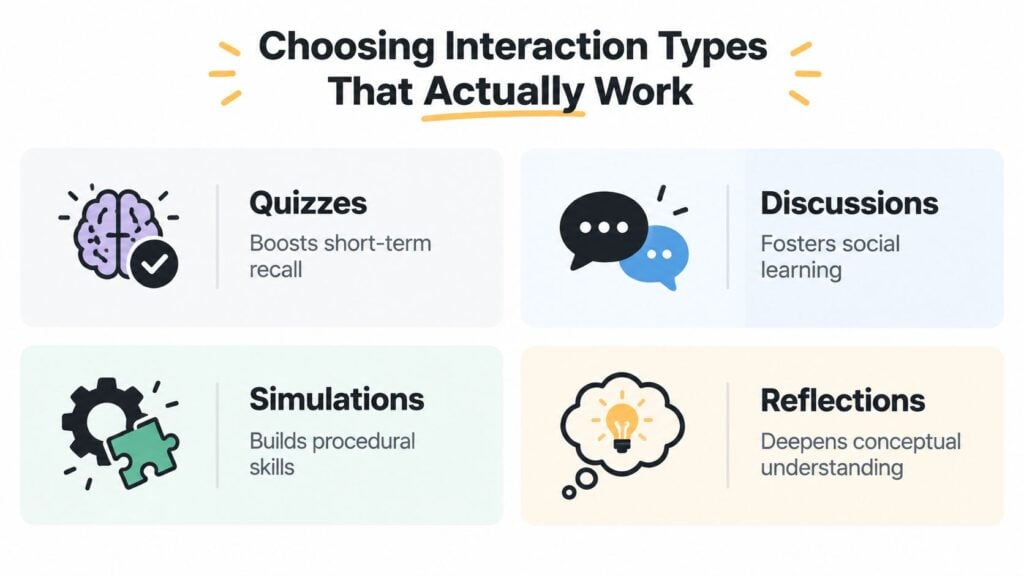
Different interactions produce different learner behaviors. A quiz supports retrieval and self-checking. A simulation gives learners a place to rehearse a process. A discussion invites interpretation, but it also depends on clear prompts and active facilitation.
A systematic review and meta-analysis of internet-based learning found a positive learning-outcome effect size of 0.27 across 15 studies for higher interactivity. The gains were larger when lessons included practice exercises, with an effect size of 0.40, feedback, with an effect size of 0.68, and repetition, with an effect size of 0.19 in the published analysis. The practical message is simple. Learners need to retrieve, act, receive correction, and encounter important ideas again.
Match the tool to the behavior
Quizzes work well for recall, recognition, and quick diagnosis. Place a short knowledge check after a concept or example, rather than saving every question for the final screen. Michigan Virtual’s review found that students engaged with about 40% of available interactive course elements, and flashcards and quizzes attracted more participation than several other formats in online science courses.
Simulations and virtual labs suit procedural learning. A learner can practice adjusting software settings, identifying a pathology finding, or operating a mechanical system without facing the consequences of a real-world mistake.
Branching scenarios test judgment. They’re useful for compliance, sales conversations, safeguarding, and management training because learners must weigh trade-offs and then see how their choice changes what happens next.
Discussions and reflective journals support analysis and perspective-taking. They need a focused question, a response model, and some instructor presence. Without those supports, a discussion board can become a quiet space that learners visit once and never return to.
Research on interactive learning also describes ISLE, an interactive e-learning environment with an analytics dashboard that lets instructors follow student learning trajectories through its instructional model. That kind of visibility helps you distinguish between an interaction learners ignored and one they attempted but couldn’t complete.
A useful selection rule is this:
If the interaction doesn’t change what the learner does next, it’s probably decoration.
Avoid novelty overload. A screen covered with hotspots, animations, pop-ups, and draggable objects can make learners hunt for interface controls instead of thinking about the subject. Keep the interaction that creates practice, reveals reasoning, or supplies useful feedback.
Building Lessons in Microlearning Segments
Microlearning works when each segment carries one clear idea. It doesn’t mean cutting a long lecture into random pieces and calling the result a course.
Begin by splitting an objective into a single concept. Build a short segment around one idea, one example, and one active response. For instance, a lesson on percentage calculations might explain one method, show one worked example, and ask the learner to calculate a new value before revealing the answer.
Use a predictable rhythm
A practical segment rhythm looks like this:
- Open with a hook. Use a question, problem, or prediction in the first part of the segment.
- Teach the core idea. Keep the explanation focused and connect it to the example.
- Ask for application. Let the learner solve, classify, sequence, or choose.
- Give feedback. Explain why the answer works, not only whether it’s right.
- Reset. Use a short transition before the next concept.
Keep each segment around three to seven minutes when that length suits the topic. Use a five to ten second transition between segments to signal a reset, then briefly recap the previous idea before introducing another one.
The exact timing should serve the content. A complicated process may need two connected segments rather than one dense explanation delivered at a slower pace. Visuals also need enough time on screen for learners to inspect them. The multimedia learning principles summarized by the University of Melbourne recommend user-paced segments and explain the value of spatial and temporal contiguity, meaning words and related visuals should appear close together and at the same time in multimedia lesson design.
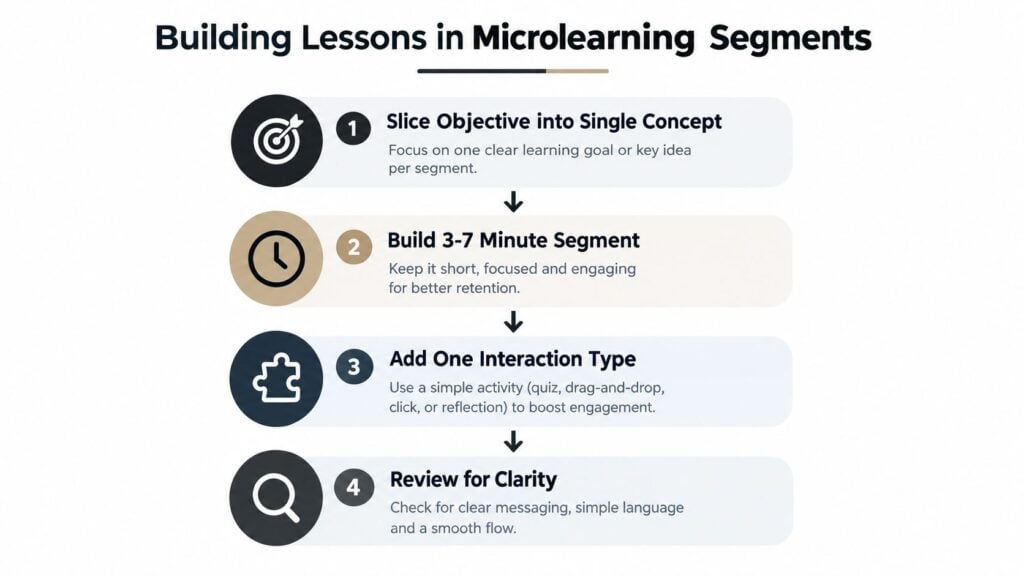
End each module with retrieval. Ask learners to recall the main principle before showing a summary or answer. That small pause gives you a better signal of understanding than another paragraph of explanation.
A 2022 undergraduate nutrition study found that students using online interactive topic guides were more engaged and spent more time with the content than students using static text-based guides in the published course comparison. The lesson design implication is practical. Replace a long reading with a guided sequence that asks learners to make decisions as they move through the material.
For more guidance on arranging these short sequences, use this resource on how to structure microlearning content.
Picking the Right Tools and Workflow
Choose the tool after you understand the lesson. A conceptual lesson with short checks needs a different setup from a branching role-play or a custom clinical simulation.
Compare tools by the work they must support
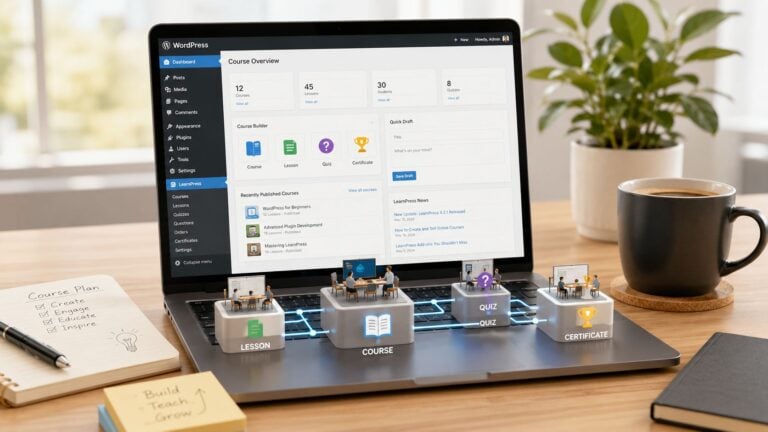
Solo educators often get plenty of mileage from Articulate Storyline, iSpring Suite, or H5P inside WordPress or Moodle. These tools support quizzes, media, and common interactions without requiring a full development team.
Teams creating more complex scenarios might compare Articulate Storyline, Adobe Captivate, and Rise by Articulate, then deliver the course through an LMS such as Thinkific, Teachable, or LearnDash. Developers who need complete control can use custom HTML, CSS, and JavaScript with frameworks such as React or Vue, hosted on Netlify or Vercel.
| Tool Category | Best For | Skill Required | Typical Cost |
|---|---|---|---|
| No-code or low-code authoring | Quizzes, topic guides, and structured lessons | Basic authoring and visual design | Subscription or platform-dependent |
| Slide-based authoring | Educators converting presentations into courses | Presentation and course-authoring skills | Commercial license or subscription |
| LMS plugins | Lessons embedded in WordPress or Moodle | Site administration and content setup | Plugin, hosting, or LMS fees |
| Custom web development | Bespoke simulations and advanced interfaces | HTML, CSS, JavaScript, React, or Vue | Development and hosting resources |
I’d also consider who will maintain the course. If a subject expert needs to update examples every term, a familiar authoring environment may be more useful than a technically elegant build that only one developer can edit. If you’re turning recorded teaching into reusable material, lecture notes from transcripts can help organize source material before you write the interaction script.
Prototype before committing
Use a small workflow:
- Draft: Write the script, objectives, feedback, and answer logic in a shared document.
- Prototype: Build one complete interaction in the chosen tool.
- Pilot: Ask a small learner group to use it without your help.
- Refine: Fix confusing instructions, awkward navigation, and weak feedback.
- Scale: Produce the remaining lesson only after the pattern works.
Don’t buy an enterprise platform for a short course that needs a handful of lessons. Don’t hand-code a frequently updated compliance program unless your team can support the maintenance. LearnStream is another option for educators planning digital learning experiences, memberships, and related software workflows, alongside dedicated authoring tools and LMS platforms.
Accessibility and Assessment Working Together
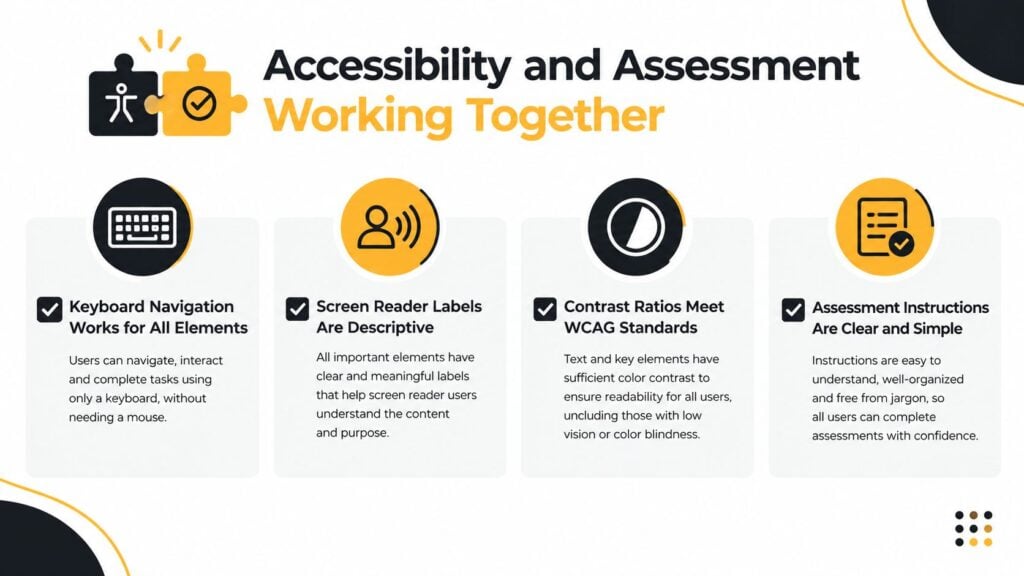
Accessibility should shape the assessment from the first sketch. If a learner can’t operate the interaction with a keyboard, understand its labels with a screen reader, or access the content through captions and transcripts, the assessment may measure access barriers instead of learning.
Start with the interface. Use semantic headings, clear labels, descriptive alternative text, and visible focus indicators. A learner moving without a mouse should know where they are and what action is available. A screen reader user should hear meaningful instructions rather than “button one” or “interactive object.”
Build access into every activity
Provide captions for video and transcripts for audio. Offer an alternative format when a simulation depends on complex visual movement. For drag-and-drop sequencing, include a keyboard-friendly option or an equivalent list-based task. Keep instructions short and explicit, especially when learners must complete several actions in one screen.
Accessibility decisions often improve assessment quality for everyone. Clear prompts reduce construct-irrelevant confusion. Consistent navigation lets learners concentrate on the question. Captions help people studying in noisy or shared spaces, while transcripts make review easier.
Align each check with one objective
Place formative assessment throughout the lesson:
- After explanation: Use a multiple-choice question to check a central concept.
- After practice: Present a short scenario that requires application.
- Before progression: Ask for a reflection or retrieval response.
Vary the format according to the behavior you need. Use drag-and-drop for sequencing, branching for decisions, and short answers when learners must apply an idea in their own words.
Research on a digital interactive learning module reported a 14.37% retention gain compared with an electronic learning module, with scores of 92.10 versus 80.55, and a 27.49% retention improvement compared with a text-based learning module in the reported study. Those findings support a careful design approach, not an assumption that every interactive element improves learning. The activity must remain accessible, relevant, and tied to the objective.
Testing, Launching, and Keeping It Interactive
A lesson isn’t finished when the authoring tool publishes it. It’s finished when learners can complete the intended actions, understand the feedback, and move through the course without avoidable friction.
Run a practical launch check
Before release, ask a colleague or pilot group to complete the lesson without coaching. Check the following:
- Interaction behavior: Every button, answer choice, drag target, feedback layer, and branching path works as intended.
- Device coverage: Learners can use the lesson across the devices and browsers your audience relies on.
- Keyboard access: A tester can move through and complete activities without a mouse.
- Media access: Captions, transcripts, audio controls, and alternative formats are present and usable.
- Assessment reporting: Quiz results and completion data reach the LMS or tracking system correctly.
- Instructions: A first-time learner can understand what to do without a verbal explanation from you.
Run the course yourself as a learner, not as the author. Don’t rely on preview mode alone. Ask someone unfamiliar with the content where they hesitated, what they expected to happen, and which feedback they ignored.
Watch the lesson after launch
Use the available analytics to inspect completion, drop-off points in branching paths, quiz score distributions, and written feedback. A pathology course study found that the maximum number of active participants fell 46% from the first observed e-lesson to the second, then fell another 27% from the second to the third, with participation also varying within individual lessons in the synchronous course analysis. That pattern makes pacing and interaction timing worth monitoring, even when the content itself remains unchanged.
Review learner behavior at the two-week and one-month marks. If people leave after a dense explanation, add a retrieval prompt or split the segment. If a simulation causes repeated exits, shorten the setup or clarify the task. If learners score well but report confusion, improve feedback and instructions rather than adding more content.
Refresh examples and interaction paths quarterly when the subject changes regularly. Sustained interaction depends on trust. Learners should recognize that each activity has a clear purpose and that the course responds when they make a mistake.
Start with one lesson you already teach. Rewrite its objectives with observable verbs, divide one objective into a short segment, and add a single interaction that requires learners to make a decision. Pilot that small build with real learners, review where they pause or leave, and refine the experience before expanding it into a full course.