Captions and Transcripts: A Practical Guide for Creators

You're on a train, your phone is on mute, and you're trying to finish a lesson before your stop. The speaker is explaining something important on screen. Without sound, you're guessing.
I've been that learner. I've also been the person who uploaded a video, clicked the auto captions button, and assumed the job was done. It usually isn't.
Captions and transcripts look similar because they're both text. They do different jobs though, and once you see that split, a lot of the confusion clears up.
Captions and Transcripts Side by Side
Take that learner on the commute again. With captions on, they can follow the lesson line by line as it plays. With a transcript open, they can skip the video for now and read the whole thing like a set of notes.
That's the core difference. Captions are timed text shown over the video. A transcript is the full text in one block, a bit like a screenplay sitting next to a movie.
| Feature | Captions | Transcript |
|---|---|---|
| Timing | Synced to each spoken line and sound, shown as it plays | Not timed by default, one continuous block of text |
| Where learners see it | Over the video frame | Beside, below or on a separate page |
| Sound information | Speaker names, music and sound effects in brackets | Included when edited in, often cleaned up for reading |
| Main job | Gives real-time access to audio for deaf and hard-of-hearing viewers | Gives a text version to scan, search, copy and reuse |
| Prerecorded video under WCAG 2.2 | Required for synchronized media | Supporting alternative, not a replacement for captions |
| Common file types | .srt, .vtt, embedded caption tracks | .txt, .docx, .pdf, web page text |
The mix up I see most is people uploading a transcript and thinking they've covered captions. For prerecorded video, a learner who can't hear still needs text that appears in time with what's happening on screen. A block of text below the player doesn't give them that link between words and visuals.
So I treat it like this. Captions handle the live work while the video plays. Transcripts handle the reading, scanning and reuse work after. Most course videos need both.
What Accessibility Rules Say About Captions
Captions didn't start with online courses. The FCC closed captioning history notes the FCC authorized line 21 technology for closed captions in 1976, and the first closed-captioned broadcasts began in 1980.
That long history helps explain why the rules are now pretty direct. Under WCAG 2.2, captions are required for all prerecorded audio content in synchronized media unless the media is clearly labeled as a text alternative, and they're also required for all live audio content in synchronized media.
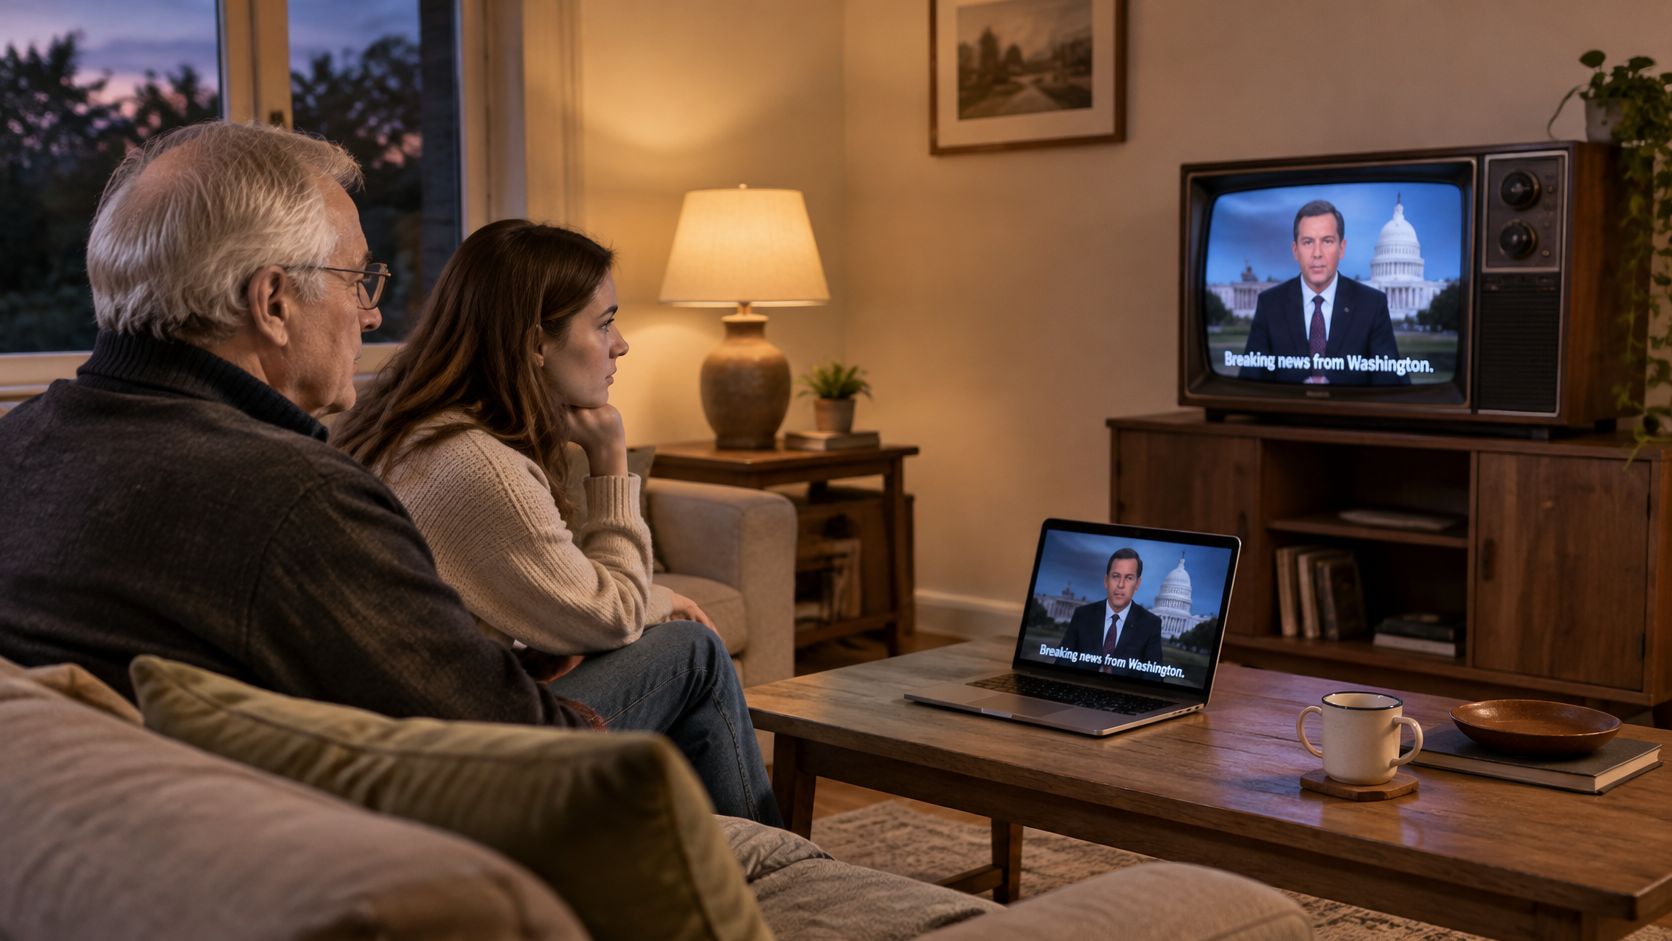
In plain terms, prerecorded captions sit at Level A. Live synchronized captions are addressed at Level AA. Recorded lessons count, and so do webinars and live Q and A sessions.
For me that means captions can't be something I add only to polished videos at the end. If you run live teaching, you need to plan captions before the session starts. Our wider guide to accessibility for online courses is a good place to map the rest of your course against the same thinking.
Rules do vary by country, sector and client contract. Check with your accessibility or legal contact before you assume your situation is covered.
Choosing Between SRT, VTT and Plain Text
I think of these three formats as three ways to write down the same lesson.
SRT is a stack of numbered index cards. Each card has a start time, an end time and the words. It works almost everywhere.
WebVTT works in a similar way, but it starts with a header line and it can carry styling and positioning. That suits browser players and HTML5 courses where you control the page.
Plain text is the script with no clock attached. It's what you want for transcript pages, search and handouts.
A quick lookup
| Format | What the file holds | Timing notation | Styling and placement | Best use |
|---|---|---|---|---|
| SRT (.srt) | Numbered cues with start time, end time and text | Hours, minutes, seconds and milliseconds separated by a comma | None built in, plain text only | Uploads to most video platforms and LMS tools |
| WebVTT (.vtt) | Header line, then cues similar to SRT | Milliseconds separated by a period | Supports position, alignment and color cues | HTML5 players and browser-based courses |
| Plain text (.txt) | Words in order with no structure | None, unless timestamps are added by hand | None | Transcript pages, search, handouts and reuse |
When I'm exporting, I keep it simple. I send SRT to most learning platforms and video hosts unless they specifically ask for VTT.
I choose VTT when I control the web page and I want control over caption placement or color cues. For example, say a software demo has important buttons at the bottom of the screen. Placement control lets me keep captions away from those buttons.
I also keep a plain text transcript for every video, even when captions already exist. The caption file is built for timing. The transcript is built for reading.
Before you upload: Check the accepted file list in your platform first. Some systems convert your file on upload and strip styling as they do it, so what you preview locally isn't always what learners get.
One last practical note. Don't try to edit timing in a plain text file and hope it becomes a caption file later. Do your timing work in SRT or VTT, then export a clean text version from the corrected file for the transcript page.
Automatic Captions or Human Review
Most of us start with a simple belief. A higher accuracy score means a better caption. I used to think that too.
Research with Deaf and hard-of-hearing users in an ACM caption quality study found that metrics incorporating word importance and semantic difference predicted user judgments of caption quality better than conventional metrics such as word error rate. The same source notes separate evidence where captions at only 60% or 70% word accuracy produced little subjectively perceived comprehension benefit in longer speech passages.
That makes sense when you think about a real lesson. One wrong proper noun, negation, number or technical term can change the meaning. Several errors on small filler words might not. If a caption turns "don't delete" into "do delete", the headline accuracy still looks fine, but the instruction is now dangerous.
| Option | Accuracy pattern | Review time | Best for | Main risk |
|---|---|---|---|---|
| Raw automatic captions | Word accuracy varies by engine, and errors cluster in names, formulas and product terms | None | Internal drafts and rough previews | Names and technical terms slip through |
| Automatic plus human edit | Collaborative correction cut word error rate from 9.3 percent to 6.2 percent in one study | Moderate, focused on terms, speakers and sound tags | Most course lessons and marketing videos | Editors skip timing checks unless they are added to the process |
| Full human captioning | Human review of every line, term and sound cue | High, a trained captioner or full review of every line | Compliance-critical, legal, medical and safety training | Cost and turnaround vary by provider |
That collaborative correction figure comes from a 2025 arXiv study on caption correction, which reported average word-error rate fell from 9.3% to 6.2% and received positive ratings from DHH readers.
My rule now is simple. I keep a controlled glossary of course terms, names and acronyms, and I check those first. I don't trust one overall percentage to tell me if a learner can follow the lesson.
Tools for Making, Editing and Embedding Captions
Tools get confusing because people lump four different jobs together. I sort them into four groups.
- Speech-to-text engines: These turn audio into a rough transcript in minutes. Many video hosts include one, and standalone services often let you add custom vocabulary for product names.
- Caption editors: These let you fix words and drag timing against a waveform or the video itself. Most of the actual cleanup happens here.
- Caption track settings: This is the part of your LMS or video host where the finished SRT or VTT file lives. It decides whether captions load by default and which language learners see.
- Human captioning services: These handle high stakes lessons where you don't want to rely on a machine draft.
If you're also publishing audio, it helps to find accurate podcast transcription software that can feed the same workflow, so you aren't fixing the same names in two different tools.
When I compare options, I check five things. Does it export SRT and VTT without stripping timing? Can I add a custom glossary? Does it mark speakers and sound tags? Can I edit the transcript and captions from the same file? And what does it cost per finished minute, including the human pass?
Test with one five minute clip from your actual course before you commit. Use a clip with jargon, a name, and a number in it. That's where tools show their weaknesses.
How to Build Captions and Transcripts Step by Step
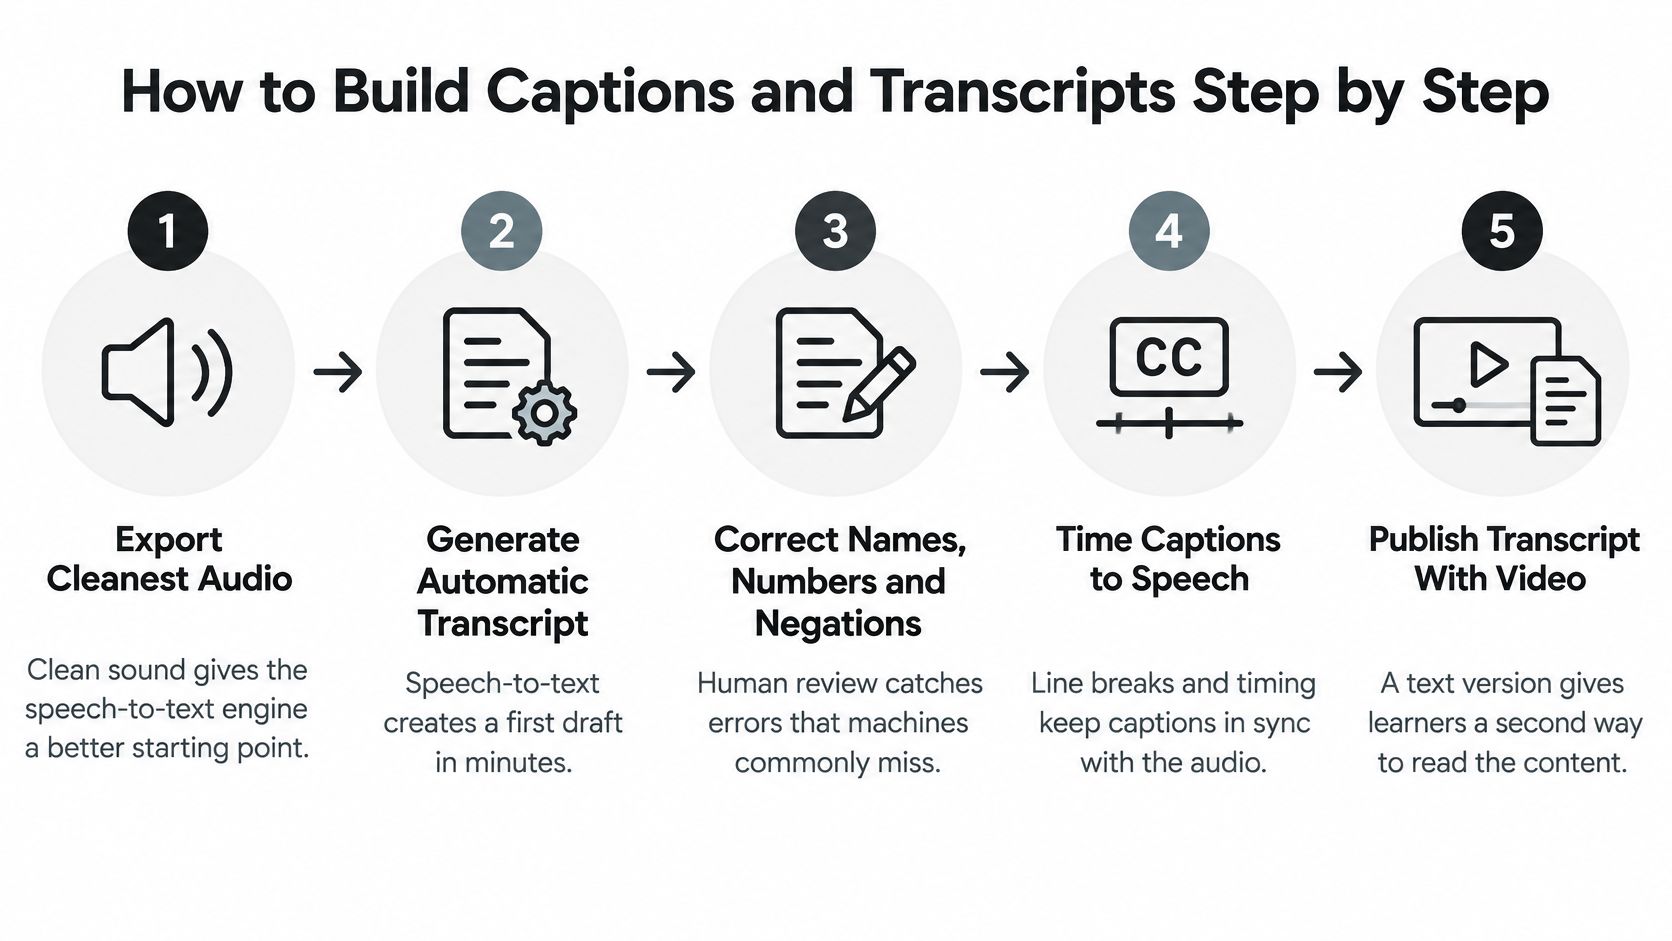
I like a workflow I can repeat for every lesson. The W3C guide to captions for media frames it well because captions must be synchronized with spoken audio and other meaningful sounds, while transcripts provide a complete text representation that can be searched, skimmed, copied, translated, or used as an alternative to the media.
This diagram shows the overall flow I follow from audio to publishing.
My repeatable workflow
- Export the cleanest audio you have. Clean sound gives the speech-to-text engine a better starting point, and you'll spend less time fixing avoidable errors later.
- Generate an automatic transcript. Add course terms, product names and people names to any custom vocabulary list before you run it.
- Edit the transcript against the recording. I fix names, technical terms, formulas, acronyms and speaker labels first. Those are the errors learners notice, and they're the ones that can change meaning in technical courses.
- Build time-aligned captions from the corrected text. Add sound tags like [music] or [applause] only where they carry meaning. Don't tag every background noise.
- Check line length and reading time. Each caption needs to stay on screen long enough to read without rushing. Break long lines at a natural pause.
- Export SRT or VTT and attach it through your player or LMS. Confirm the track loads and plays in sync. Embedding steps differ by platform, so don't assume an upload worked.
- Publish the plain text transcript beside the video. Use the same corrected text so the two versions match.
If you want to watch the timing step done in a player, this short walkthrough helps before you try it on a full lesson.

Once the file is live, I don't call the lesson finished yet. I run the muted check you'll see in the quality checks, because that's how I find out if the lesson still makes sense without audio.
How Learners and Marketers Put Transcripts to Work
Learners don't all use transcripts the way creators expect. In a 2025 UK government accessibility survey of 87 respondents, 28% watched video without reading the transcript, while 25% read the transcript without watching the video. Among transcript readers, 55% used it to decide whether the video was relevant and 46% used it because reading was faster than watching.
That changed how I think about transcripts. For a lot of people, the transcript is a preview and a fast review tool.
It fits with wider caption habits too. Research by The Audience Agency commissioned by Stagetext found in 2023 that 42% of respondents said they used subtitles or captions to improve concentration.

What that means for a course
A good transcript page gives search engines text to index. It also supports search inside your course library, and it lets a potential buyer preview the substance of a lesson before they enroll.
I usually turn a lesson transcript into two extra assets. First, a short lesson summary for revision. Second, a glossary of terms pulled from the corrected text, which helps learners and helps my next caption edit too.
For marketing, the path is just as practical. Say you have a 20 minute webinar. The transcript can become a blog post, three quote graphics, chapter timestamps in the video description, and a follow up email. Our guide on how to repurpose webinar content maps that reuse in more detail.
Do watch one trap. A polished transcript can drop pauses, emphasis, and on screen demonstrations. I add short notes for visual context, like noting when a diagram changes or when a button is clicked, so readers aren't misled.
Search engines can only index words that appear on the page. If you want the SEO benefit, publish the transcript as visible web text on the video page, not only as a locked download, and keep your real course terms in it.
Quality Checks Before Every Caption File Goes Live
This is the part I used to rush. I'd fix the obvious typos and publish. Then a learner would point out a wrong name or a caption covering the exact button I was explaining.
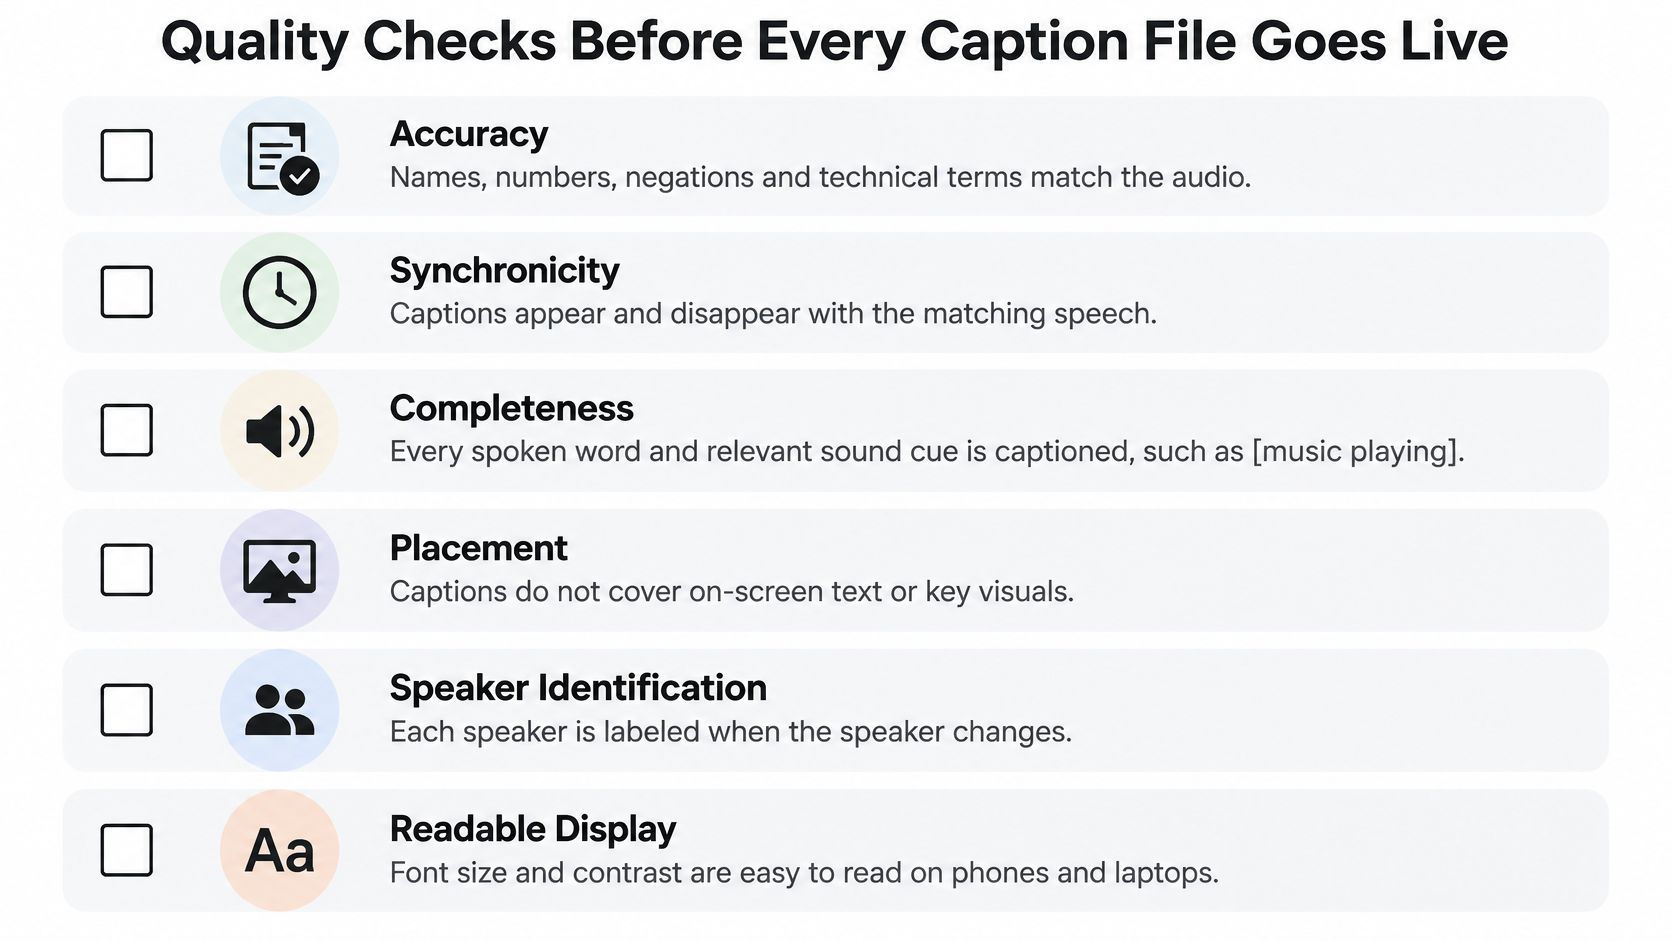
Now I use a checklist built around four measures. The FCC caption quality guidance defines four core requirements as accuracy, synchronicity, completeness, and proper placement.
This checklist graphic is the short version I keep in mind during a final pass.
The four checks in practice
Accuracy comes first. Names, numbers, negations and technical terms need to match the audio. Sound cues like music, applause or laughter go in brackets when they matter, and speakers, music, sound effects, and audience reactions should be identified where they're important.
Synchronicity is about timing. Each caption should appear when the related speech or sound begins and clear when it ends, while remaining readable on screen. If a caption flashes up late, the learner connects it to the wrong visual.
Completeness means captions run from the start through the end of the program. I include the closing remarks and any Q and A. Those final minutes often contain deadlines or next steps, and cutting them off hurts.
Placement is the check people forget on slide based lessons. Properly placed captions should not cover important visual content, overlap each other, or run beyond the edge of the video frame. On a code walkthrough, a caption over the code is a real problem.
Checks learners feel even more
I add a few items the short labels only hint at.
- Speaker changes: Mark who is speaking every time it changes. In an interview lesson, unlabeled speakers get confusing fast.
- Punctuation: Let punctuation separate questions from statements. A missing question mark can turn a prompt into an instruction.
- Equations and code: Read them as a learner sees them on screen. Check symbols, capitalization, and spacing, because speech engines often guess here.
- Readable display: Watch on a phone as well as a laptop. Font size and contrast that look fine on a big monitor can fail on a small screen.
How I sample a long lesson
Checking every second of a long course can feel impossible, so I use a sampling plan for lower risk lessons. I review the opening minute, one middle section, the final two minutes, and every slide with dense terminology. High stakes lessons still get a full review.
Then I run a muted playback of at least one full lesson. I turn the sound off and try to follow along and answer the lesson's main questions from the captions and visuals alone. If I get lost, a learner probably will too.
For any non English file, I repeat these checks with a native speaker of that language. A fluent editor catches tone and term choices that I won't catch from a glossary alone.
Choose Your Multilingual Caption Workflow
Multilingual captions leave a lot of creators stuck. Do you translate what you have, or do you caption again in each language? I've used both routes, and the right answer depends on your course.
Route one, translate a verified transcript
With this route, you get one source transcript right first. You translate that trusted text into subtitle files for each language and keep the same time codes, so your timing stays intact.
This keeps one source of truth. Updates are faster too, because when you correct a term you know exactly which translated files need the same fix. It suits stable courses with lots of lessons.
Route two, caption directly in each language
With this route, you create captions from the audio in each language. That can work well when the speech-to-text engine performs well in that language and the original audio is clean.
It can catch local speech patterns a straight translation might smooth out. The trade off is review work. Every language becomes its own editing job, with its own speaker labels and timing checks.
My decision rule: Choose translation for stable, high volume courses. Choose native captioning for interviews and discussions with many speakers. Use a native reviewer for any high stakes lesson either way.
Practical rules for both routes
- Build a glossary per language: Cover product names, course terms, and phrases you never want translated word for word. Keep it next to your source glossary so editors work from the same list.
- Keep line breaks sensible for the target language: A break that reads well in English can split a phrase in an awkward place in another language. Let the reviewer adjust breaks, not just words.
- Name files with the language code: I use names like lesson-03.es.vtt. It sounds dull, but clear file names prevent uploading the wrong track to the wrong lesson.
- Put each translated transcript on the video page: Learners should find the matching text in the same place as the video, in the language they selected.
If you're planning a broader rollout, our guide to elearning localization best practices will help you line captions up with the rest of your translation work.
One warning from experience. Don't publish a translated caption file nobody fluent has watched with the video. Timing can look correct in a file and still feel off when a sentence runs longer in the target language. A short muted check in that language catches it fast.
Start small this week. Pick one lesson your learners watch a lot, fix its captions with your glossary first, publish the matching transcript on the lesson page, and run the muted test before you move on. If you want more practical guides like this on building courses people can use, explore LearnStream and put the same captions and transcripts workflow into your next module.